Policy
Policy is a Resource in DataOS that defines a set of rules or guardrails governing the behavior of users, be it individuals or applications/services. Within DataOS, Policies are enforced using Attribute Based Access Control (ABAC) and define what predicates a user a subject can perform on a dataset, API Path, or a Resource an object, thus defining the constraints of the relationship between the subject and object. To understand the key characteristics of Policy, refer to the following link: Core Concepts.
Types of Policies
DataOS offers two primary categories of policies: Access Policy and Data Policy. These policies play essential roles in governing user access, actions, and data management within the DataOS system.
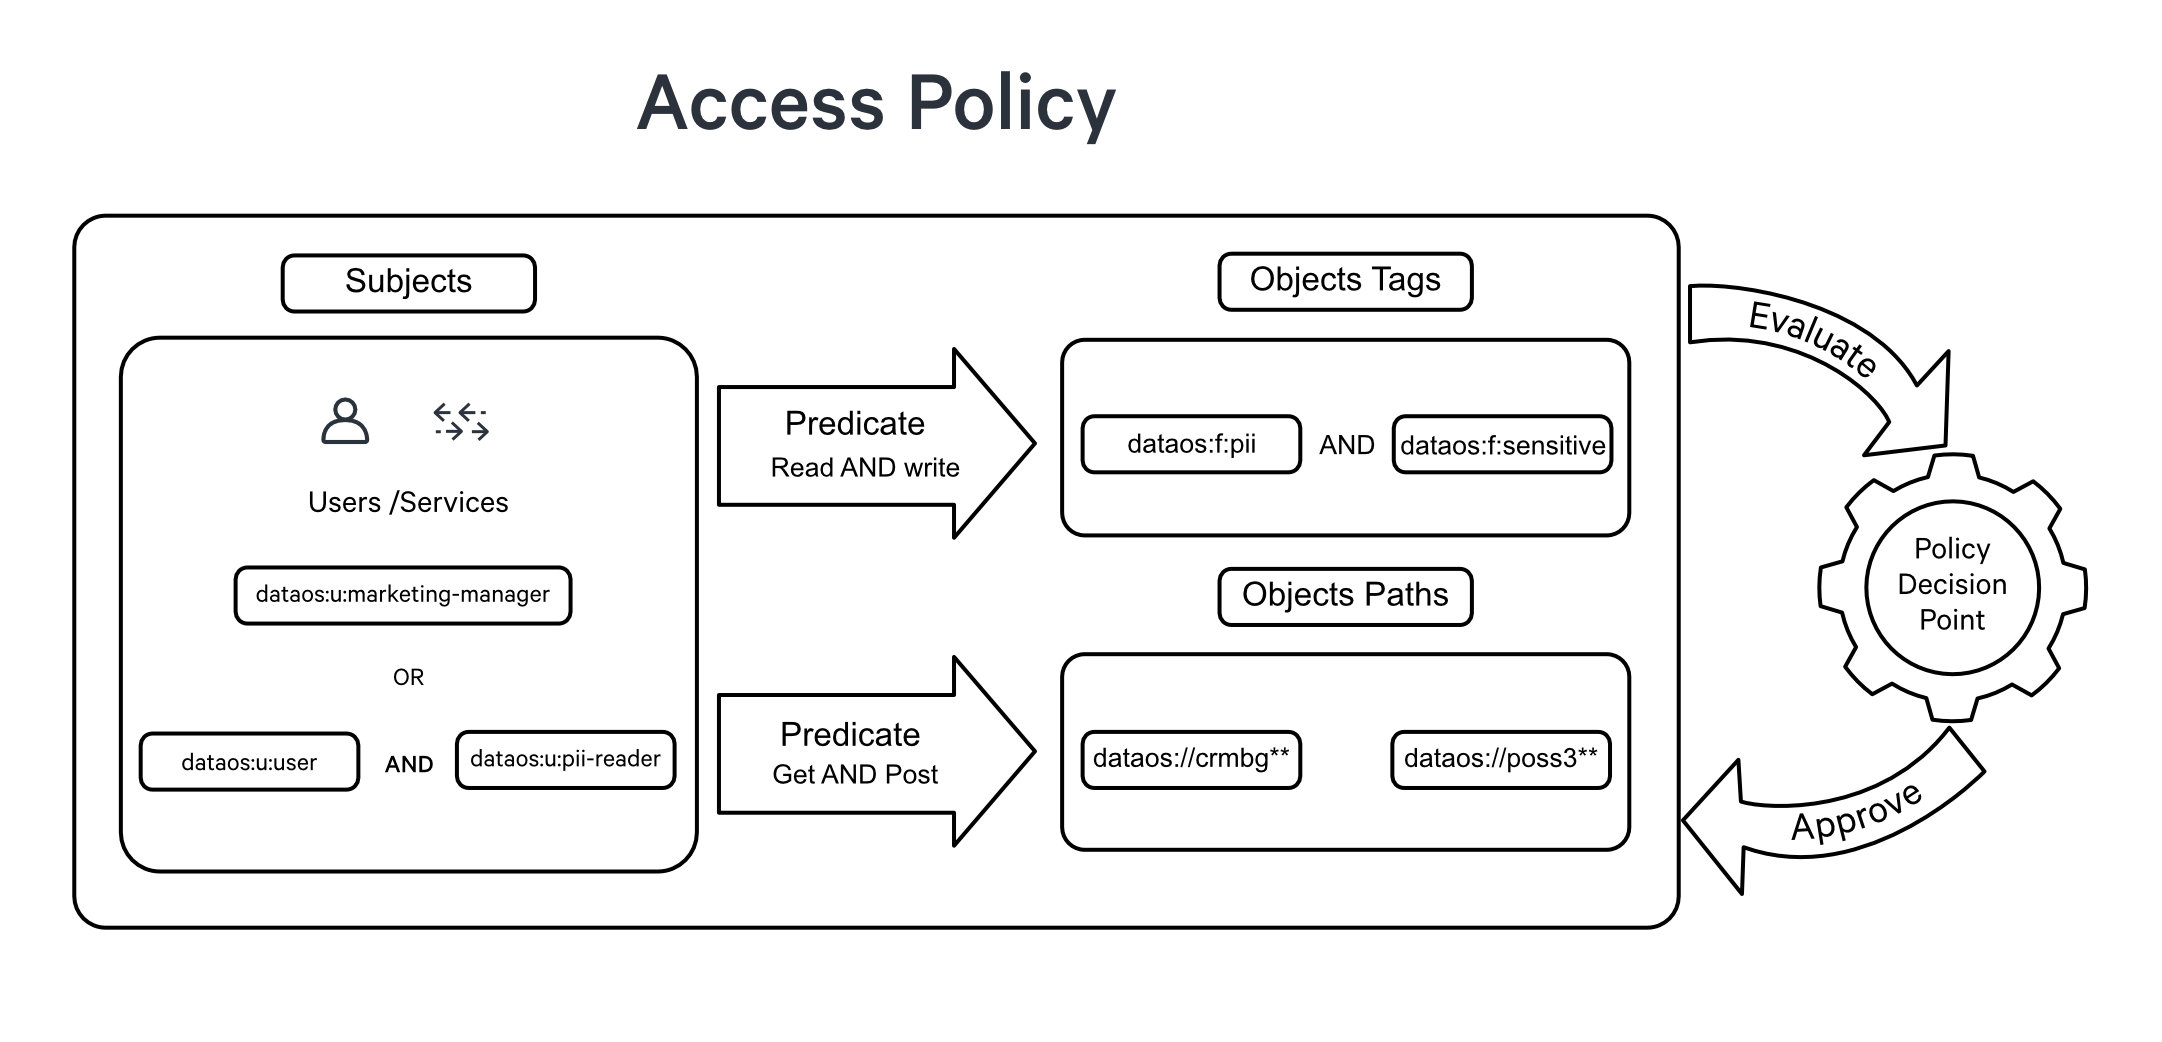
Access Policies serve as the initial layer of defense, overseeing user access and actions within the system. They establish a set of well-defined rules that determine whether a user, known as the subject, is authorized to perform a specific action, referred to as a predicate, on a given dataset, API path, or other resources, known as objects. These policies serve as regulatory mechanisms, effectively governing user interactions and ensuring that access to specific actions is either granted or denied. This decision is based on the evaluation of attributes associated with the subjects and objects involved in the access request.
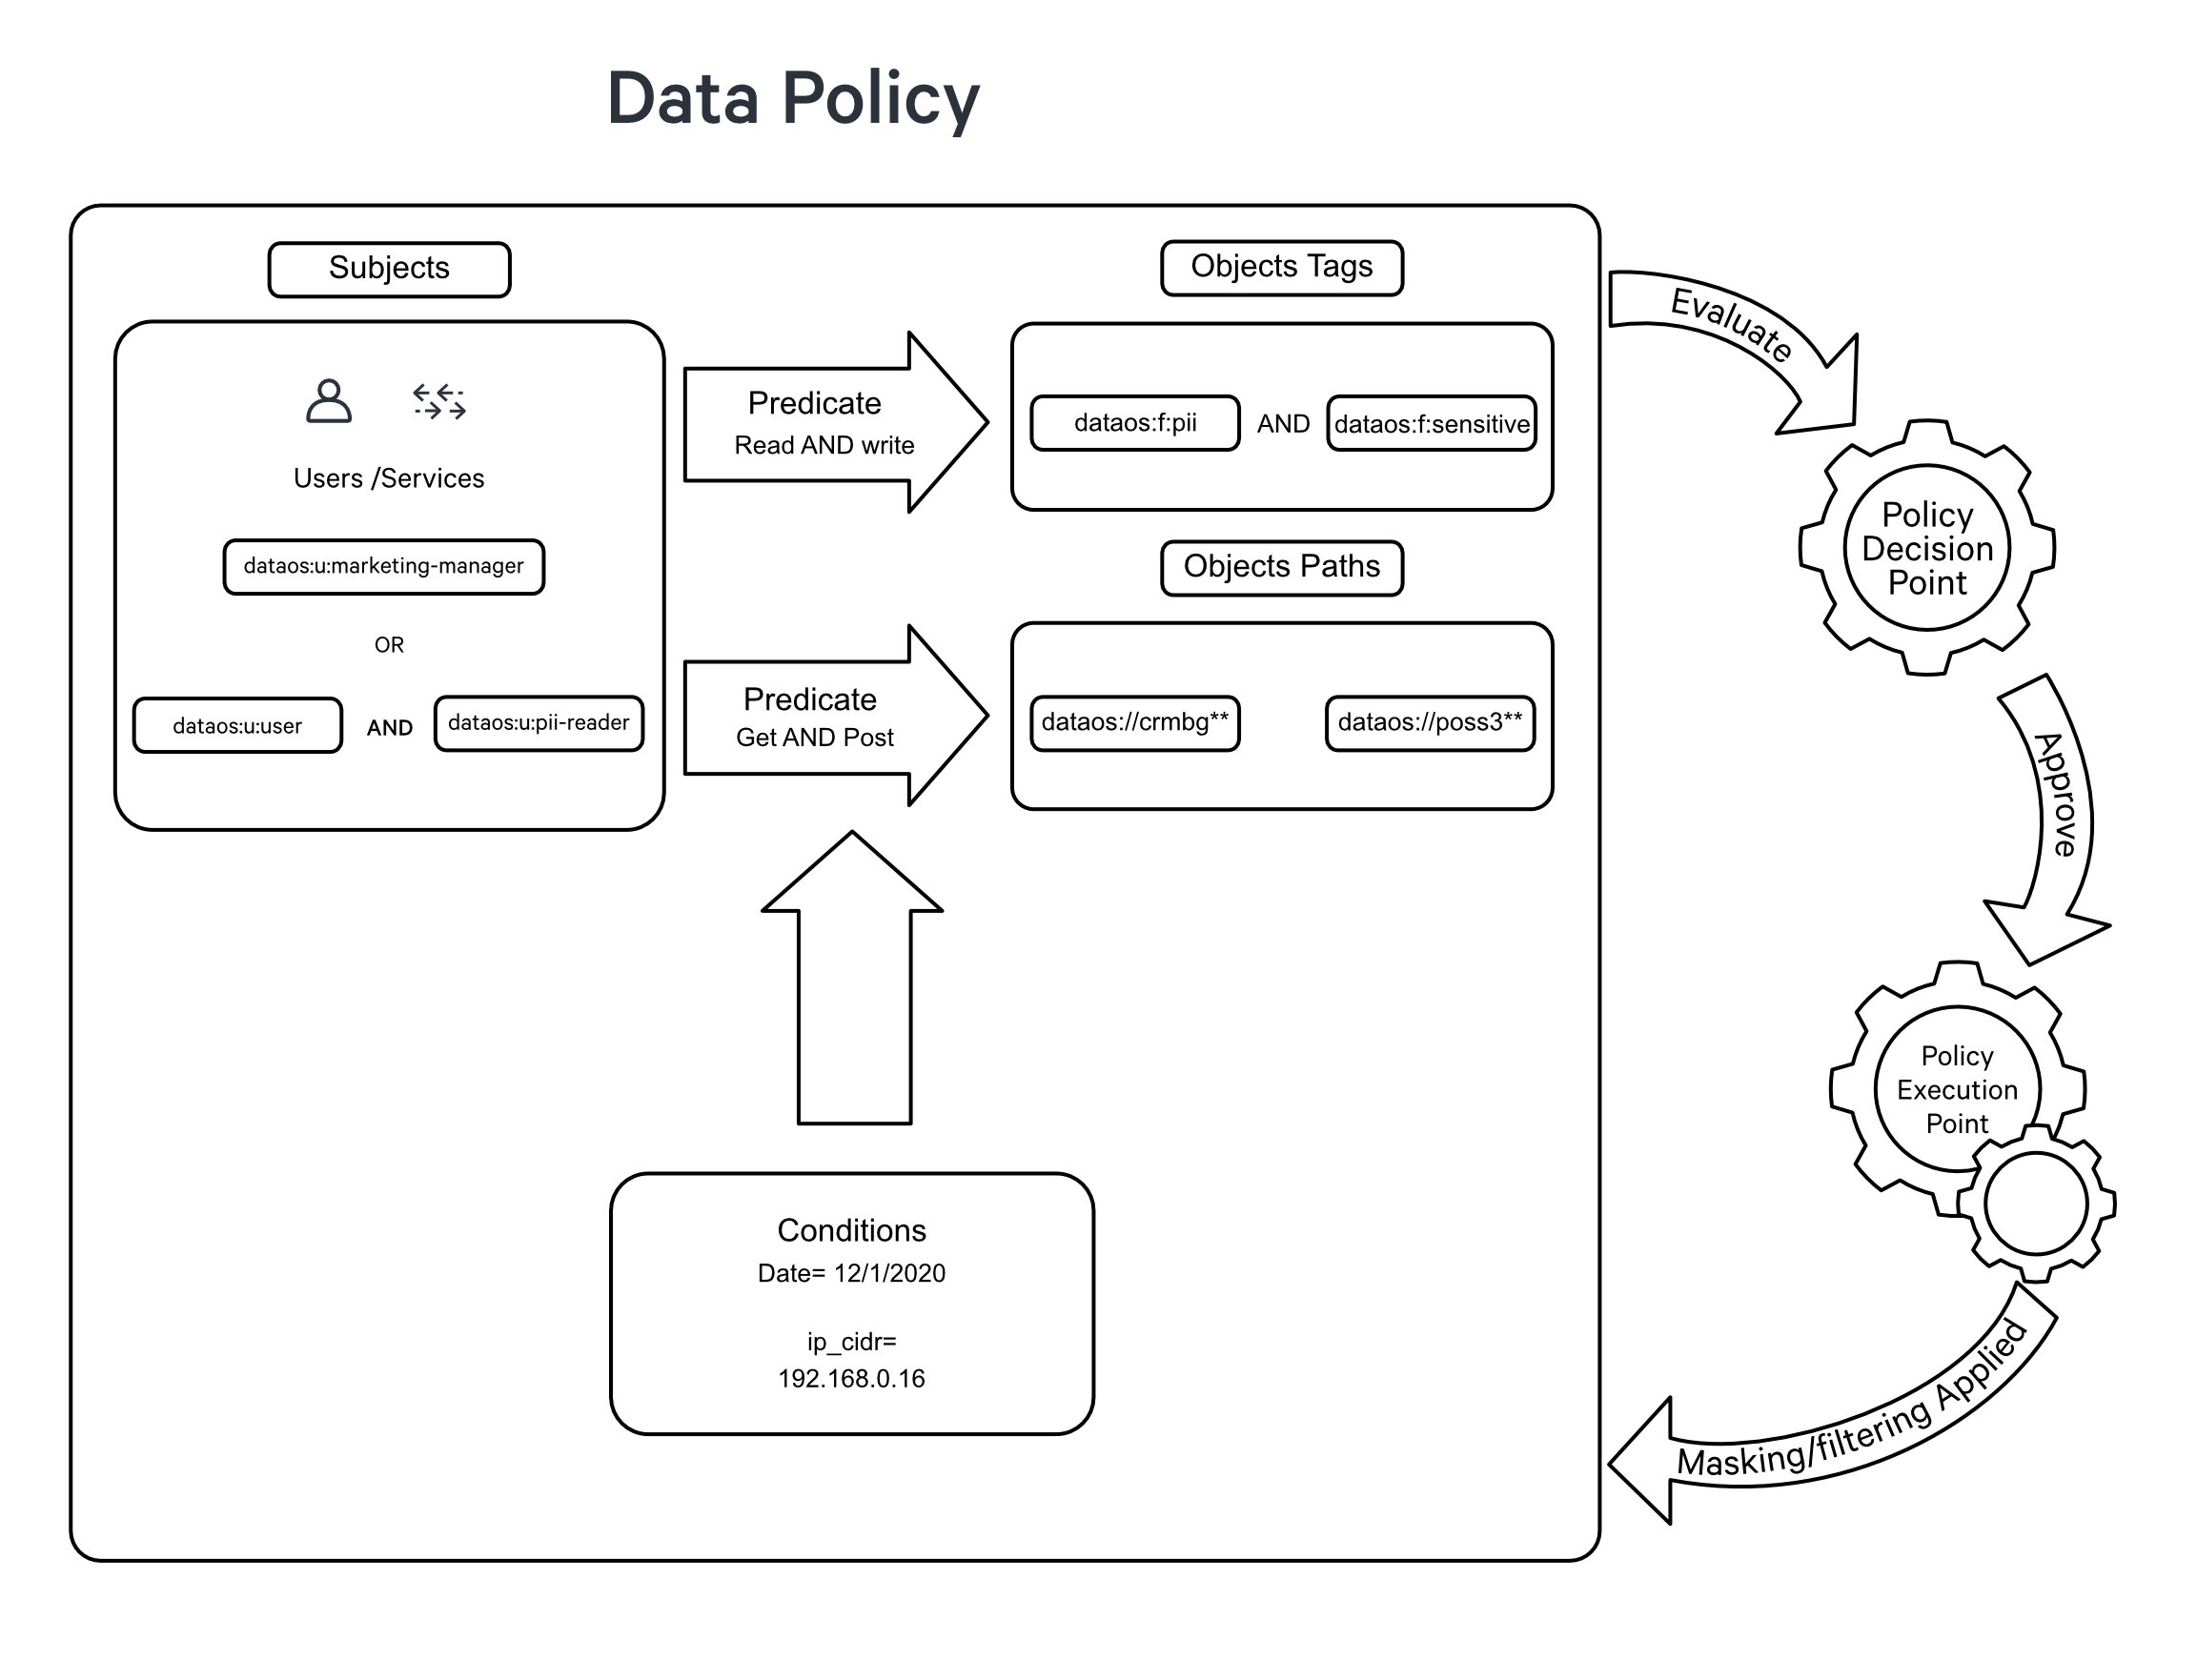
In contrast, Data Policy operates as a secondary layer of control, regulating the visibility and interaction with specific data once access has been granted. It involves the implementation of techniques such as data masking or filtering to obscure or restrict the visibility of sensitive or restricted data based on predefined rules or conditions.
For example, when working with a dataset that includes a column labeled credit_card_number, it is crucial to protect the sensitive information it contains from unintended exposure. Employing data masking policies or applying data anonymization methods becomes essential to secure the contents of this specific column.
Within Data Policy, we have two separate types one is the Data Masking Policy, and another is the Data Filtering Policy.
Data masking policies are designed to protect sensitive information by replacing original data with fictitious yet structurally similar data. This ensures that the privacy of sensitive data is maintained while keeping the data useful for purposes such as testing and development.
Data masking is particularly beneficial for Personally Identifiable Information (PII), where original data can be represented through masking, replacement with a placeholder (such as "####"), or obfuscation through a hash function.
Upon the application of a data masking policy, the original data is transformed, as illustrated in the sample example table below:
| Data Category | Original Value | Masked Value |
|---|---|---|
| Email ID | john.smith\@gmail.com | bkfgohrnrtseqq85\@bkgiplpsrhsll16.com |
| Social Security Number (SSN) | 987654321 | 867-92-3415 |
| Credit Card Number | 8671 9211 3415 4546 | #### #### #### #### |
Such a policy ensures the protection of sensitive details, including but not limited to names, titles, addresses, etc.
You can apply the Mask policy, say to mask the column with ‘customer name’ in it, directly from the Metis UI via policy tags or via DataOS CLI by applying a manifest file.
Data filtering policies establish parameters for determining which data elements should be accessible to various users or systems. Proper implementation of data filtering (or simply row filtering) policies ensures that only authorized individuals can access specific data segments.
For Example, in an e-commerce system, customer support agents may need access to customer order details. By applying a data filtering policy:
- Agent A can only view order records associated with customers they are assigned to.
- Agent B can only access order records for a specific geographic region.
- Agent C, as a supervisor, has unrestricted access to all order records.
With the data filtering policy in place, each agent can efficiently access the necessary information while maintaining data security and confidentiality.
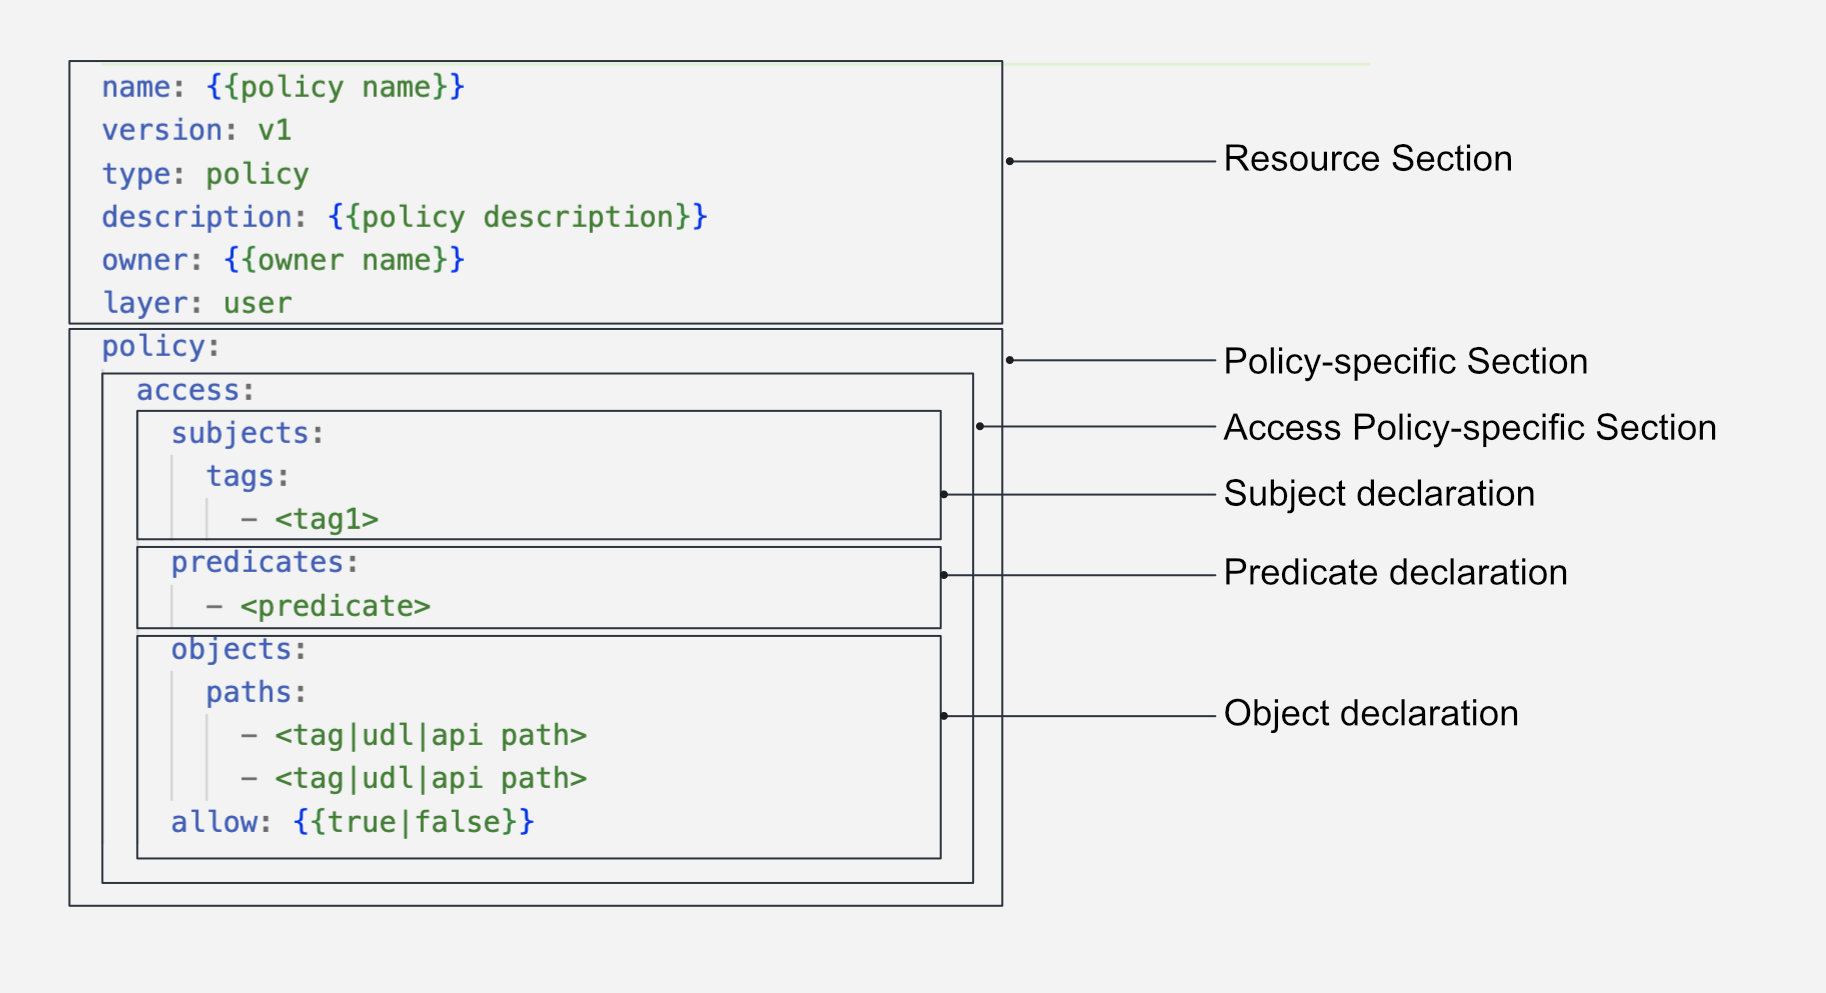
Structure of Policy manifest
Access Policies are defined using a subject-predicate-object triad. The YAML syntax for an Access Policy is as follows:
#Resource-specific section
version: v1
name: test-policy-allowing-access-01
type: policy
layer: user
description: "Policy allowing all users"
#Policy-specific section
policy:
  access:
    name:  test-policy-01
    description: this is to test policy
    collection: default       #optional
    subjects:
      tags:
        - "roles:id:operator"
    predicates:
      - "read"
    objects:
      paths:                 # Sample dataset
        - "dataos://postgresdp:public/product_data"
    allow: true              # Granting access
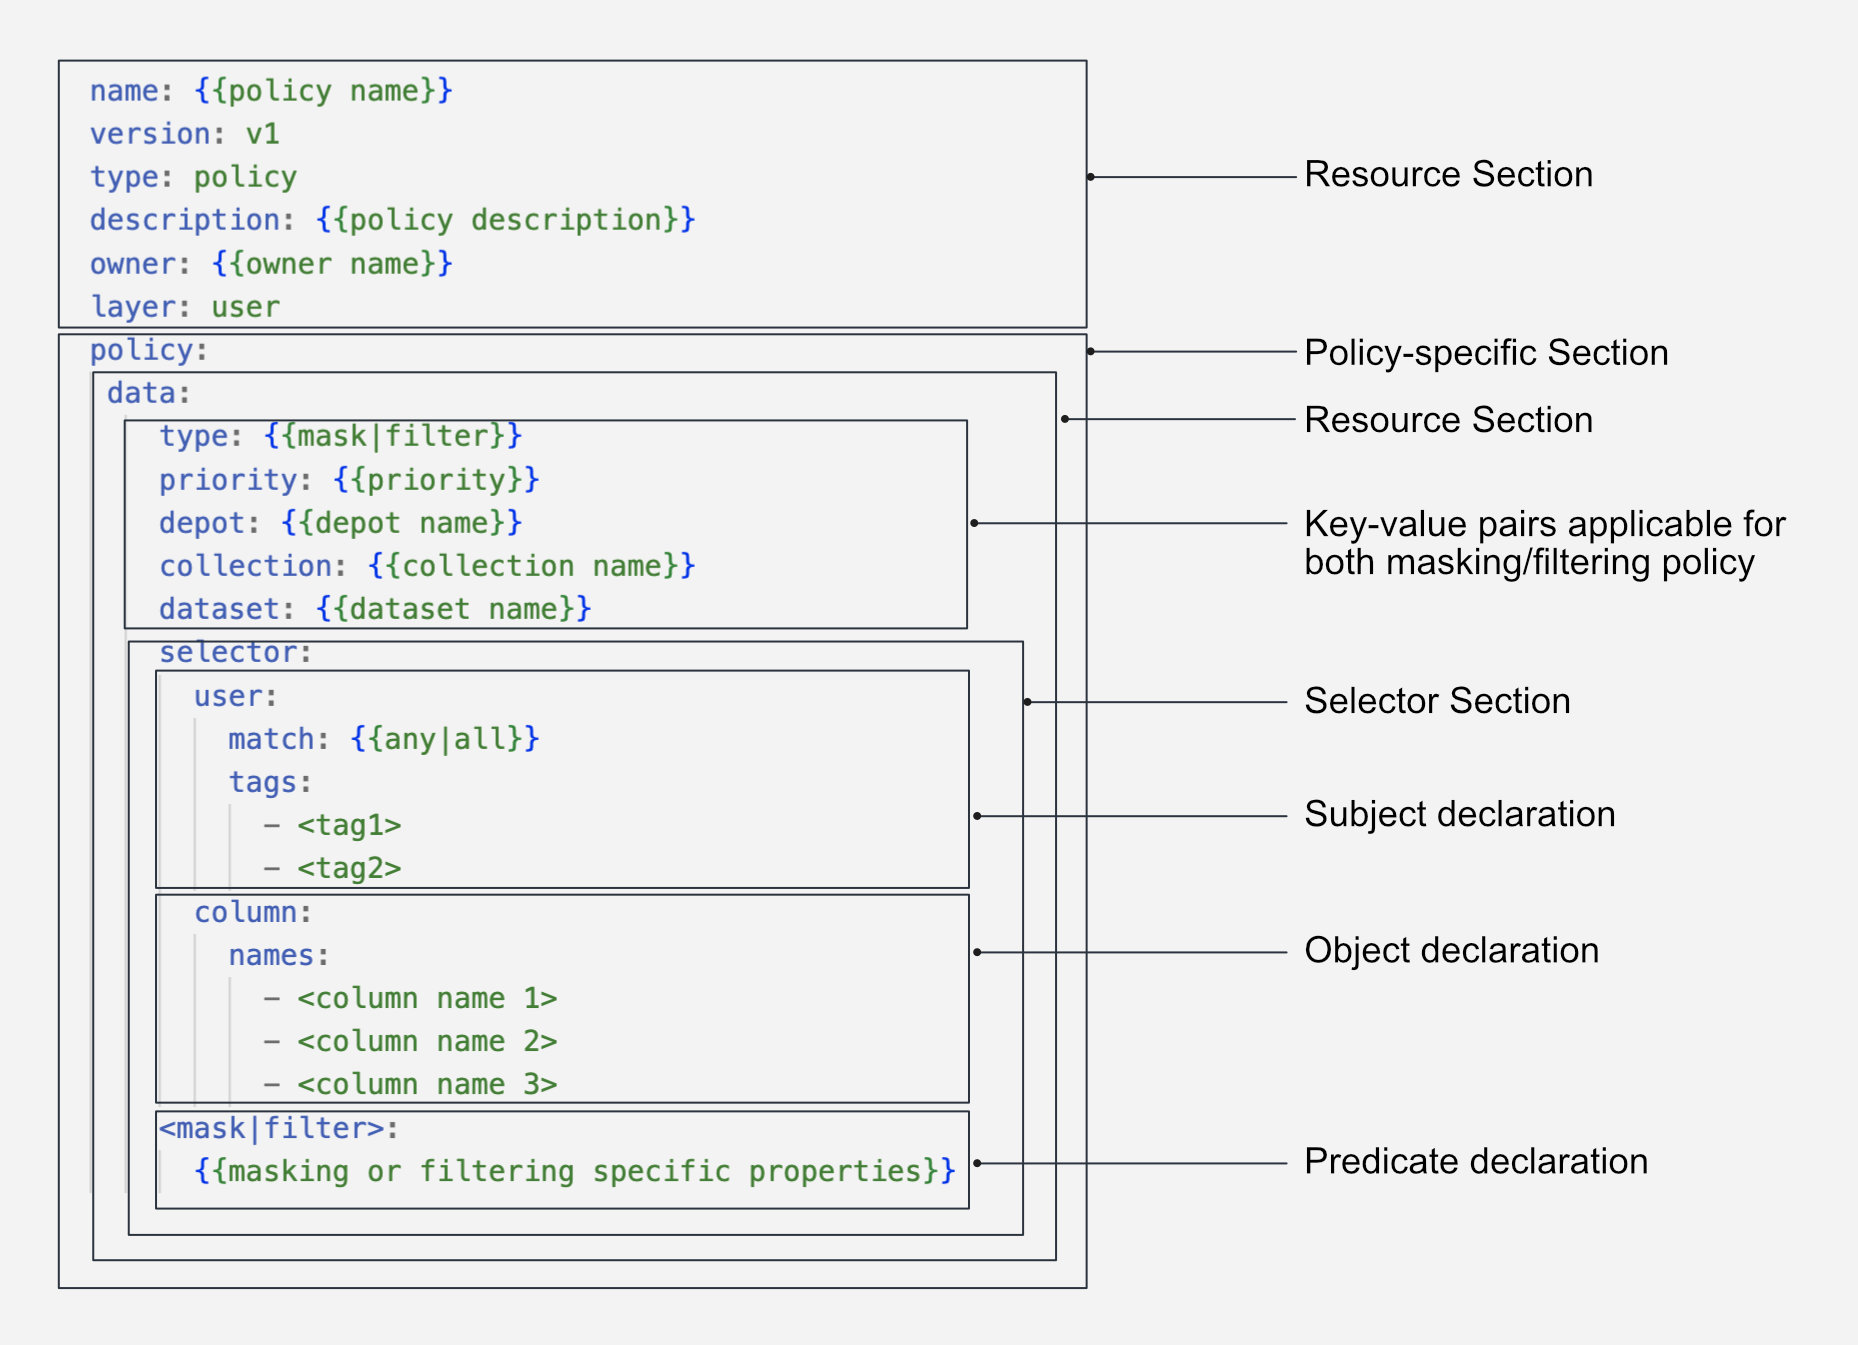
The Data Policy is further divided in two section: filter data policy and masking data policy.
name: filter-lakehouse-city
version: v1
type: policy
tags:
  - policy
  - data
  - filter
description: "data policy to filter zip data"
layer: user
policy:
  data:
    type: filter
    name: "filterlakehousecity"
    priority: 10
    selector:
      user:
        match: any
        tags:
          - "users:id:iamgroot"
    filters:
      - column: county_name
        operator: not_equals
        value: "Autauga County"
    dataset_id: lakehouse.retail.city
    description: 'data policy to filter data on zip code'
name: bucketage
version: v1
type: policy
layer: user
description: "data policy to filter zip data"
policy:
  data:
    priority: 1
    type: mask
    depot: lakehouse
    collection: retail
    dataset: customer
    selector:
      column:
        tags:
          - PII.mycustomtag
      user:
        match: any
        tags:
          - "roles:id:user"
    mask:
      operator: bucket_number
      bucket_number:
        buckets:
          - 15
          - 25
          - 30
          - 35
          - 40
          - 45
          - 50
          - 55
          - 60
    name: age_masking_policy
    description: An age bucket is formed by grouping the ages together. Based on defined
      age buckets, the age of individuals is redacted and anonymized. If an
      individual's age falls under a defined bucket, it is replaced with the
      lowest value of the bucket.
First Steps
Policy Resource in DataOS can be created by applying the manifest file using the DataOS CLI. To learn more about this process, navigate to the link: First steps.
Configuration
Policy can be configured depending on the use case. For a detailed breakdown of the configuration options and attributes, please refer to the documentation: Attributes of Policy manifest.
Configuration Templates
Explore configuration templates of different policies here
Recipes
-
A end to end use-case on how to implement Filter Data Policy
-
A end to end use-case on how to implement Masking Data Policy