Building Data Products
Information
This quick guide provides an overview of designing and building a data product, from defining use cases to creating a functional product. It helps users understand how to identify business needs, set up data ingestion, transformation, quality checks. Additionally, it explains how to create a manifest file for a data product that delivers valuable business insights through enriched datasets, Metrics, APIs, and logical data model.
Pre-requisites
Before you start creating a data product, ensure you have the following:
Access Level Permissions for Creating a Data Product
You need specific tags roles:id:data-dev and roles:id:system-dev that authorize you to create and manage a data product within DataOS.
Alternatively, having specific use cases assigned can also grant you access.
| Intended Action | Required Use-case |
|---|---|
| To build a Data Product | Manage Products/Domain in Poros |
| To view a Data Product | Get Products/Domain Details From Poros |
For more details, visit Bifrost.
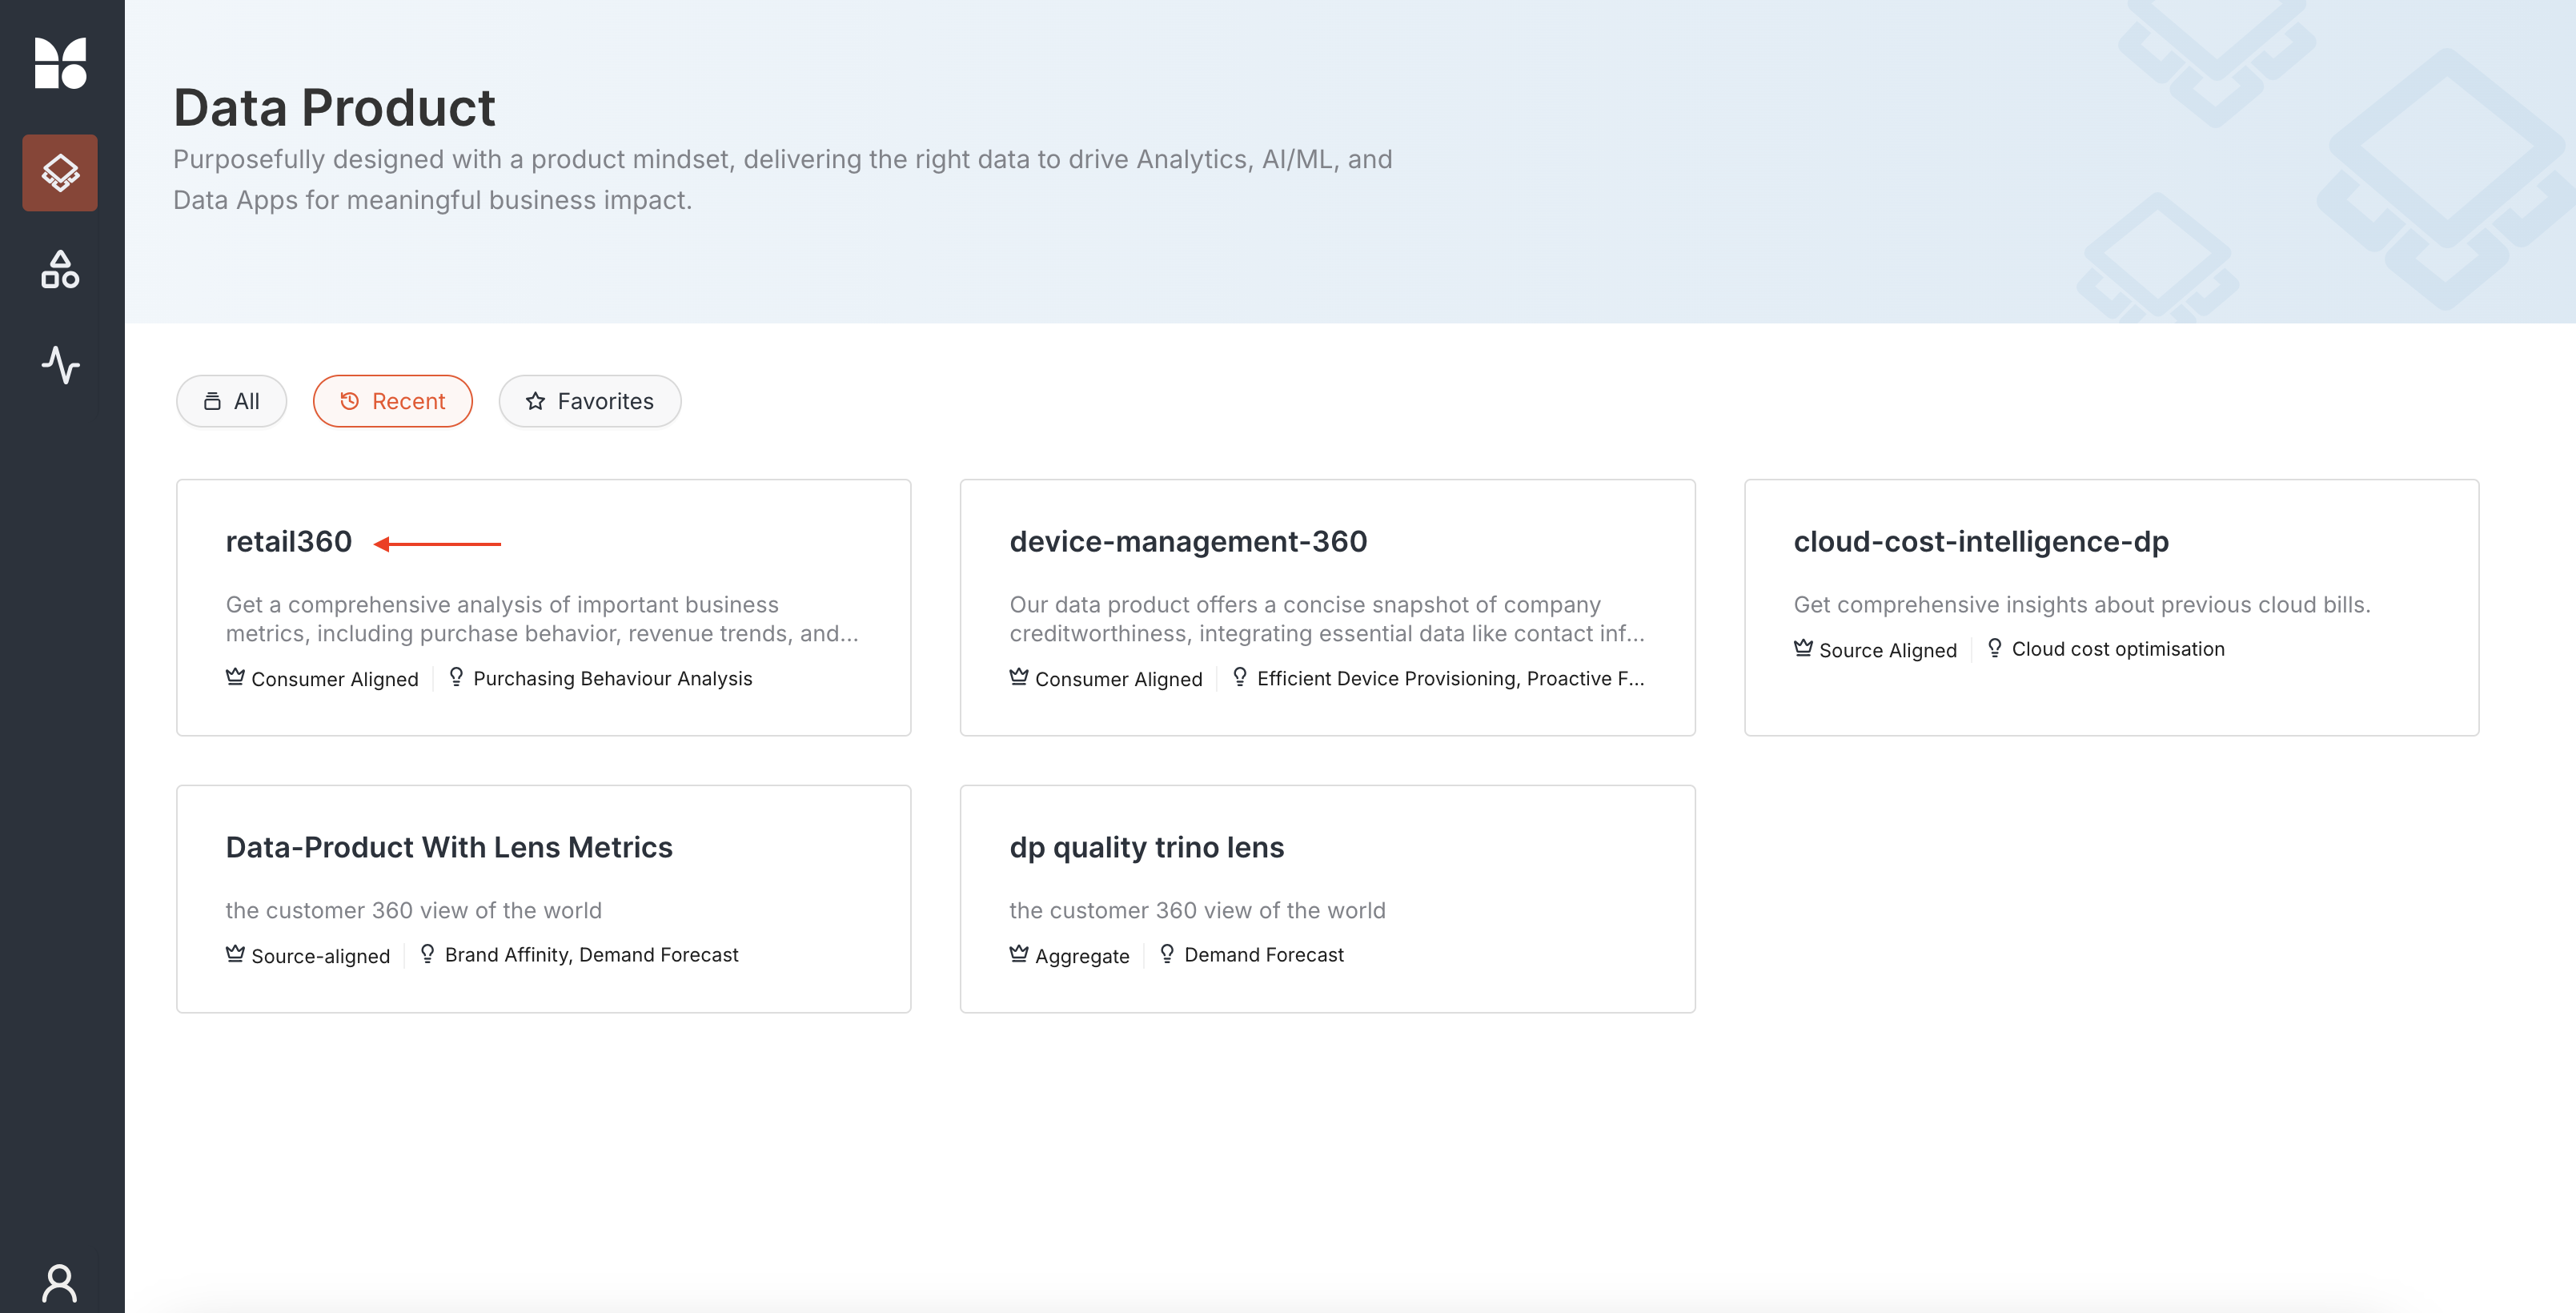
DataOS gives you everything you need to build a Data Product—whether starting from scratch or reusing an existing one. You can explore the Data Product Hub to discover and learn about all available data products, each with detailed information to help you get started or find inspiration.
Designing Data Product
When designing a data product, it is essential to clearly define the expectations and problems it will address.
The development of a Data Product begins with defining use cases. A single data product can cater to multiple use cases, and vice versa. Suppose our use case is to analyze Customer Purchase Behavior. This analysis can reveal patterns, preferences, and trends in customer purchases. Such insights assist in customer segmentation and personalized marketing.
The audience for this data product could include sales teams, marketing analysts, business stakeholders, and data science teams. These insights help refine sales and marketing strategies, ultimately boosting customer retention and business growth.
To effectively design the data product, consider the following key aspects:
- Input Data Sources: Determine the necessary data inputs required to build the product. These might include transactional data, customer demographic data, and product inventory data.
- ETL Process: Extract, clean, and transform raw data from different systems (e-commerce, CRM, etc.)
- SLOS: Identify data quality or access-related conditions. to ensure it is accurate and ready for analysis.
- Data Model: Organize the transformed data into a structured logical model (Lens) that represents key customer and product relationships. Users can explore data through this logical model.
- Data Security: Ensure secure handling, storage, and compliance with data privacy regulations throughout the data pipeline.
- Outputs: Identify how end users will consume and benefit from the data product.
- Data APIs: Specify any APIs required to expose the data, facilitating integration and consumption across different applications.
Building Data Product
After completing the design phase, it's time to assemble the necessary resources for building your data product. This involves setting up data ingestion and transformation processes, managing credentials, enforcing quality rules, and more.
Example Scenario:
We will create a Data Product that outputs/materializes an enriched dataset providing a comprehensive view of the customer landscape. This enriched dataset can be used for exploratory analysis to understand buying patterns and downstream applications such as targeted marketing campaigns and loyalty programs. We will also include the data model which can help experiment with understanding key business drivers and metrics.
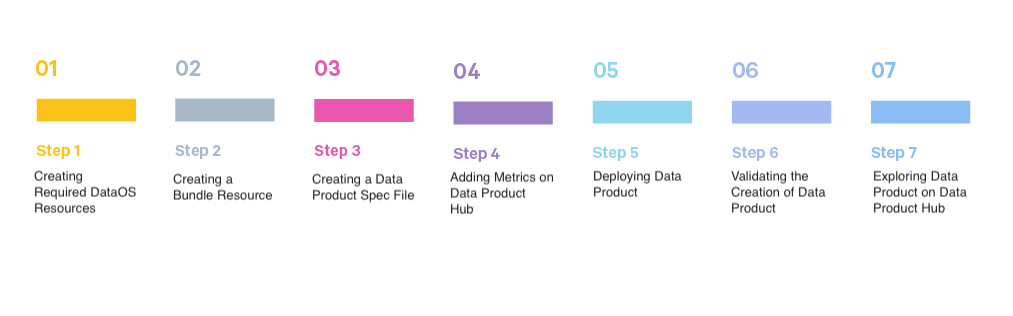
Step 1: Creating Required DataOS Resources
Ensure you have created all necessary Resources, such as Worker, Workflow, Service, Depot, Cluster, Policy, Secret, Instance Secret, Monitor, Pager, etc.
The following DataOS Resources are required for the example scenarios:
- Instance-Secret to store credentials safely
- Depot to connect to the source system.(e.g., bigquery)
- Flare Workflow to ingest raw data from Bigquery to DataOS Lakehouse
- Soda Workflows to check the quality of data
- Policy to enable accessing certain columns of data which is masked by default DataOS policies.
Step 2: Creating a Bundle Resource
Create a Bundle resource with the above Resources. Along with all other Resources, Lens is also deployed through Bundle.
The Bundle is necessary to link all relevant artifacts to your DP. This enables both data producers and consumers to view all workspace-level resources needed for the DP under one umbrella.
In the below example, the bundle contains:
- The ingestion Workflow
- The Lens model and deployment YAMLs
- The Soda Quality workflows
- The Talos API service YAML
name: retail360-bundle
version: v1beta
type: bundle
tags:
  - dataproduct
description: This bundle resource is for the data product retail360.
layer: "user"
bundle:
  workspaces:
    - name: public
      description: "This workspace runs bundle resources for the retail360"
      tags:
        - dataproduct
        - bundleResource
      labels:
        name: "dataproductBundleResources"
      layer: "user"
  resources:
    - id: sales
      file: retail360/bundle/quality/output/sales.yml
      workspace: public

    - id: customer
      file: retail360/bundle/quality/input/customer.yml
      workspace: public

    - id: product
      file: retail360/bundle/quality/input/product.yml
      workspace: public

    - id: lens
      file: retail360/bundle/lens2/deployment.yml
      workspace: public

    - id: dataapi
      file: retail360/bundle/dataApi/service.yaml
      workspace: public
      dependencies:
        - lens

    - id: ingestion
      file: dp_retail360/bundle/ingestion/flare.yml
      workspace: public
Step 3: Creating a Data Product Spec File
Create a data product spec file that holds the configuration details for your data product. This file contains the following sections:
Data Product General Information Section
This section outlines essential metadata attributes for the product.
-
Name:
retail360(Identifies the product name for cloud cost analysis.)The name cannot contain underscores (_). Names with multiple words can only be punctuated using hyphens(-).
-
Version:
v1betaIndicates the version of the product. - Entity:
productClassifies the entity as a data product. - Type:
dataSpecifies that the product handles data. - Purpose: Defines the objective and impact of the product.
- Tags: Tags provide important context for categorizing the data product on the DPH (Data Product Hub). These tags are used to populate three important data points on the DPH UI -
Domain,UsecaseandTier - Description: Provides an overview of what the Data Product delivers.
-
Refs: Include reference links in the DP spec file to add any additional context to the DP. Provide
titleand linkhref.The following code snippet shows how the above properties come in spec file for our example.
version: v1beta
entity: product
type: data
tags:
  - DPDomain.Retail OPS
  - DPUsecase.Purchasing Behaviour Analysis
  - DPTier.Consumer Aligned
description: Get a comprehensive analysis of important business metrics, including purchase behavior, revenue trends, and customer insights. This analysis helps identify patterns, preferences, and purchasing trends, providing insights into customer segmentation, and personalized marketing strategies.
refs:
- title: 'Workspace Info'
  href: https://dataos.info/interfaces/cli/command_reference/#workspace
Data Product-Specific Section
This section outlines data product-specific attributes such as Bundle resource, inputs, outputs, and references. All the specific details related to the data product. comes under data section in spec file.
-
Meta
Developers now have to include a
metasection, nested under thedatasection, to provide additional context and information to DPH.- The
sourceCodeUrlkey is used to link the associated repository where the DP artefacts are maintained -
The
trackerUrlkey is used to link the associated JIRA ticket where the DP issues are being managedv1beta: data: meta: sourceCodeUrl: https://bitbucket.org/tmdc/cloud-cost-360/src/main/ title: Cloud Cost 360 # this appears on the UI | If you want to capitalise and format your DP name's appearance on DPH trackerUrl: https://rubikai.atlassian.net/browse/DPRB-19?atlOrigin=eyJpIjoiZDVmMDNmYmYxOWYwNGVjZDlhNDdiYTA4NTZmMjg0NTIiLCJwIjoiaiJ9
- The
-
Collaborators
User IDs of individuals who are collaborating on this data product. You can to add
nameanddescriptionas additional context to each collaborator under thedatasection in the DP Spec YAML.v1beta: data: meta: foo: bar sourceCodeUrl: https://github.com/NandaAtModern/dp_retail360/tree/master/retail360 trackerUrl: https://rubikai.atlassian.net/browse/DPRB-19?atlOrigin=eyJpIjoiZDVmMDNmYmYxOWYwNGVjZDlhNDdiYTA4NTZmMjg0NTIiLCJwIjoiaiJ9 collaborators: - name: nandapage # name is mandatory description: owner # description is optional - name: Shraddha description: consumer - name: kanakgupta description: developer -
Resource
With a
resourcesection, you give a reference to a single Bundle Resource which is expected to contain all the DataOS Resources which are part of Data Product. For example, Workflows, Services, Secrets, Policies etc.This section is crucial to bring every workspace-level resource needed for the DP under one umbrella for lifecycle management and context comprehensive context sharing of the Data Product.
-
Input/Output refType
There are two types of dataset references -
- dataos: this is used when your dataset is stored in DataOS Lakehouse and has a DataOS address
-
depot: this can be used when your dataset is stored on a third party system
inputs:
  - description: Fetching sales data from lakehouse, for comprehensive analysis of sales metrics, providing insights into revenue trends, performance tracking, and decision-making support.
    refType: dataos
    ref: dataset:lakehouse:sales360mockdb:f_sales

  - description: Pulling customer data from bigquery, for understanding customer demographics, behaviors, preferences and customer segmentation.
    refType: depot
    ref: dataos://bigquery:sales_360/customer_data_master

  - description: Fetching product data from Bigquery,to get a full view of the product portfolio, product performance analysis, and market positioning strategies.
    refType: depot
    ref: dataos://bigquery:sales_360/product_data_master

outputs:
  - description: The objective is to expose this sales data to facilitate the creation of data APIs to enable seamless access to sales data, allowing integration with external systems, real-time data consumption, and enhanced analytical capabilities.
    refType: depot
    ref: dataos://lakehouse:sales360_mockdb/sales
-
Ports
The Ports section lets you set up links to various services and tools tied to your Data Product, such as Lens, Talos, REST APIs, and Postgres databases. While it's optional for creating a Data Product, adding ports significantly enhances functionality.
Adding a Lens port enables direct access to data models in the Model tab of the Data Product details page, making data exploration seamless.
Talos, REST, and Postgres Ports ports enable integration with external services, APIs, and databases that the data product may interact with.
    ports:
      lens:
        ref: lens:v1alpha:retail360-lens:public
        refType: dataos

      talos:
      - ref: service:v1:service-retail360-api:public
        refType: dataos

      rest:
      - url: https://liberal-donkey.dataos.app/lens2/api/public:cloud-cost-analysis/v2/rest

      postgres:
      - host: tcp.liberal-donkey.dataos.app
        port: 5432
        params:
          ssl: true
Retail360 Data Product Spec (YAML) File
name: retail360
version: v1beta
entity: product
type: data
tags:
  - DPDomain.Retail OPS
  - DPUsecase.Purchasing Behaviour Analysis
  - DPTier.Consumer Aligned
description: Get a comprehensive analysis of important business metrics, including purchase behavior, revenue trends, and customer insights. This analysis helps identify patterns, preferences, and purchasing trends, providing insights into customer segmentation, and personalized marketing strategies.
refs:
- title: 'Workspace Info'
  href: https://dataos.info/interfaces/cli/command_reference/#workspace
v1beta:
  data:
    meta:
      # sourceCodeUrl: https://bitbucket.org/tmdc/sales_360/src/main/
      # trackerUrl: https://rubikai.atlassian.net/browse/DPRB-2?atlOrigin=eyJpIjoiOWEyOGQxZWU5NmRiNGViZTlmYjcxYjBhNWQwYmFkZDUiLCJwIjoiaiJ9
      foo: bar
    collaborators:
      - name: nandapage
        description: consumer
      - name: kanakgupta
        description: developer

    resource:
      description: 'Ingest data'

      refType: dataos
      ref: bundle:v1beta:retail360-bundle
    inputs:
    - description: Fetching sales data from the S3 bucket, for comprehensive analysis of sales metrics, providing insights into revenue trends, performance tracking, and decision-making support.
      refType: dataos
      ref: dataset:lakehouse:sales360mockdb:f_sales

    - description: Pulling customer data from the S3 bucket, for understanding customer demographics, behaviors, preferences and customer segmentation.
      refType: dataos
      ref: dataset:lakehouse:sales360mockdb:customer_data_master

    - description: Fetching product data from the S3 bucket,to get a full view of the product portfolio, product performance analysis, and market positioning strategies.
      refType: dataos
      ref: dataset:lakehouse:sales360mockdb:product_data_master

    outputs:
    - description: The objective is to expose this sales data to facilitate the creation of data APIs to enable seamless access to sales data, allowing integration with external systems, real-time data consumption, and enhanced analytical capabilities.
      refType: dataos
      ref: dataset:lakehouse:sales360mockdb:f_sales

    ports:
      lens:
        ref: lens:v1alpha:retail360-lens:public
        refType: dataos

      talos:
      - ref: service:v1:service-retail360-api:public
        refType: dataos
Step 4: Adding Metrics on Data Product Hub
To ensure that Metrics show up on DPH and under Metrics tab on the DP details page, you need to do the following changes in the Lens model:
-
Add
metrics.yamlunder the Lens View folder.One metric should contain only one measure and at least one Time dimension. You may add multiple metrics to the same DP by adding multiple metrics to the same
metrics.yamlfile.Example 1: Single metrics in the YAML
views:
  - name: conversion_rate
    description: This metric tracks the percentage of leads or prospects who successfully converted into paying customers over a month time period.
    public: true
    meta:
      title: Conversion Rate
      tags:
        - DPDomain.Sales OPS
        - DPUsecase.Purchasing Behaviour Analysis
        - DPTier.Consumer Aligned
      metric:
        expression: "*/5  * * * *"
        timezone: "UTC"
        window: "month"
        excludes:
          - invoice_no
    tables:
      - join_path: sales
        prefix: true
        includes:
          - frequency
          - customer_no
          - invoice_date
          - invoice_no
      # excludes:
        # - columnname
Example 2: multiple metrics in the same YAML
views: - name: conversion_rate description: This metric tracks the percentage of leads or prospects who successfully converted into paying customers over a month time period. It provides insights into the effectiveness of marketing efforts and sales processes. public: true meta: title: Conversion Rate tags: - DPDomain.Sales OPS - DPUsecase.Purchasing Behaviour Analysis - DPTier.Consumer Aligned metric: expression: "*/5 * * * *" timezone: "UTC" window: "month" excludes: - invoice_no tables: - join_path: sales prefix: true includes: - frequency - customer_no - invoice_date - invoice_no - name: qtd_revenue description: This metric tracks the total revenue generated in the current quarter to date (QTD). It provides insights into financial performance over the quarter, helping to evaluate growth trends and revenue targets. public: true meta: title: QTD Revenue tags: - DPDomain.Sales - DPUsecase.Purchasing Behaviour Analysis - DPTier.Consumer Aligned metric: expression: "*/5 * * * *" timezone: "UTC" window: "month" excludes: - ext_net tables: - join_path: sales prefix: true includes: - total_revenue # - frequency - invoice_date - ext_net - source - join_path: product prefix: true includes: - category - brand - class - join_path: account prefix: true includes: - site_name - state - license_type - customer_name -
Add a metric section to the Lens Deployment Manifest File.
The metric section go at the end of the YAML.
-
Deploy the Lens YAML through the Bundle
In order for the Metrics to show up in the Metrics list, the Lens should be deployed through the Bundle, as shown below.
name: retail360-bundle
version: v1beta
type: bundle
tags:
  - dataproduct
description: This bundle resource is for the data product retail360.
layer: "user"
bundle:
  workspaces:
    - name: public
      description: "This workspace runs bundle resources for the retail360"
      tags:
        - dataproduct
        - bundleResource
      labels:
        name: "dataproductBundleResources"
      layer: "user"

  resources:

    - id: sales
      file: retail360/bundle/quality/output/sales.yml
      workspace: public

    - id: customer
      file: retail360/bundle/quality/input/customer.yml
      workspace: public

    - id: product
      file: retail360/bundle/quality/input/product.yml
      workspace: public

    **- id: lens
      file: retail360/bundle/lens2/deployment.yml
      workspace: public**

    - id: dataapi
      file: retail360/bundle/dataApi/service.yaml
      workspace: public
      dependencies:
        - lens

    - id: ingestion
      file: dp_retail360/bundle/ingestion/flare.yml
      workspace: public
Step 5: Deploying Data Product
Once you have made all the above changes to the DP Spec, Bundle, and Lens YAMLs, use the apply command to deploy your Data Product on Data Product Hub successfully:
-
Run the Bundle manifest file.
-
Run the Data Product Spec file(YAML).
-
Run the Scanner YAML containing a valid reference to the Data Product. This step is important to make your data product discoverable in the Data Product Hub or Metis.
Step 6: Validating the Creation of Data Product
To check if you have created a data product, run the following command. It lists all data products created by you:
Example Usage
dp_retail360 git:(master) dataos-ctl product get
INFO[0000] 🔍 product get...
INFO[0000] 🔍 product get...complete

  TYPE | VERSION |          NAME          | STATUS |   OWNER
-------|---------|------------------------|--------|------------
  data | v1beta  | retail360              | active | nandapage
Step 7: Exploring Data Product on Data Product Hub
You can also check your data product on Data Product Hub.
-
Log in to the DataOS instance and Navigate to Data Product Hub.
-
Click on the data product to view its details.

Download Data Product Code Files
Download the Data Product dp_retail360.zip which includes the necessary DataOS Resources, Lens model, API service, etc.