Queries
Edit a Query
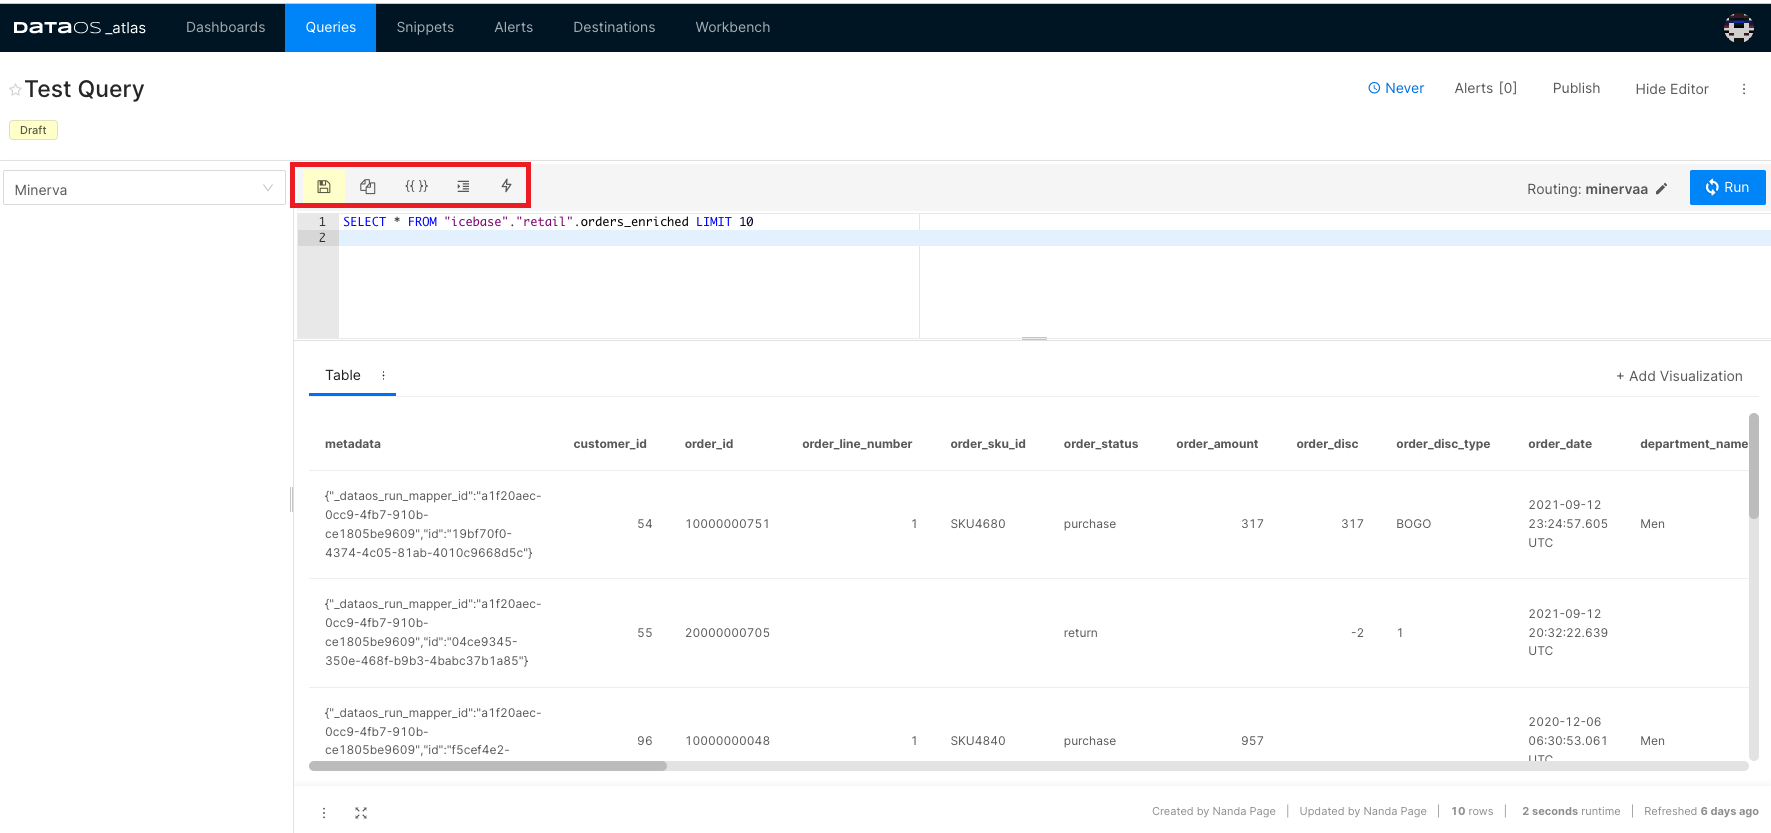
Click on the specific query to view/edit the SQL statement.
Query editor allows you to format your query and enable/disable the live auto-complete feature. To save a query, press Ctrl+ S (or Cmd +S)/ click Save. *Once you finish editing, you can click on ‘*Run’ to view the query result. From here, you can also build visualizations based on the results returned from queries.

Query Parameters
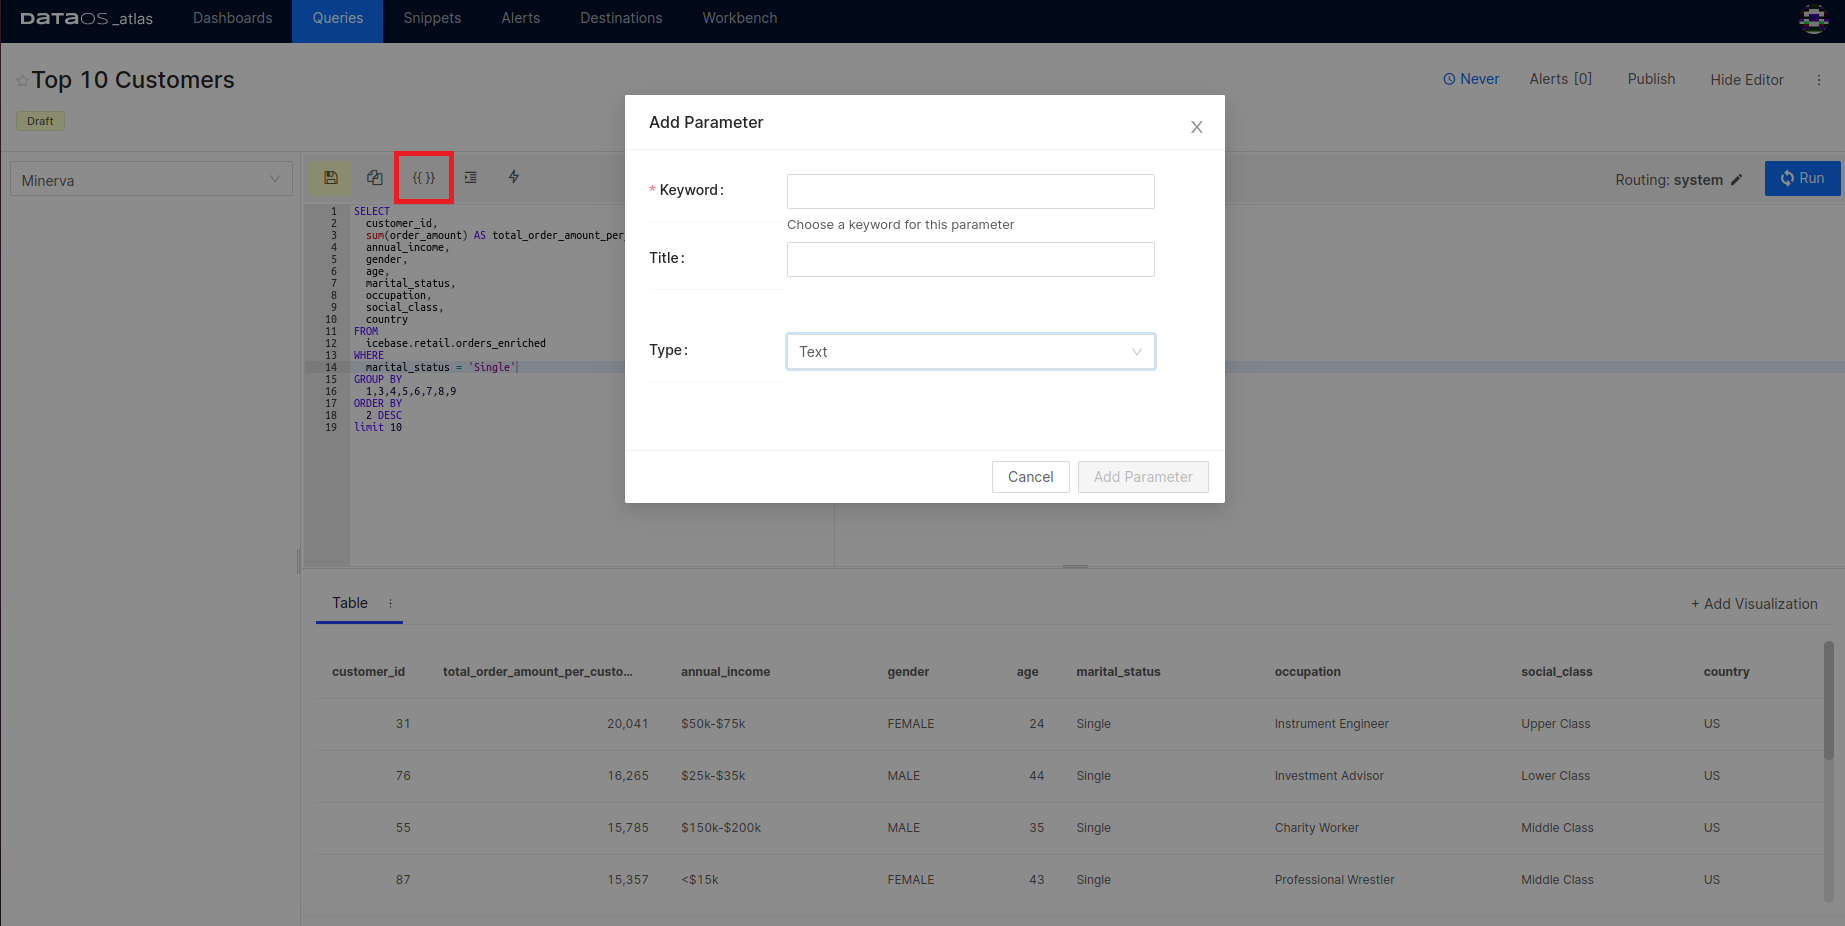
Atlas allows you to write parameterized queries. A query parameter lets you substitute values into a query at runtime. Any string between double curly braces {{ }}
is treated as a query parameter. Clicking on the double curly brackets, the Add Parameter
dialog appears where you set the parameter and its type. The parameter is inserted at the text caret in your query. While running your query, you will get the option to provide the value for the defined parameter(s).

Query Parameter Types
- Text- Provide a text value
- Number- Provide a numeric value
- Dropdown List- You can restrict the parameters by creating a drop-down. You have to enter the values manually.
- Query Based Dropdown List- The options in the drop-down can be tied to the results of an existing query. You need to publish the query that will generate the options.
- Date & Time related options-You have several options to parameterize date and timestamp values, including their ranges.
To learn more about the parameter types and how to add parameters to the queries, click here.
Download query result
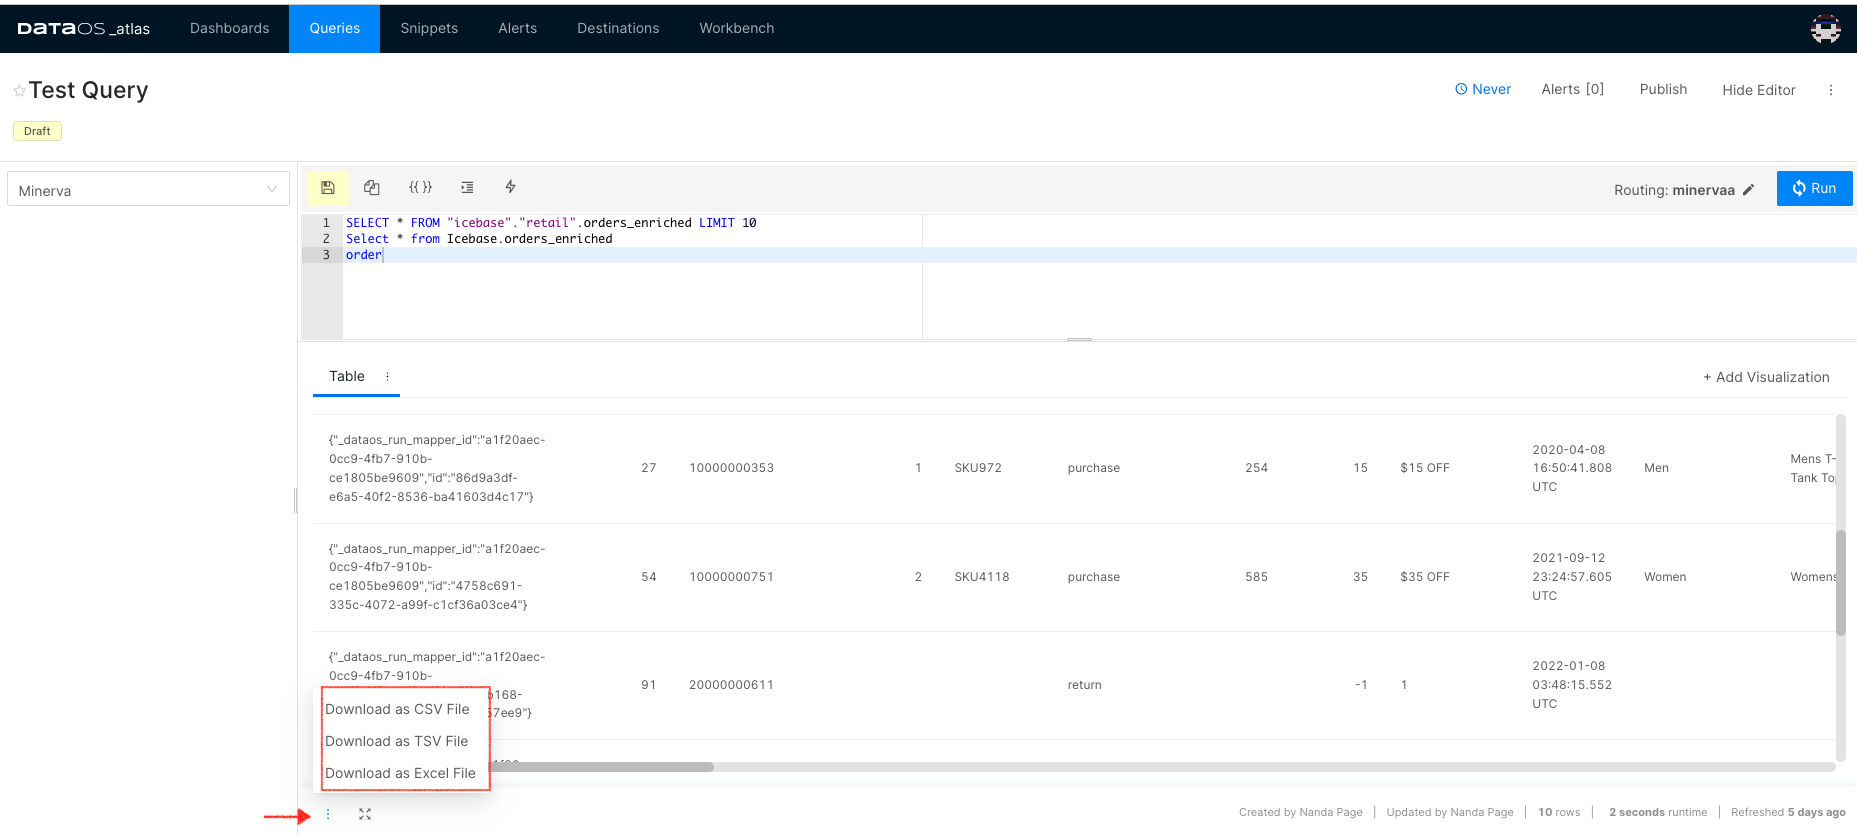
Click on the three dots to download a query result as a CSV, TSV, or Excel file.

Manage Query
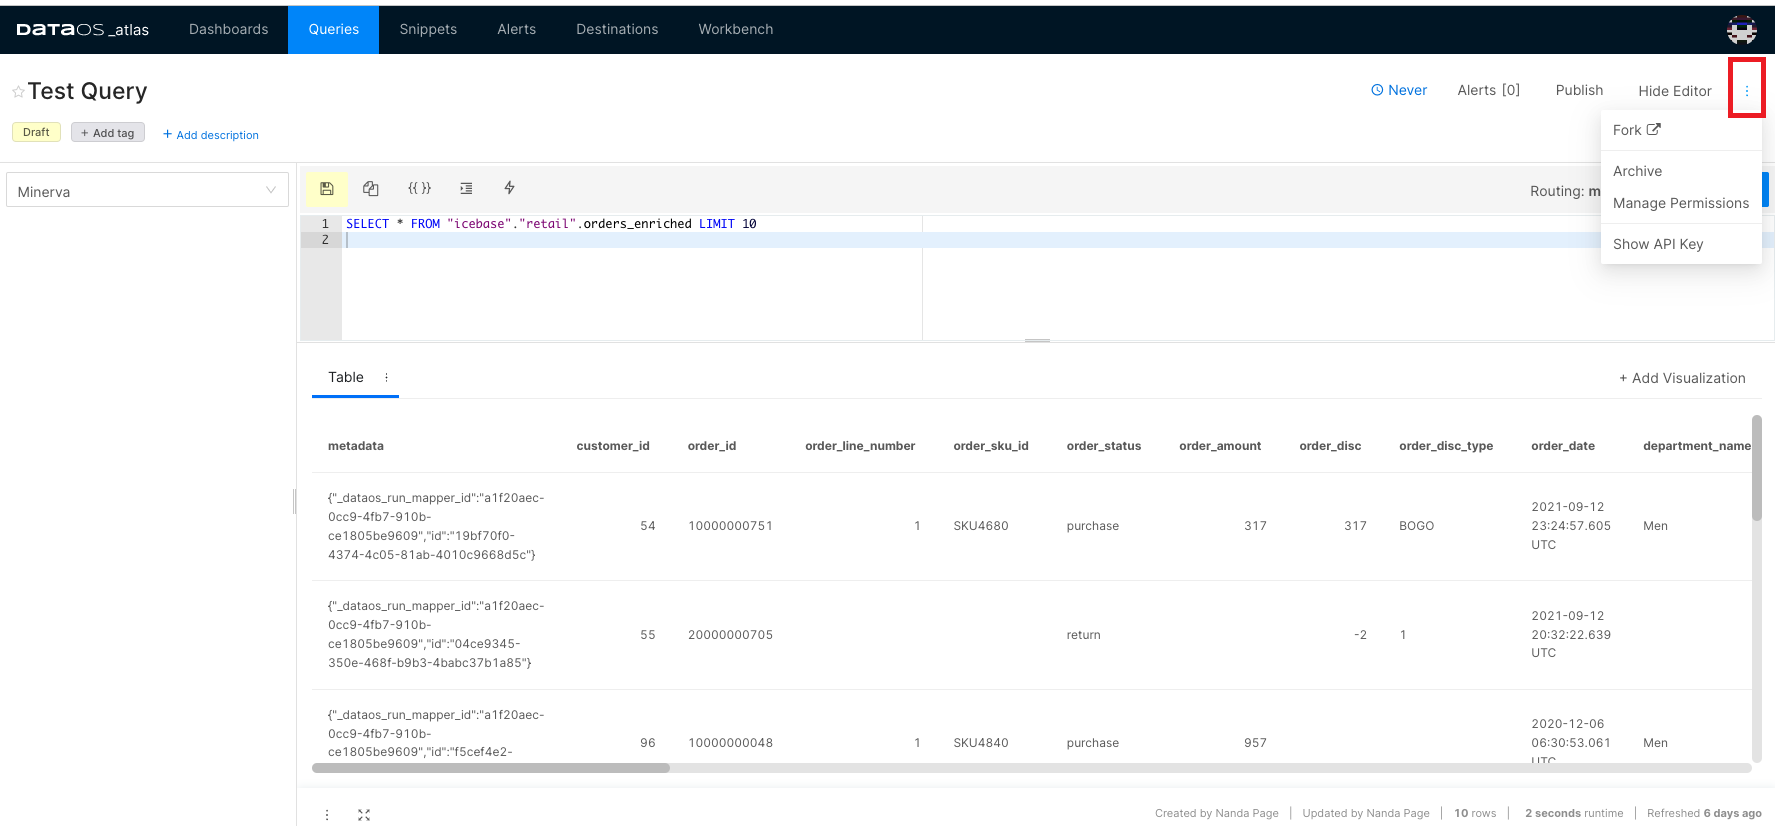
The following options appears by clicking on the three dots in the extreme right corner.
Fork a Query
Sometimes you want to duplicate a query. You can do so by using the Fork option given in the menu.

Archive a Query
Deleting a query may break down your existing dashboards, so Atlas gives you the option to archive your query instead of deleting it. Existing dashboards continue to point to this query, but you can not use it further.
Manage Edit Permissions
By default, the queries can only be edited by the user who created them. But you can provide edit permissions to other users using the Manage Permissions option.
Show API Key
This option will provide a URL you can share or download the query result.
Refresh Schedule
The refresh schedule for the execution of the query, can be tailored according to specific needs and preferences. Scheduling query executions will help in keeping your dashboards updated and in generating routine alerts. By default, your queries do not have a schedule.
Click on the default settings ‘Never’ to customize it.
A pop-up will appear with the scheduling options. Select the cadence and configure the corresponding settings that will appear on the screen, such as the end date for the scheduled execution or which day of the week to run the query. That’s pretty easy to do once you have this dialog box open. Once you set the schedule, your query will run automatically.

View Alerts
Here, you can view all the alerts set for the query.
To learn more, click here.[link to alerts]
Publish Query
By default, the query will be in draft mode initially. It can not be used in the dashboard or alerts until published. You can toggle the status published/unpublished. Unpublishing a query will not remove it from existing dashboards or alerts. But you will not be able to add it to any other dashboard/alert.