Skip to content

Creating Jobs upon Flare Stack

Flare Workflow

DataOS uses Flare workflows to carry out large-scale data transformation, ingestion, profiling, syndication, and even a combination of these tasks.
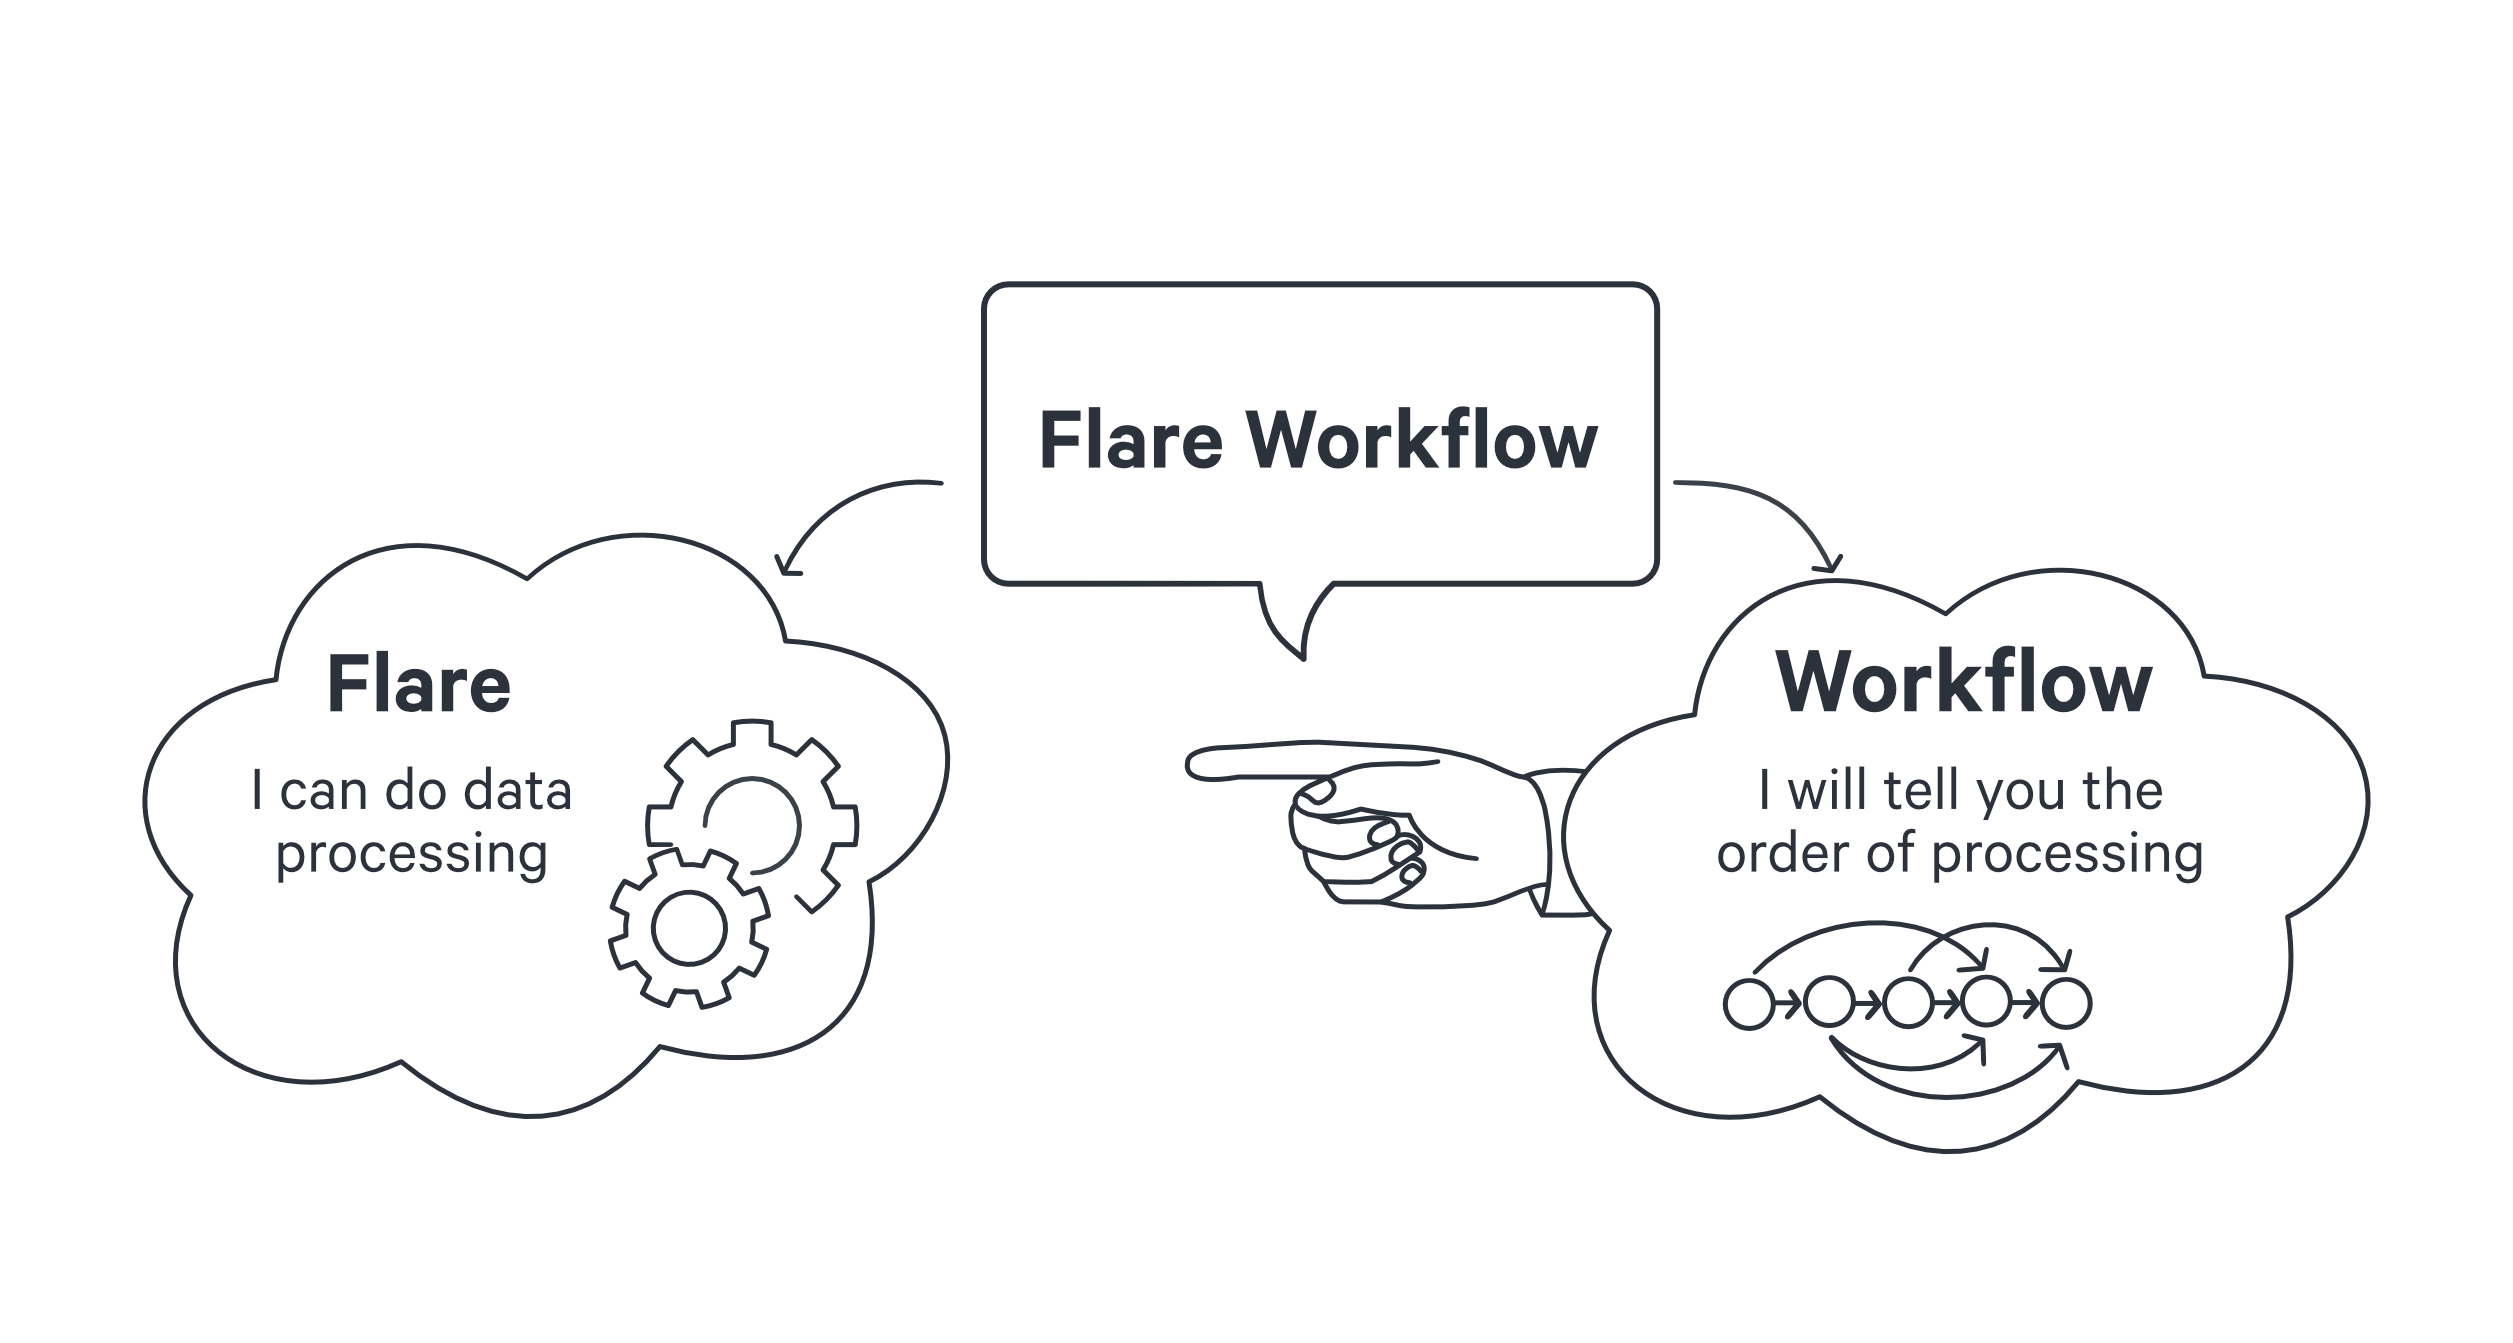
diagram 03.jpg

Flare is a declarative stack that can process large-scale data processing workflows using sequential YAML. On the other hand, a workflow is a primitive/Resource within DataOS that runs a sequence of jobs in a specific order. A workflow is a DAG (Directed Acyclic Graph) of jobs. To learn more about workflows, click here.

Deep Diving into a Flare Job

A Job is a generalized way of defining a transformation task based on the scenario and use case; it requires the assistance of stacks to achieve the desired outcome. Any job is fully reliant on the completion of the job before it. E.g. A Flare Job represents a data processing workload which could be ingestion, transformation, profiling, syndication, etc., running on Flare stack, while in scenarios when the output dataset is to be stored in the Icebase depot, you also need the Toolbox stack along with the Flare Stack. If you would like to learn more about the Toolbox stack, click here.

In terms of YAML structure how a Flare Job is declared within the DAG, it comprises three sections: The Input (read data from), the Output (write data to), and the Steps (transformation of data during transit).

Build.svg

In order to grasp the intricacies of creating a Flare Job and the process of testing and deploying it, we shall explore a specific example of Data Ingestion. The data ingestion process will involve acquiring batch data in CSV format from an external source, applying various transformations on top of it, and ultimately storing the data within DataOS internal storage, Icebase.

However, before delving into the technical aspects of this task, it is vital to ensure that certain prerequisites have been met to ensure a smooth and successful execution.

Prerequisites

Check whether DataOS CLI (Command Line Interface) is Installed

Before proceeding, verify that the DataOS CLI is installed on your system. If it is, proceed to the next step. If not, use the provided link to install the CLI.

CLI

Check Required Permissions to Run the Flare Workflow

Before proceeding to run a Flare Workflow, kindly ensure that you have the necessary permissions. To execute the Flare Workflow through the CLI, you must possess the roles:id:data-dev, roles:id:depot-manager, roles:id:depot-reader, and roles:id:user tags.

If you don’t have the required permissions, you will get the Forbidden Error message.

Use the command below to check your permission tags. Make sure that you are logged in to DataOS CLI before running the above command.

dataos-ctl user get
#This is the output you will get
INFO[0000] πŸ˜ƒ user get...   # we hope u keep smiling                             
INFO[0000] πŸ˜ƒ user get...complete

      NAME     |     ID      |  TYPE  |        EMAIL         |              TAGS               
---------------|-------------|--------|----------------------|---------------------------------
    IamGroot   |   iamgroot  | person |   iamgroot@tmdc.io   | roles:direct:collated,          
               |             |        |                      | **roles:id:data-dev**,              
               |             |        |                      | **roles:id:depot-manager**,         
               |             |        |                      | **roles:id:depot-reader**,                  
               |             |        |                      | roles:id:system-dev,            
               |             |        |                      | **roles:id:user**,                  
               |             |        |                      | users:id:iamgroot

Note: In case of unavailability of required tags, contact the administrator within your organization with Operator-level permissions or dataos:u:operator tag to add the required tags for running your workflow.

Check the required depot

To run a Flare Workflow, you need depots addressing both source and sink systems to read and write data. If you already have a depot created you can proceed to the next step. You can take help from the Metis to explore the datasets within various depots.

To get the list of depots, created by all the DataOS users, run the below command in the CLI

dataos-ctl get -t depot -a
To check the output, click the toggle button Output (with your job highlighted in bold)
INFO[0000] πŸ” get...                                     
INFO[0000] πŸ” get...complete                             

        NAME      | VERSION | TYPE  | WORKSPACE | STATUS  |  RUNTIME  |          OWNER           
-----------------|---------|-------|-----------|---------|-----------|--------------------------
  azureblob      | v1      | depot |           | pending | running:1 | user01       
  blender        | v1      | depot |           | active  |           | dataos-resource-manager  
  crmbq          | v1      | depot |           | active  |           | user02             
  customer       | v1      | depot |           | active  | running:1 | user02             
  distribution   | v1      | depot |           | active  |           | user02             
  dropzone01     | v1      | depot |           | active  | running:1 | dataos-resource-manager  
  fastbase       | v1      | depot |           | active  |           | dataos-resource-manager  
  filebase       | v1      | depot |           | active  | running:1 | dataos-resource-manager  
  gateway        | v1      | depot |           | active  |           | dataos-resource-manager  
  **icebase**        | v1      | depot |           | active  | running:1 | dataos-resource-manager  
  manufacturing  | v1      | depot |           | active  |           | user02             
  metisdb        | v1      | depot |           | active  |           | dataos-resource-manager  
  poss3          | v1      | depot |           | active  | running:1 | user02             
  primeorgbucket | v1      | depot |           | active  | running:1 | dataos-resource-manager  
  product        | v1      | depot |           | active  | running:1 | user02             
  publicstreams  | v1      | depot |           | active  |           | dataos-resource-manager  
  redshift       | v1      | depot |           | active  |           | user03                
  retail         | v1      | depot |           | active  | running:1 | user02             
  snowflake01    | v1      | depot |           | active  |           | user02             
  snrksh         | v1      | depot |           | active  |           | user04        
  syndicate01    | v1      | depot |           | active  | running:1 | dataos-resource-manager  
  systemstreams  | v1      | depot |           | active  |           | dataos-resource-manager  
  **thirdparty01   | v1**      **| depot |           | active  | running:1 | dataos-resource-manager**  
  transportation | v1      | depot |           | active  | running:1 | user02             
  yakdevbq       | v1      | depot |           | active  |           | user02

In case you don’t have the required depot in the list, you can create a YAML configuration file for a depot and apply it through CLI. To know more about creating a depot click on the below link

Create Depot

Check the type of workload you wanna run

A workload can either be a Batch or Streaming workload. For a batch workload, you can submit one workflow with you have two options either submit a workflow that contains a job on both Flare and Toolbox Stack respectively both the Flare and Toolbox jobs one after the other in a DAG or submit two separate workflows one containing the DAG of Flare jobs and another containing the DAG of the Toolbox job.

While for a streaming workload, you need to create two separate workflows one for DAG of Flare Jobs and another for DAG of Toolbox job. In the below use case, we will take a batch workload.

Check the size of the data

For small and medium-sized data it's best to stick to the default configurations, but if you wanna do some heavy lifting by running some hundred Gigabyte and even Terabyte-sized workloads you need to alter the configuration and optimize the job according to that. To know more about optimization click the below link

Flare Optimizations

Getting started with Flare Job

Excited to run the workflow for Flare Job, without further ado let’s get right into it.

Create a YAML file

To define a workflow for the Flare job you want to run, you must provide various configuration values in the key-value pairs in the YAML file. Before creating the YAML, you need to get the UDL of the input and output depots. For this case scenario

  • Input
    • dataset - dataos://thirdparty01:none/city
    • format - CSV
  • Output: dataos://icebase:retailsample

This example requires two depots (thirdparty01 and icebase) to connect with the source and sink to perform the reading and writing of data.

version: v1
name: cnt-city-demo-001
type: workflow
tags:
- Connect 2342
- CONNECT
description: The job ingests city data from dropzone into raw zone
workflow: # Workflow
  title: Connect City
  dag: # DAG (Directed Acyclic Graph)
  - name: wf-sample-job-001 # Job 1
    title: City Dimension Ingester
    description: The job ingests city data from dropzone into raw zone
    spec:
      tags:
      - Connect
      - City
      stack: flare:5.0 # Stack is Flare, so its Flare Job
      compute: runnable-default
      stackSpec:
        job:
          explain: true
          logLevel: INFO
                    # Inputs
          inputs:
           - name: city_connect
             dataset: dataos://thirdparty01:none/city
             format: csv
             schemaPath: dataos://thirdparty01:none/schemas/avsc/city.avsc
                    # Outputs
          outputs:
            - name: cities
              dataset: dataos://icebase:retailsample/city?acl=rw
              format: Iceberg
              description: City data ingested from external csv
              options:
                saveMode: append
                sort:
                  mode: partition
                  columns:
                    - name: version
                      order: desc
                iceberg:
                  properties:
                    write.format.default: parquet
                    write.metadata.compression-codec: gzip
                  partitionSpec:
                    - type: identity
                      column: version
                    # Steps
          steps:
          - sequence:
              - name: cities
                doc: Pick all columns from cities and add version as yyyyMMddHHmm formatted
                  timestamp.
                sql: |
                    SELECT
                      *,
                      date_format (now(), 'yyyyMMddHHmm') AS version,
                      now() AS ts_city
                    FROM
                      city_connect

Save the YAML and copy its path. Path could be either relative or absolute.

To know more about the various Flare Stack YAML configurations, click here.

Validate the YAML

Before running the workflow, ensure the validity of the YAML using the Linter command. The Linter command will check for correct syntax, indentation, naming convention, etc. To know more about the aspects verified by the Linter command -

In case you encounter errors, check out the below link

Flare Errors and Issues

To use the linter command use the lint -l flag with the apply command.

dataos-ctl apply -f <file-path> -l

Sample

dataos-ctl apply -f /home/tmdc/Desktop/city_flare -l
If there are no errors in the YAML config file, click the toggle to check the output
INFO[0000] πŸ›  apply...                                   
INFO[0000] πŸ”§ applying(public) cnt-city-demo-001:v1beta1:workflow... 

---
# cnt-city-demo-001:v1beta1:workflow
name: cnt-city-demo-001
version: v1
type: workflow
tags:
- Connect
- City
description: The job ingests city data from Third party into DataOS
workflow:
  title: Connect City
  dag:
  - name: city-001
    description: The job ingests city data from Third party into DataOS
    title: City Dimension Ingester
    spec:
      tags:
      - Connect
      - City
      stack: flare:5.0
      stackSpec:
        job:
          explain: true
          inputs:
          - dataset: dataos://thirdparty01:none/city
            format: csv
            name: city_connect
            schemaPath: dataos://thirdparty01:none/schemas/avsc/city.avsc
          logLevel: INFO
          outputs:
          - depot: dataos://icebase:retailsample?acl=rw
            name: output01
          steps:
          - sequence:
            - name: cities
              sql: select * from city_connect
            sink:
            - datasetName: city
              description: City data ingested from external csv
              outputName: output01
              outputOptions:
                iceberg:
                  partitionSpec:
                  - column: state_name
                    type: identity
                  properties:
                    write.format.default: parquet
                    write.metadata.compression-codec: gzip
                saveMode: overwrite
              outputType: Iceberg
              sequenceName: cities
              tags:
              - Connect
              - City
              title: City Source Data

INFO[0001] πŸ”§ applying cnt-city-demo-001:v1beta1:workflow...valid 
INFO[0001] πŸ›  apply(public)...lint                       
INFO[0001] πŸ›  apply...nothing

Testing the YAML on Flare Standalone

In spite of validating the YAML, there is a chance that the Flare job will fail in production which will result in a loss of both computing resources and time. To avoid such unforeseeable situations its the best practice to test the Flare job in the Flare Standalone before deploying it into production.

Testing the Flare job on Flare Standalone

Applying the YAML

Use the apply command to create a workflow from the given YAML file.

dataos-ctl apply -f <file-path>
dataos-ctl apply -f /home/tmdc/Desktop/city_flare

Output

INFO[0000] πŸ›  apply...                                   
INFO[0000] πŸ”§ applying(public) cnt-city-demo-001:v1beta1:workflow... 
INFO[0002] πŸ”§ applying(public) cnt-city-demo-001:v1beta1:workflow...created 
INFO[0002] πŸ›  apply...complete

Create Your Workspace (Optional)

This is an optional step. By default, you can always run your Flare workflow

s in public workspace, but if you wanna create a new workspace for some specific workflows, execute the below command.

dataos-ctl workspace create -n <name of your workspace>

Monitoring Workflow

Get Status of the Workflow

Created by you

Use the get command for the workflow information on CLI. This command will list the workflows created by you. You can check this information for all the users by adding -a flag to the command.

dataos-ctl -t workflow -w public get

Output

INFO[0000] πŸ” get...                                     
INFO[0001] πŸ” get...complete                             

        NAME        | VERSION |   TYPE   | WORKSPACE | STATUS | RUNTIME |   OWNER     
--------------------|---------|----------|-----------|--------|---------|-------------
  cnt-city-demo-001 | v1      | workflow | public    | active | running |   tmdc

Created by everyone

dataos-ctl -t workflow -w public get -a

Output

INFO[0000] πŸ” get...                                     
INFO[0001] πŸ” get...complete                             

                 NAME                | VERSION |   TYPE   | WORKSPACE | STATUS |  RUNTIME  |       OWNER        
-------------------------------------|---------|----------|-----------|--------|-----------|--------------------
  checks-sports-data                 | v1      | workflow | public    | active | succeeded | user01        
  cnt-city-demo-001                  | v1      | workflow | public    | active | running   | tmdc         
  cnt-city-demo-001-01               | v1      | workflow | public    | active | succeeded | otheruser          
  cnt-city-demo-01001                | v1      | workflow | public    | active | succeeded | user03       

Get Runtime Information

Get the Runtime status of the workflow, using the below command

Command

dataos-ctl get runtime -w <workspace-name> -t workflow -n <name-of-workflow>

Example

dataos-ctl get runtime -w public -t workflow -n cnt-city-demo-001

Alternative method:

You can pass the information as a string from the output of the get command as highlighted in red in the below command

dataos-ctl -t workflow -w public get
# the output is shown below
        NAME        | VERSION |   TYPE   | WORKSPACE | STATUS | RUNTIME |   OWNER     
--------------------|---------|----------|-----------|--------|---------|-------------
  **cnt-city-demo-001 | v1      | workflow | public**    | active | running |   tmdc

Select from Name to workspace, for example cnt-city-demo-001 | v1 | workflow | public

dataos-ctl -i " cnt-city-demo-001 | v1      | workflow | public" get runtime
Output
INFO[0000] πŸ” workflow...                                
INFO[0001] πŸ” workflow...complete                        

        NAME        | VERSION |   TYPE   | WORKSPACE |    TITLE     |   OWNER     
--------------------|---------|----------|-----------|--------------|-------------
  cnt-city-demo-001 | v1      | workflow | public    | Connect City |   tmdc  

  JOB NAME |   STACK    |        JOB TITLE        | JOB DEPENDENCIES  
-----------|------------|-------------------------|-------------------
  city-001 | flare:5.0  | City Dimension Ingester |                   
  system   | dataos_cli | System Runnable Steps   |                   

  RUNTIME | PROGRESS |          STARTED          |         FINISHED           
----------|----------|---------------------------|----------------------------
  failed  | 6/6      | 2022-06-24T17:11:55+05:30 | 2022-06-24T17:13:23+05:30  

                NODE NAME              | JOB NAME |             POD NAME              |     TYPE     |       CONTAINERS        |   PHASE    
--------------------------------------|----------|-----------------------------------|--------------|-------------------------|------------
  city-001-bubble-failure-rnnbl       | city-001 | cnt-city-demo-001-c5dq-2803083439 | pod-workflow | wait,main               | failed     
  city-001-c5dq-0624114155-driver     | city-001 | city-001-c5dq-0624114155-driver   | pod-flare    | spark-kubernetes-driver | failed     
  city-001-execute                    | city-001 | cnt-city-demo-001-c5dq-3254930726 | pod-workflow | main                    | failed     
  city-001-failure-rnnbl              | city-001 | cnt-city-demo-001-c5dq-3875756933 | pod-workflow | wait,main               | succeeded  
  city-001-start-rnnbl                | city-001 | cnt-city-demo-001-c5dq-843482008  | pod-workflow | wait,main               | succeeded  
  cnt-city-demo-001-run-failure-rnnbl | system   | cnt-city-demo-001-c5dq-620000540  | pod-workflow | wait,main               | succeeded  
  cnt-city-demo-001-start-rnnbl       | system   | cnt-city-demo-001-c5dq-169925113  | pod-workflow | wait,main               | succeeded

Get runtime refresh

You can see the updates for the workflow progress.

dataos-ctl -i " cnt-city-demo-001 | v1     | workflow | public" get runtime -r
Output
INFO[0000] πŸ” workflow...                                
INFO[0001] πŸ” workflow...complete                        

        NAME        | VERSION |   TYPE   | WORKSPACE |    TITLE     |   OWNER     
--------------------|---------|----------|-----------|--------------|-------------
  cnt-city-demo-001 | v1beta1 | workflow | public    | Connect City | mebinmoncy  

  JOB NAME |   STACK    |        JOB TITLE        | JOB DEPENDENCIES  
-----------|------------|-------------------------|-------------------
  city-001 | flare:5.0  | City Dimension Ingester |                   
  system   | dataos_cli | System Runnable Steps   |                   

  RUNTIME | PROGRESS |          STARTED          |         FINISHED           
----------|----------|---------------------------|----------------------------
  failed  | 6/6      | 2022-06-24T17:11:55+05:30 | 2022-06-24T17:13:23+05:30  

                NODE NAME              | JOB NAME |             POD NAME              |     TYPE     |       CONTAINERS        |   PHASE    
--------------------------------------|----------|-----------------------------------|--------------|-------------------------|------------
  city-001-bubble-failure-rnnbl       | city-001 | cnt-city-demo-001-c5dq-2803083439 | pod-workflow | wait,main               | failed     
  city-001-c5dq-0624114155-driver     | city-001 | city-001-c5dq-0624114155-driver   | pod-flare    | spark-kubernetes-driver | failed     
  city-001-execute                    | city-001 | cnt-city-demo-001-c5dq-3254930726 | pod-workflow | main                    | failed     
  city-001-failure-rnnbl              | city-001 | cnt-city-demo-001-c5dq-3875756933 | pod-workflow | wait,main               | succeeded  
  city-001-start-rnnbl                | city-001 | cnt-city-demo-001-c5dq-843482008  | pod-workflow | wait,main               | succeeded  
  cnt-city-demo-001-run-failure-rnnbl | system   | cnt-city-demo-001-c5dq-620000540  | pod-workflow | wait,main               | succeeded  
  cnt-city-demo-001-start-rnnbl       | system   | cnt-city-demo-001-c5dq-169925113  | pod-workflow | wait,main               | succeeded

Press Ctrl + C to Exit.

Troubleshoot Errors

Check Logs for Errors

Run the same workflow again with the same specifications

Check the logs using the following command. You can run the runtime command to get the names of nodes that failed

dataos-ctl -i "<copy the name-to-workspace in the output table from get status command" --node <failed-node-name-from-get-runtime-command> log

Example

dataos-ctl -i " cnt-city-demo-001 | v1 | workflow | public" --node city-001-c5dq-0624114155-driver log
Output
INFO[0000] πŸ“ƒ log(public)...                             
INFO[0001] πŸ“ƒ log(public)...complete                     

              NODE NAME            |     CONTAINER NAME      | ERROR  
----------------------------------|-------------------------|--------
  city-001-c5dq-0624114155-driver | spark-kubernetes-driver |        

-------------------LOGS-------------------
++ id -u
+ myuid=0
++ id -g
+ mygid=0
+ set +e
++ getent passwd 0
+ uidentry=root:x:0:0:root:/root:/bin/bash
+ set -e
+ '[' -z root:x:0:0:root:/root:/bin/bash ']'
+ SPARK_CLASSPATH=':/opt/spark/jars/*'
+ env
+ grep SPARK_JAVA_OPT_
+ sort -t_ -k4 -n
+ sed 's/[^=]*=\(.*\)/\1/g'
+ readarray -t SPARK_EXECUTOR_JAVA_OPTS
+ '[' -n '' ']'
+ '[' -z ']'
+ '[' -z ']'
+ '[' -n '' ']'
+ '[' -z ']'
+ '[' -z x ']'
+ SPARK_CLASSPATH='/opt/spark/conf::/opt/spark/jars/*'
+ case "$1" in
+ shift 1
+ CMD=("$SPARK_HOME/bin/spark-submit" --conf "spark.driver.bindAddress=$SPARK_DRIVER_BIND_ADDRESS" --deploy-mode client "$@")
+ exec /usr/bin/tini -s -- /opt/spark/bin/spark-submit --conf spark.driver.bindAddress=10.212.6.129 --deploy-mode client --properties-file /opt/spark/conf/spark.properties --class io.dataos.flare.Flare local:///opt/spark/jars/flare.jar -c /etc/dataos/config/jobconfig.yaml
2022-06-24 11:42:37,146 WARN  [main] o.a.h.u.NativeCodeLoader: Unable to load native-hadoop library for your platform... using builtin-java classes where applicable
build version: 5.9.16-dev; workspace name: public; workflow name: cnt-city-demo-001; workflow run id: 761eea3b-693b-4863-a83d-9382aa078ad1; run as user: mebinmoncy; job name: city-001; job run id: 03b60c0e-ea75-4d08-84e1-cd0ff2138a4e; 
found configuration: Map(explain -> true, appName -> city-001, outputs -> List(Map(depot -> dataos://icebase:retailsample?acl=rw, name -> output01)), inputs -> List(Map(dataset -> dataos://thirdparty01:none/city, format -> csv, name -> city_connect, schemaPath -> dataos://thirdparty01:none/schemas/avsc/city.avsc)), steps -> List(/etc/dataos/config/step-0.yaml), logLevel -> INFO)
22/06/24 11:42:41 INFO Flare$: context is io.dataos.flare.contexts.ProcessingContext@49f40c00
22/06/24 11:42:41 ERROR Flare$: =>Flare: Job finished with error build version: 5.9.16-dev; workspace name: public; workflow name: cnt-city-demo-001; workflow run id: 761eea3b-693b-4863-a83d-9382aa078ad1; run as user: mebinmoncy; job name: city-001; job run id: 03b60c0e-ea75-4d08-84e1-cd0ff2138a4e; 
io.dataos.flare.exceptions.FlareInvalidConfigException: Could not alter output datasets for workspace: public, job: city-001. There is an existing job with same workspace: public and name: city-001 writing into below datasets
  1. dataos://aswathama:retail/city
  You should use a different job name for your job as you cannot change output datasets for any job.
        at io.dataos.flare.configurations.mapper.StepConfigMapper$.$anonfun$validateSinkWithPreviousJob$3(StepConfigMapper.scala:180)
        at io.dataos.flare.configurations.mapper.StepConfigMapper$.$anonfun$validateSinkWithPreviousJob$3$adapted(StepConfigMapper.scala:178)
        at scala.collection.immutable.List.foreach(List.scala:431)
        at scala.collection.generic.TraversableForwarder.foreach(TraversableForwarder.scala:38)
        at scala.collection.generic.TraversableForwarder.foreach$(TraversableForwarder.scala:38)
        at scala.collection.mutable.ListBuffer.foreach(ListBuffer.scala:47)
        at io.dataos.flare.configurations.mapper.StepConfigMapper$.validateSinkWithPreviousJob(StepConfigMapper.scala:178)
        at io.dataos.flare.configurations.mapper.StepConfigMapper$.validate(StepConfigMapper.scala:38)
        at io.dataos.flare.contexts.ProcessingContext.setup(ProcessingContext.scala:37)
        at io.dataos.flare.Flare$.main(Flare.scala:61)
        at io.dataos.flare.Flare.main(Flare.scala)
        at sun.reflect.NativeMethodAccessorImpl.invoke0(Native Method)
        at sun.reflect.NativeMethodAccessorImpl.invoke(NativeMethodAccessorImpl.java:62)
        at sun.reflect.DelegatingMethodAccessorImpl.invoke(DelegatingMethodAccessorImpl.java:43)
        at java.lang.reflect.Method.invoke(Method.java:498)
        at org.apache.spark.deploy.JavaMainApplication.start(SparkApplication.scala:52)
        at org.apache.spark.deploy.SparkSubmit.org$apache$spark$deploy$SparkSubmit$$runMain(SparkSubmit.scala:958)
        at org.apache.spark.deploy.SparkSubmit.doRunMain$1(SparkSubmit.scala:183)
        at org.apache.spark.deploy.SparkSubmit.submit(SparkSubmit.scala:206)
        at org.apache.spark.deploy.SparkSubmit.doSubmit(SparkSubmit.scala:90)
        at org.apache.spark.deploy.SparkSubmit$$anon$2.doSubmit(SparkSubmit.scala:1046)
        at org.apache.spark.deploy.SparkSubmit$.main(SparkSubmit.scala:1055)
        at org.apache.spark.deploy.SparkSubmit.main(SparkSubmit.scala)

Exception in thread "main" io.dataos.flare.exceptions.FlareInvalidConfigException: Could not alter output datasets for workspace: public, job: city-001. There is an existing job with same workspace: public and name: city-001 writing into below datasets
  1. dataos://aswathama:retail/city
  You should use a different job name for your job as you cannot change output datasets for any job.

22/06/24 11:42:42 INFO Flare$: Gracefully stopping Spark Application
22/06/24 11:42:42 **ERROR** ProcessingContext: =>Flare: Job finished with error=Could not alter output datasets for workspace: public, job: city-001. **There is an existing job with same workspace**: public and name: city-001 writing into below datasets
  1. dataos://aswathama:retail/city
  **You should use a different job name for your job as you cannot change output datasets for any job.**
Exception in thread "shutdownHook1" io.dataos.flare.exceptions.FlareException: Could not alter output datasets for workspace: public, job: city-001. There is an existing job with same workspace: public and name: city-001 writing into below datasets
  1. dataos://aswathama:retail/city
  You should use a different job name for your job as you cannot change output datasets for any job.
        at io.dataos.flare.contexts.ProcessingContext.error(ProcessingContext.scala:87)
        at io.dataos.flare.Flare$.$anonfun$addShutdownHook$1(Flare.scala:84)
        at scala.sys.ShutdownHookThread$$anon$1.run(ShutdownHookThread.scala:37)
2022-06-24 11:42:42,456 INFO  [shutdown-hook-0] o.a.s.u.ShutdownHookManager: Shutdown hook called
2022-06-24 11:42:42,457 INFO  [shutdown-hook-0] o.a.s.u.ShutdownHookManager: Deleting directory /tmp/spark-bb4892c9-0236-4569-97c7-0b610e82ff52

You will notice the error β€œThere is an existing job with the same workspace. You should use a different job name for your job as you cannot change output datasets for any job.”

Fix the Errors

Modify the YAML by changing the name of the workflow. For this example, it is renamed as cnt-city-demo-999 from cnt-city-demo-001

Delete the Workflows

Now before you rerun the workflow, you need to delete the previous version of this workflow from the environment. You can delete the workflow in two ways as shown below.

Method 1: Select the name to workspace from get command output and copy it as a string as shown below

Command

dataos-ctl -i "<name-to-workspace in the output table from get status command>" delete

Example

dataos-ctl -i " cnt-city-demo-001 | v1 | workflow | public" delete
# this is the output
INFO[0000] πŸ—‘ delete...                                  
INFO[0001] πŸ—‘ deleting(public) cnt-city-demo-001:v1beta1:workflow... 
INFO[0003] πŸ—‘ deleting(public) cnt-city-demo-001:v1beta1:workflow...deleted 
INFO[0003] πŸ—‘ delete...complete

Method 2: Select the path of the YAML file and use the delete Command

Command

dataos-ctl delete -f <file-path>

Example

dataos-ctl delete -f /home/desktop/flare/connect-city/config_v2beta1.yaml 
# this is the output
INFO[0000] πŸ—‘ delete...                                  
INFO[0000] πŸ—‘ deleting(public) cnt-city-demo-010:v1beta1:workflow... 
INFO[0001] πŸ—‘ deleting(public) cnt-city-demo-010:v1beta1:workflow...deleted 
INFO[0001] πŸ—‘ delete...complete

Method 3:

Command

dataos-ctl -w <workspace> -t workflow -n <workflow-name> delete

Example

dataos-ctl -w public -t workflow -n cnt-city-demo-001 delete
# this is the output
INFO[0000] πŸ—‘ delete...                                  
INFO[0000] πŸ—‘ deleting(public) cnt-city-demo-010:v1beta1:workflow... 
INFO[0001] πŸ—‘ deleting(public) cnt-city-demo-010:v1beta1:workflow...deleted 
INFO[0001] πŸ—‘ delete...complete

Rerun the Workflow

Run the workflow again using apply command. Check the Runtime for its success. Scroll to the right to see the status as shown in the previous steps.

Command

dataos-ctl -i "copy the name-to-workspace in the output table from get status command" get runtime -r

Example

dataos-ctl -i " cnt-city-demo-999 | v1 | workflow | public" get runtime -r
Output
INFO[0000] πŸ” workflow...                                
INFO[0002] πŸ” workflow...complete                        

        NAME        | VERSION |   TYPE   | WORKSPACE |    TITLE     |   OWNER     
--------------------|---------|----------|-----------|--------------|-------------
  cnt-city-demo-999 | v1beta1 | workflow | public    | Connect City | mebinmoncy  

  JOB NAME |   STACK    |        JOB TITLE        | JOB DEPENDENCIES  
-----------|------------|-------------------------|-------------------
  city-999 | flare:5.0  | City Dimension Ingester |                   
  system   | dataos_cli | System Runnable Steps   |                   

    RUNTIME  | PROGRESS |          STARTED          |         FINISHED           
------------|----------|---------------------------|----------------------------
  succeeded | 5/5      | 2022-06-24T17:29:37+05:30 | 2022-06-24T17:31:50+05:30  

                NODE NAME              | JOB NAME |             POD NAME              |     TYPE     |       CONTAINERS        |   PHASE    
--------------------------------------|----------|-----------------------------------|--------------|-------------------------|------------
  city-999-execute                    | city-999 | cnt-city-demo-999-lork-1125088085 | pod-workflow | main                    | succeeded  
  city-999-lork-0624115937-driver     | city-999 | city-999-lork-0624115937-driver   | pod-flare    | spark-kubernetes-driver | completed  
  city-999-start-rnnbl                | city-999 | cnt-city-demo-999-lork-1790287599 | pod-workflow | wait,main               | succeeded  
  city-999-success-rnnbl              | city-999 | cnt-city-demo-999-lork-2939697963 | pod-workflow | wait,main               | succeeded  
  cnt-city-demo-999-run-success-rnnbl | system   | cnt-city-demo-999-lork-2544494600 | pod-workflow | wait,main               | succeeded  
  cnt-city-demo-999-start-rnnbl       | system   | cnt-city-demo-999-lork-2374735668 | pod-workflow | wait,main               | succeeded

Metadata Registration

Only for Depots with Hadoop Catalog

Run Data Toolbox Workflow

Data Toolbox plays the role of registering the metadata of ingested data within Icebase with the DataOS Metis. You need to run the following Data tool YAML for your workflow to record the metadata. Use the apply command to run the workflow and check its runtime status. The stack here is toolbox

Sample YAML

version: v1
name: dataos-tool-city-test
type: workflow
workflow:
  dag:
      - name: data-tool-job-001 # Job 2
        spec:
          stack: toolbox # Stack is Toolbox, so its a Toolbox Job
          compute: runnable-default
          stackSpec:
            dataset: dataos://icebase:retailsample/city?acl=rw
            action:
              name: set_version
              value: latest

Alternative Method

You can also use the set-metadata Icebase command for Metadata Registration and configuring the metadata version

dataos-ctl dataset -a dataos://icebase:retailsample/city set-metadata -v <latest|v2.gz.metadata.json>

To know more about the Icebase approach click the link.

Check Registered Dataset with Metis

Check the registered dataset on the Metis UI.

You have just run your first Flare Workflow and successfully ingested a dataset within the Icebase. We have also checked it on the Datanet. Once we are done with the ingestion and transformation, we can start querying the data using the Workbench and build analytics Dashboard.

But wait! The work doesn’t end here

Delete the Workflow

It’s always good to clean your desk, after getting the work done. You should delete the workflow from the environment after your job is successfully run. The workflow, otherwise, will keep floating in the environment for three days.

First, list the workflows.

dataos-ctl -t workflow -w public get

Output

INFO[0000] πŸ” get...                                     
INFO[0001] πŸ” get...complete                             

          NAME          | VERSION |   TYPE   | WORKSPACE | STATUS |  RUNTIME  |  OWNER     
------------------------|---------|----------|-----------|--------|-----------|-----------
  cnt-city-demo-999     | v1      | workflow | public    | active | succeeded |  tmdc  
  dataos-tool-city-test | v1      | workflow | public    | active | succeeded |  tmdc

And then delete using the below command

dataos-ctl -i "cnt-city-demo-999     | v1 | workflow | public " delete

Output

INFO[0000] πŸ—‘ delete...                                  
INFO[0001] πŸ—‘ deleting(public) cnt-city-demo-999:v1beta1:workflow... 
INFO[0003] πŸ—‘ deleting(public) cnt-city-demo-999:v1beta1:workflow...deleted 
INFO[0003] πŸ—‘ delete...complete