Grant
A Grant Resource links the Subject-Predicate-Object relationship, generating an access policy. Through grants, administrators assign use cases to subjects either as users or roles, granting them access to specific parts of the system or data. This level of detail in access control enables administrators to regulate user interactions effectively. Grants facilitate the assignment of use cases to multiple roles and users, providing flexibility in access management. Grants can be implemented via CLI or through the Bifrost Interface. To learn about how to create grant through Bifrost click here.
How to create and manage a Grant Resource?
Create a Grant manifest file
Data Developers can create a Grant Resource by applying the manifest file of a Grant from the DataOS CLI. An example of a grant manifest is as follows:
Example Grant manifest
name: test-user-runas-test-dev1
version: v1alpha
type: grant
layer: user
tags:
  - governance
  - grant
grant:
  policy_use_case_id: run-as-user
  subjects:
    - users:id:test-user
  values:
    run-as-dataos-resource:
      - path: ${valid-path}
  requester: iamgroot
  notes: the user test-user needs to run as the test-developer for data dev purposes
  approve: false
The above YAML artifact defines a grant named "test-user-runas-test-dev1" for allowing the user "test-user" to run as a "test-developer" for data development purposes.
The manifest for creating a Grant has the following two sections:
Resource meta section
In DataOS, a Grant is categorized as a Resource-type. The Resource meta section within the manifest file encompasses attributes universally applicable to all Resource-types. The provided manifest file elucidates the requisite attributes for this section:
For more information about the various attributes in Resource meta section, refer to the Attributes of Resource meta section.
Grant-specific section
The Grant-specific section of a Grant manifest comprises attributes-specific to the Grant Resource.
| Attribute | Data Type | Default Value | Possible Values | Requirement |
|---|---|---|---|---|
grant |
mapping | none | valid grant-specific attributes | mandatory |
policy_use_case_id |
string | none | Unique identifier for the policy use case | mandatory |
subjects |
list of strings | none | List of subject identifiers | optional |
values |
list of mapping | none | List of key-value pairs representing values | mandatory |
path |
string | none | valid path string indicating the resource location | optional |
approve |
boolean | false | true, false | optional |
requester |
string | none | Unique identifier for the requester | optional |
notes |
string | none | Textual notes or comments | optional |
collection |
string | none | Unique identifier for the collection | optional |
manageAsUser |
string | none | UserID of the Use Case Assignee | optional |
To know more about the grant attributes click here
Before applying any manifest, it's considered a best practice to lint the manifest file to fix potential issues in manifest.
Apply the Grant manifest
After successfully creating the Grant manifest, it’s time to apply manifest. To apply the Grant manifest, utilize the apply command.
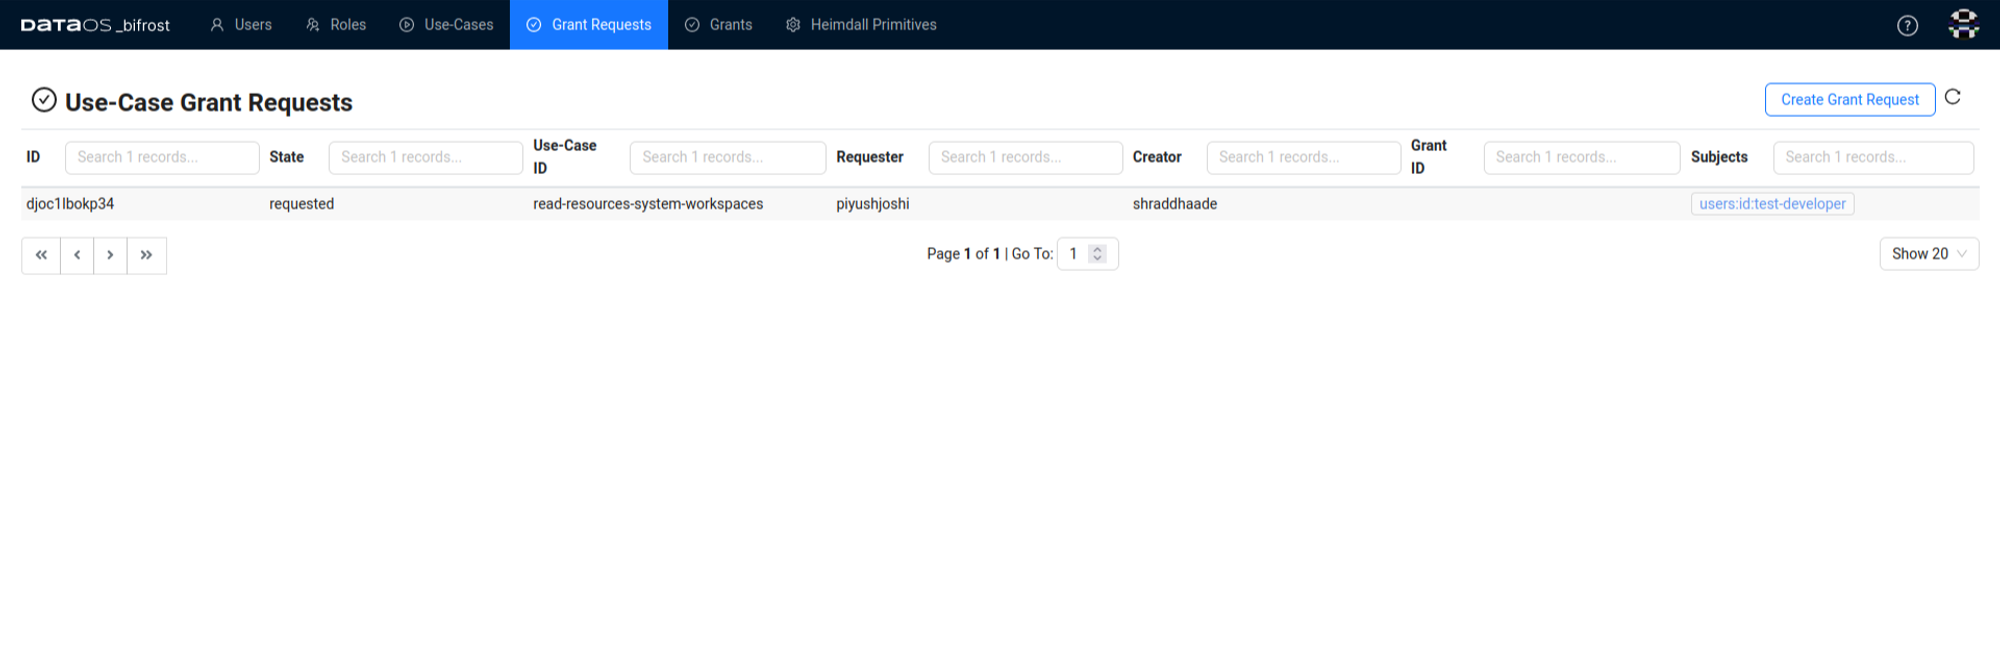
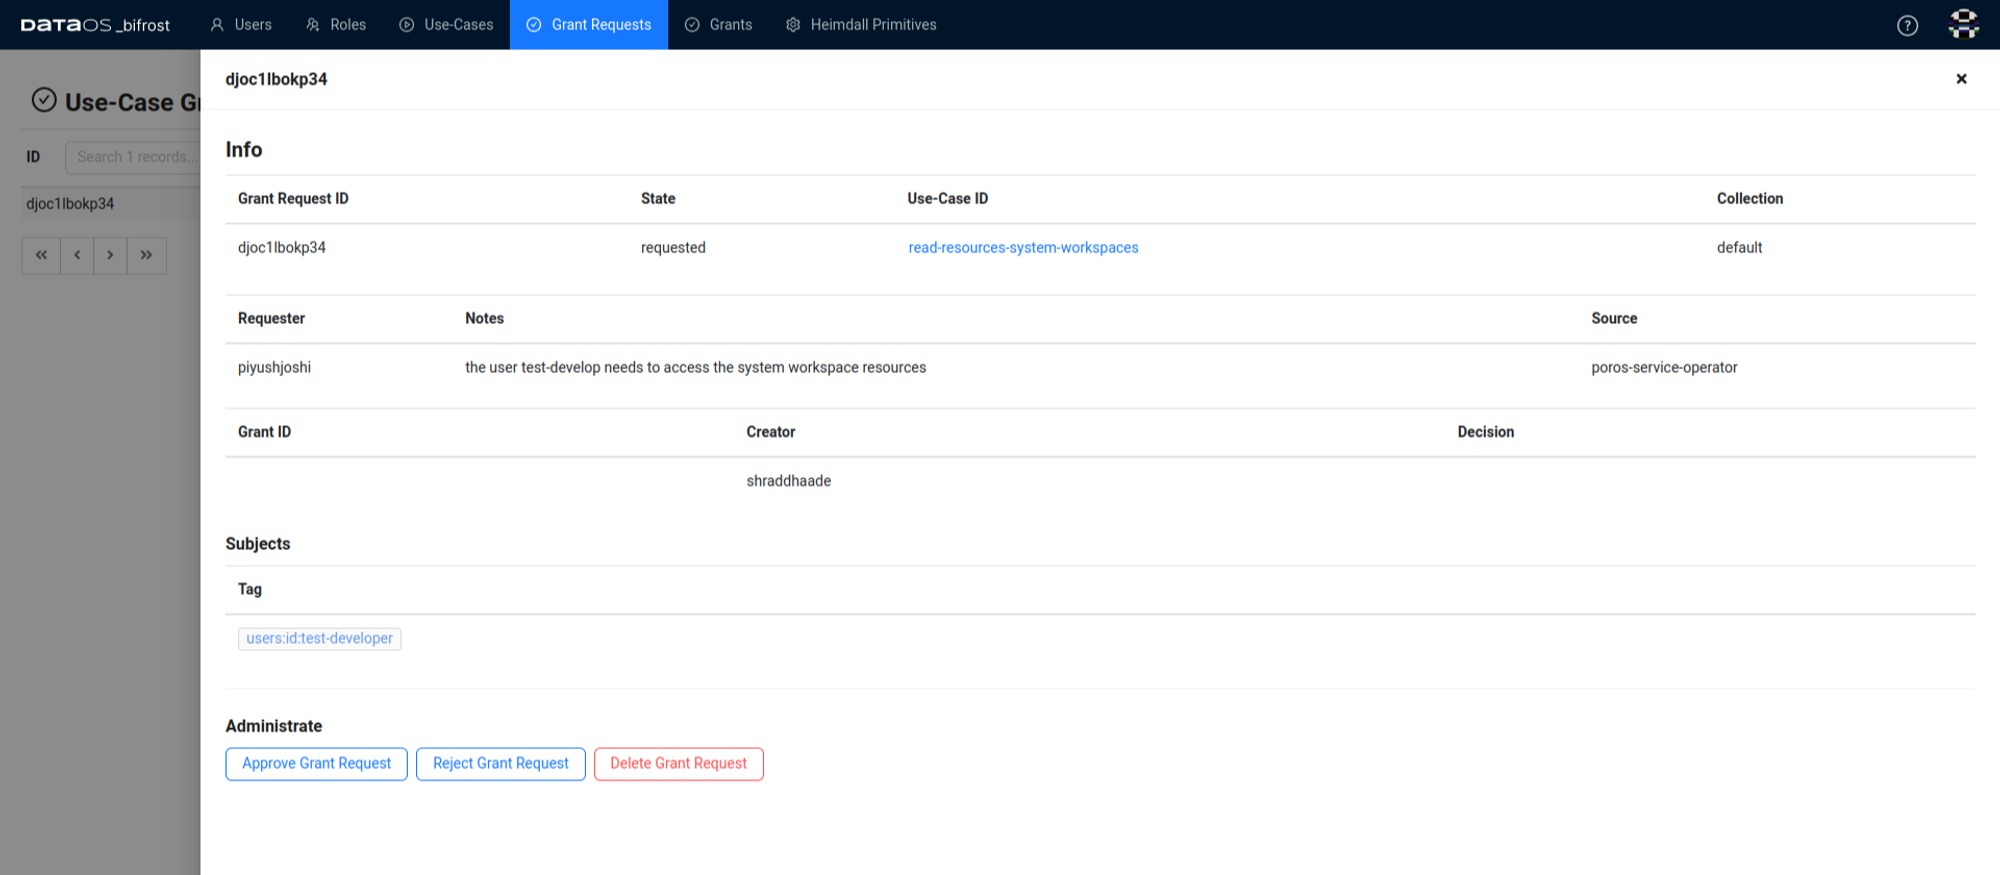
Upon applying the grant, administrators can track and manage grant requests through the Bifrost UI. The applied grant are reflected in the grant request tab, providing administrators with an interface to oversee, approve, reject, or delete grant requests as needed.
After applying for the Grant via the CLI, the status or log can be viewed in the Grant request section of the Bifrost UI as following.
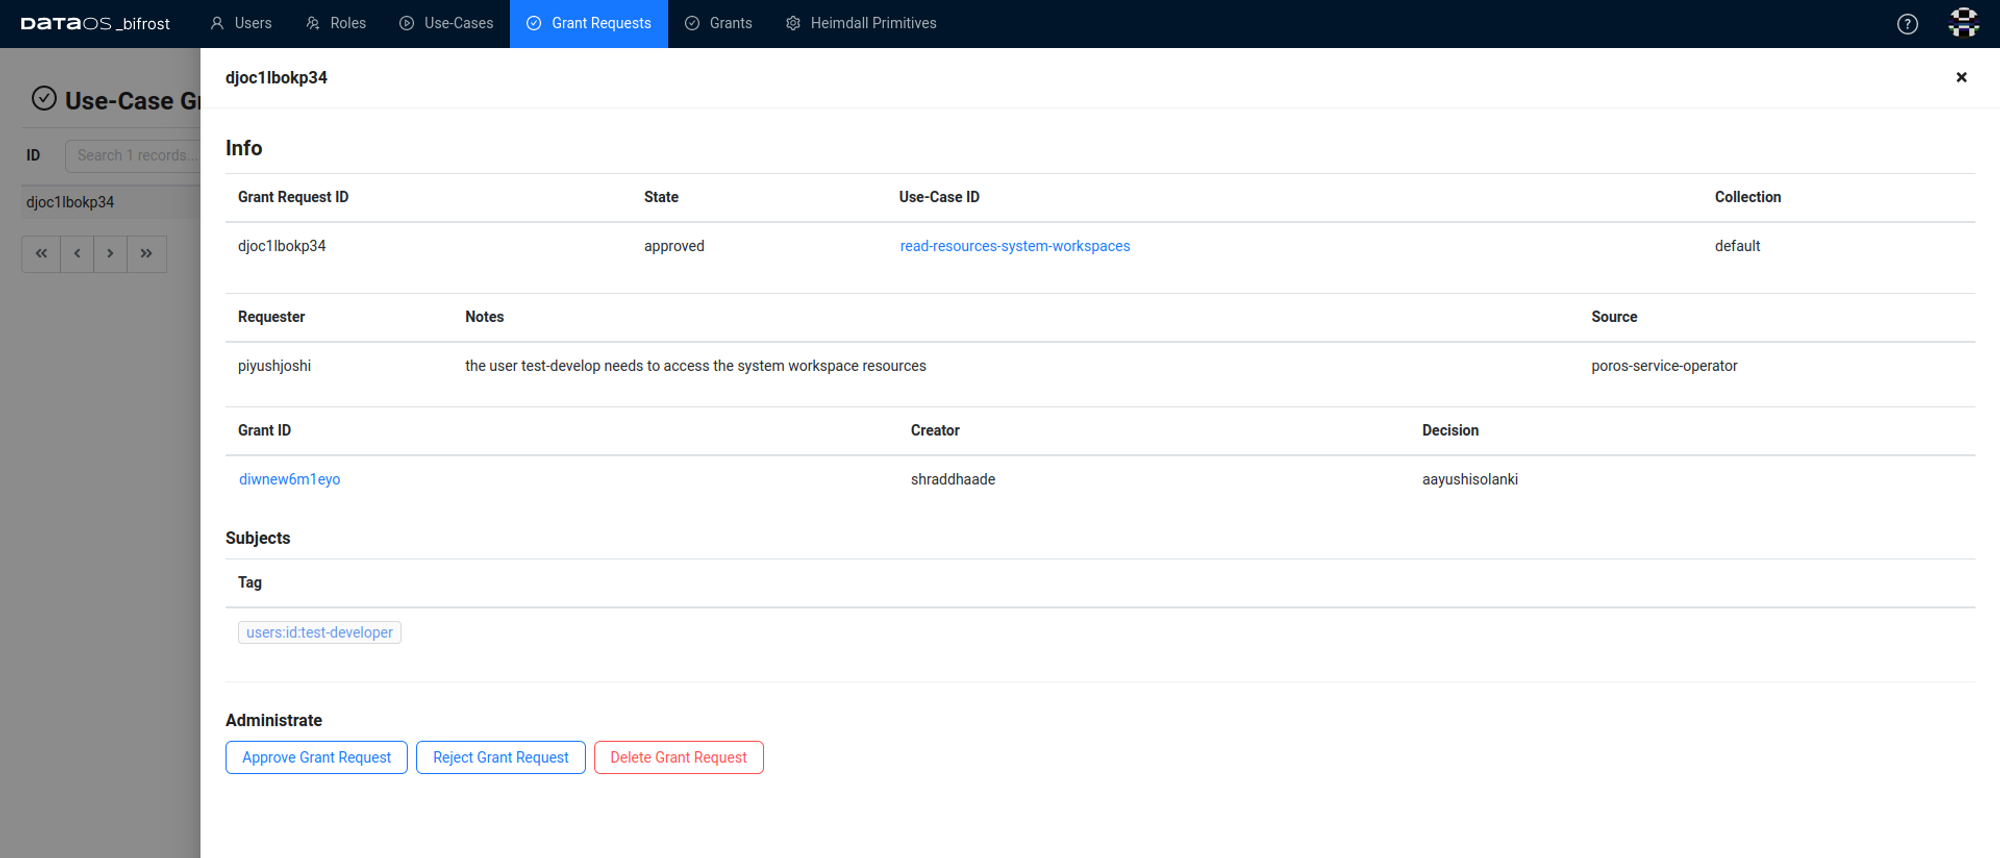
Once the grant request is submitted, the operator views the request and makes a decision. If another operator views the request and finds it appropriate, they can also grant the request.
The name of the operator who took the final decision will be recorded
Managing Grant
Verify Grant creation
To check the successful creation of Grant in DataOS Workspace use the following two methods:
- Check the Grant in a Workspace: Use the following command to list the grant
- Retrieve all Databases in a Workspace: To retrieve the list of all Grants created, add the
-aflag to the command:
Debugging a Grant
When a Grant creation encounter errors, data developers can employ various tactics to diagnose and resolve issues effectively using command:
Deleting a Grant
To delete Grant that are no longer in use the following methods: