End to end use-case to query the data on workbench
Create Database migration
CREATE TABLE IF NOT EXISTS customers(
  id serial PRIMARY KEY,
  first_name VARCHAR (50) NOT NULL,
  last_name VARCHAR (50) NOT NULL,
  email VARCHAR (300) UNIQUE NOT NULL);
INSERT INTO customers (first_name, last_name, email) VALUES
    ('John', 'Doe', 'john.doe@example.com'),
    ('Jane', 'Smith', 'jane.smith@example.com'),
    ('Alice', 'Johnson', 'alice.johnson@example.com');
Create the Database manifest
name: customersdb
version: v1
type: database
description: customersdb database created for testing.
tags:
  - database
database:
  migrate:
    includes:
      - migration/
    command: up
  compute: runnable-default
Create the Service manifest
Always update the PGRST_OPENAPI_SERVER_PROXY_URI with the latest dataos context.
  version: v1
  name: customers-test1
  type: service
  service:
    replicas: 1
    ingress:
      enabled: true
      stripPath: true
      path: /customersdb/api/v1    # naming of path what you want but formatting is neccessary.
      noAuthentication: true
    stack: beacon+rest
    compute: runnable-default
    envs:
      PGRST_OPENAPI_SERVER_PROXY_URI: https://emerging-hawk.dataos.app/customersdb/api/v1

    stackSpec:
      source:
        type: database
        name: customersdb
        workspace: public
    topology:
      - name: database
        type: input
        doc: customers database connection
      - name: rest-api
        type: output
        doc: serves up the customers database as a RESTful API
        dependencies:
          - database
Create a Depot on the hosted Database Service
Once you have the Database Service up and running, the next step involves creating a Depot on the Postgres Database associated with that Service. This necessitates the formulation of a Postgres Depot Manifest. Detailed configuration specifications are available on the PostgreSQL Depot config templates. In this specific context, certain attributes demand precise configuration, as outlined below:
In this specific context, certain attributes demand precise configuration, as outlined below:
- Database name: The name of your PostgreSQL database.
- Hostname/URL of the server: The hostname or URL of the PostgreSQL server.
- Parameters: Additional parameters for the connection, if required.
- Username: The username for authentication.
- Password: The password for authentication.
The resulting manifest file after configuration for this specific context will appear as follows:
version: v1
name: databasetestdepot
type: depot
layer: user
depot:
  type: JDBC                                # Depot type
  description: To write data to retaildb postgresql database
  external: false
  connectionSecret:                               # Data source specific configurations
    - acl: r
      type: key-value-properties
      data:
        username: "postgres"
        password: "049a1aa1a90e448fb0bd9dbc8babc226"
  spec:                                           # Data source specific configurations
    host: usr-db-dataos-ck-emergingh-dev.postgres.database.azure.com
    port: 5432
    database: customersdb
    subprotocol: postgresql
Apply Depot manifest
Once you have created a Depot manifest, simply copy the or relative path of the manifest file and apply it through the DataOS CLI, using the command given below:
Verify Depot Creation
bash
  NAME         | VERSION | TYPE  | WORKSPACE | STATUS | RUNTIME |     OWNER
----------------------|---------|-------|-----------|--------|---------|-----------------
  customersdb0curriculum  | v1      | depot |           | active |         | iamgroot
  customersdbdatabase | v1      | depot |           | active |         | iamgroot
  databasetestdepot   | v1      | depot |           | active |         | iamgroot
Target a cluster
Add Depot to Cluster Sources to enable the Minerva/Themis Query Engine to access database, you can create the Postgres Depot. This allows you to query the data using the DataOS Workbench.
Create a new Cluster manifest with specified depot address. Below is a sample Cluster manifest provided for reference.
name: databasetestcluster
version: v1
type: cluster
cluster:
  compute: runnable-default
  type: minerva
  minerva:
    replicas: 1
    resources:
      requests:
        cpu: 2000m
        memory: 2Gi
      limits:
        cpu: 2000m
        memory: 2Gi
    depots:
      - address: dataos://databasetestdepot:default
    debug:
      logLevel: DEBUG
      trinoLogLevel: DEBUG
Apply the Cluster manifest
Verify the creation
Expected Output
Use Bundle Resource
Alternatively, you can use Bundle Resource to execute all Resources in one manifest file only.
The sample Bundle manifest is given below:
# Resource meta section
name: databasetestbundle
version: v1beta
type: bundle
layer: user
tags:
  - database
  - service
description: this bundle resource is for testing database resource

# Bundle-specific section
bundle:

  # Bundle Resources section
  resources:
    - id: create-database # Resource ID (mandatory)
      workspace: public # Workspace (optional)
      # spec: # Resource spec (mandatory)
      #   ${{resource spec manifest}}
      file: ./database.yaml # Resource spec file (optional)
      # dependencies: # Resource dependency (optional)
      #   - ${{bundle-depot}}

    - id: create-service # Resource ID (mandatory)
      workspace: public # Workspace (optional)
      file: ./service.yaml # Resource spec file (optional)
      dependencyConditions: # Resource dependency conditions (optional)
        - resourceId: create-database # Resource ID (mandatory)
          status: # Status dependency condition (optional)
            is: # Status is (optional)
              - active


    - id: create-depot # Resource ID (mandatory)
      workspace: public # Workspace (optional)
      file: ./depot.yaml # Resource spec file (optional)
      dependencyConditions: # Resource dependency conditions (optional)
        - resourceId: create-service # Resource ID (mandatory)
          status: # Status dependency condition (optional)
            is: # Status is (optional)
              - active
          runtime: # Runtime dependency condition (optional)
            contains: # Runtime is (optional)
              - running

    - id: create-cluster # Resource ID (mandatory)
      workspace: public # Workspace (optional)
      file: ./database_cluster.yaml # Resource spec file (optional)
      dependencyConditions: # Resource dependency conditions (optional)
        - resourceId: create-depot # Resource ID (mandatory)
          status: # Status dependency condition (optional)
            is: # Status is (optional)
              - active
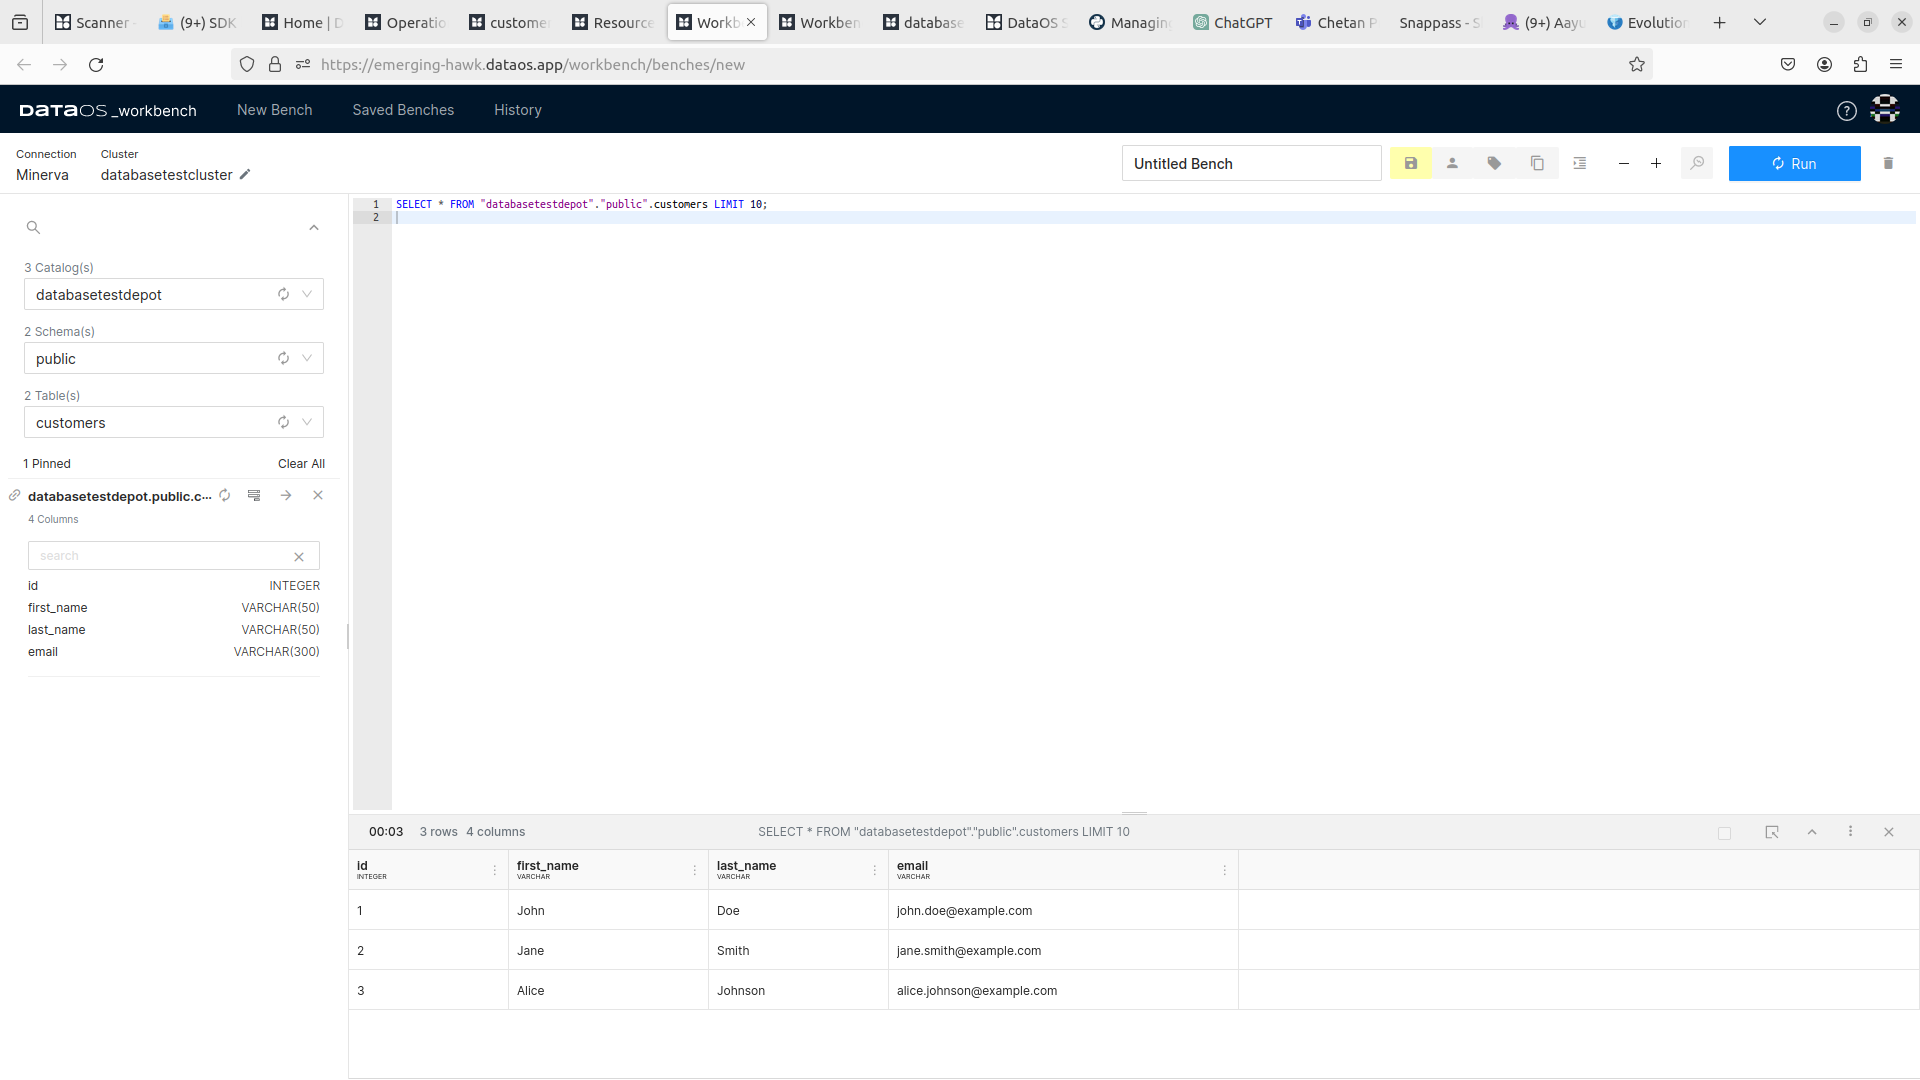
Query from Workbench
To verify the successful execution of the query, navigate to the Workbench, then select the cluster, depot collections and dataset associated with the created database customersdb.
- Catalog, Schema, and Table Selection: The user must select the appropriate catalog, schema, and tables within the Workbench interface which here is
databasetestdepot,publicandcustomersrespectively . - Query Execution: After formulating the query, the user executes it by clicking the 'Run' button.
- Result Retrieval: The outcomes of the executed query are displayed in the pane situated below the query input area.
For comprehensive details on the features and capabilities of Workbench, refer to the dedicated Workbench documentation.