Pre-defined Filtering with Segments
Information
This quick guide walks you through defining and applying segments in Lens that can be used during analysis. With segments, you can save time and make your complex filtering logic reusable.
Step 1: Understanding Segments in Lens
Segments are predefined groups of filters that are written in the Lens YAML configuration. They allow you to bundle common filtering logic into reusable code blocks that stakeholders can use across multiple queries. They can be used to define groups of filters used repetitively by the stakeholders.
When to Use Segments
- Complex Filtering Logic
Segments are perfect for situations where complex filtering logic is needed. For instance, if your SQL queries need to filter data in intricate ways, such as applying multiple conditions across columns, Segments can help streamline this process. Instead of applying multiple filter conditions for every query, you can define them once as a reusable Segment.
- Reusability
Segments come in handy when you notice certain filters frequently reused across different queries. If the filter values remain relatively constant—such as filtering for specific regions, dates, or product categories—you can define them as Segments to make your queries cleaner and more efficient.
Step 2: Defining Segments
Segments are defined at the table level within a Lens Table’s manifest file, which means they apply to a specific table’s schema. Use the sql parameter to specify filtering criteria, written as valid SQL that fits into a WHERE clause.
The following attributes will come under the segments section.
| Attribute | Description |
|---|---|
name |
The name of the segment. |
public |
Specifies visibility of the segment. |
sql |
SQL condition for the segment filter. |
meta |
Metadata for security and user groups. Define the list of user groups that the segment applies to under the secure sub-property, which controls access. For example, the default group includes all users by default. |
For example:
This segment filters for records where the state is Illinois or Ohio.
Incorporating OR and AND Conditions
You can include logical operators like OR and AND to create dynamic criteria for segments. This is useful when you need to apply filters to more than one column.
For example:
This Segment filters records where the region is "Midwest" or the sales are greater than 1000.
Using Filtering Keywords like LIKE
You can also use SQL keywords like LIKE in Segments to define more dynamic filters, such as filtering based on partial matches.
Example:
This filter matches records where the state is "Illinois" or where the state contains "Ohio" in any part of the field.
Best Practices
- Descriptive Names: Name your segments clearly so stakeholders know what they do.
- Keep It Simple: Avoid overloading segments with too many conditions. Instead, break them into smaller, more manageable pieces.
Step 3: Applying Segments
Once defined, segments can be applied across queries in the Lens Studio interface.
- Navigate to Lens Studio and open your Lens.
- Drag and drop dimensions and measures into your query based on the analysis requirements.
-
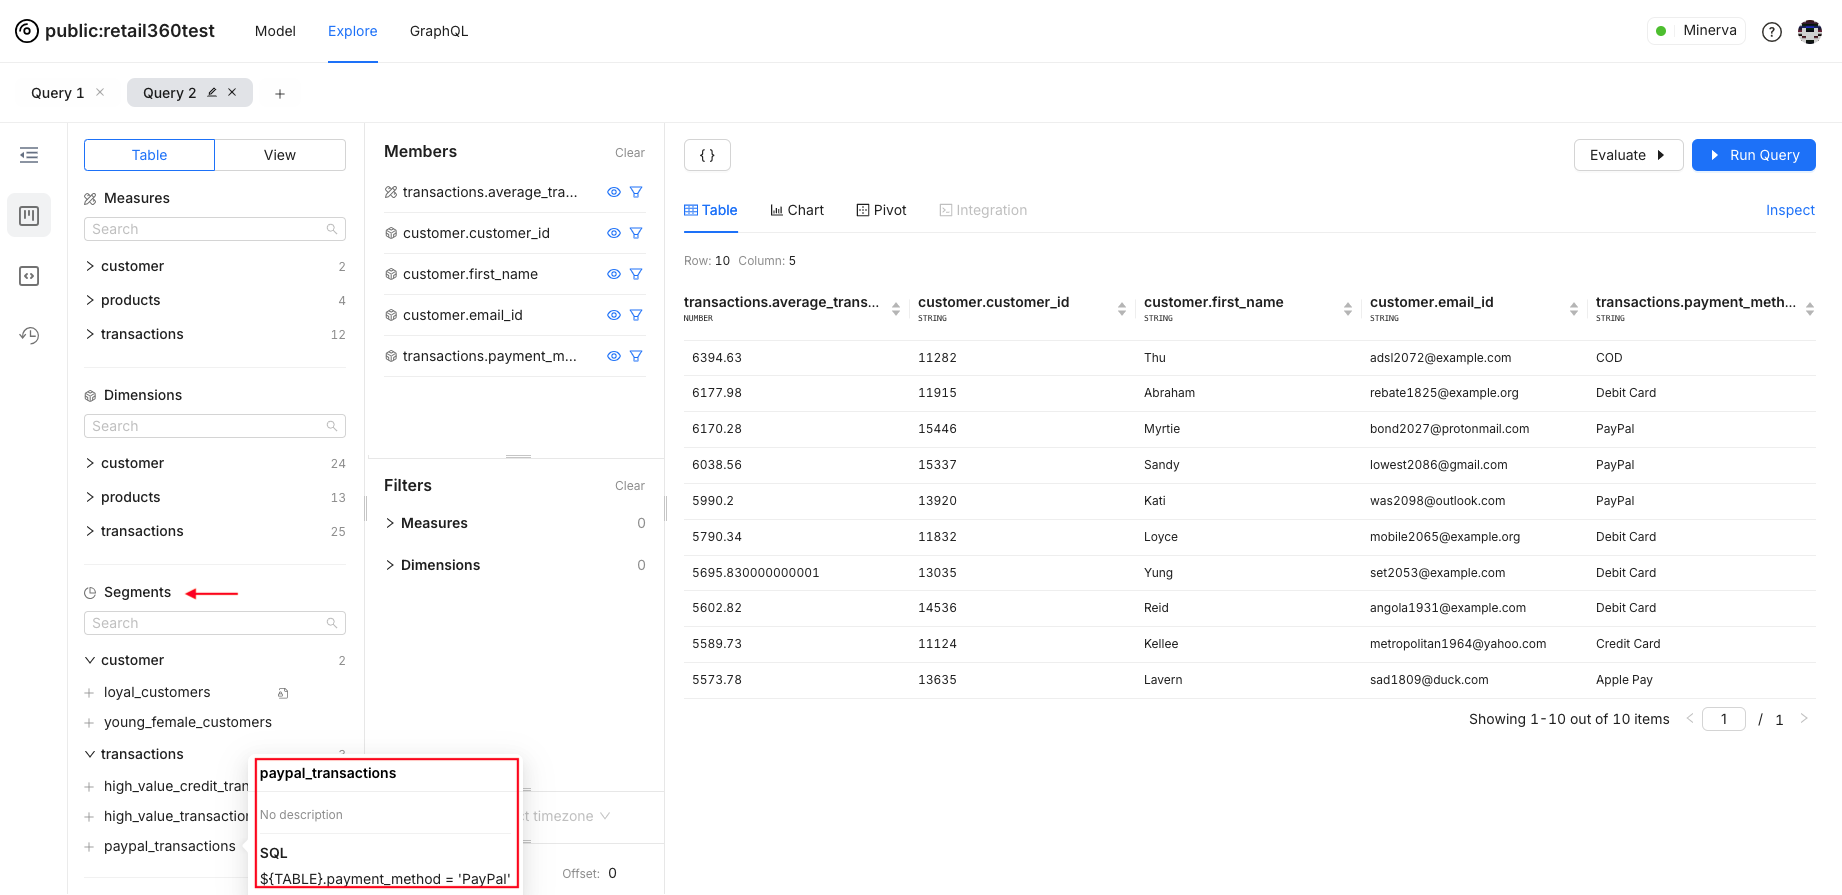
Under the Segment section, locate your segment.
You can view the details of the criterion on the Lens Studio interface.
-
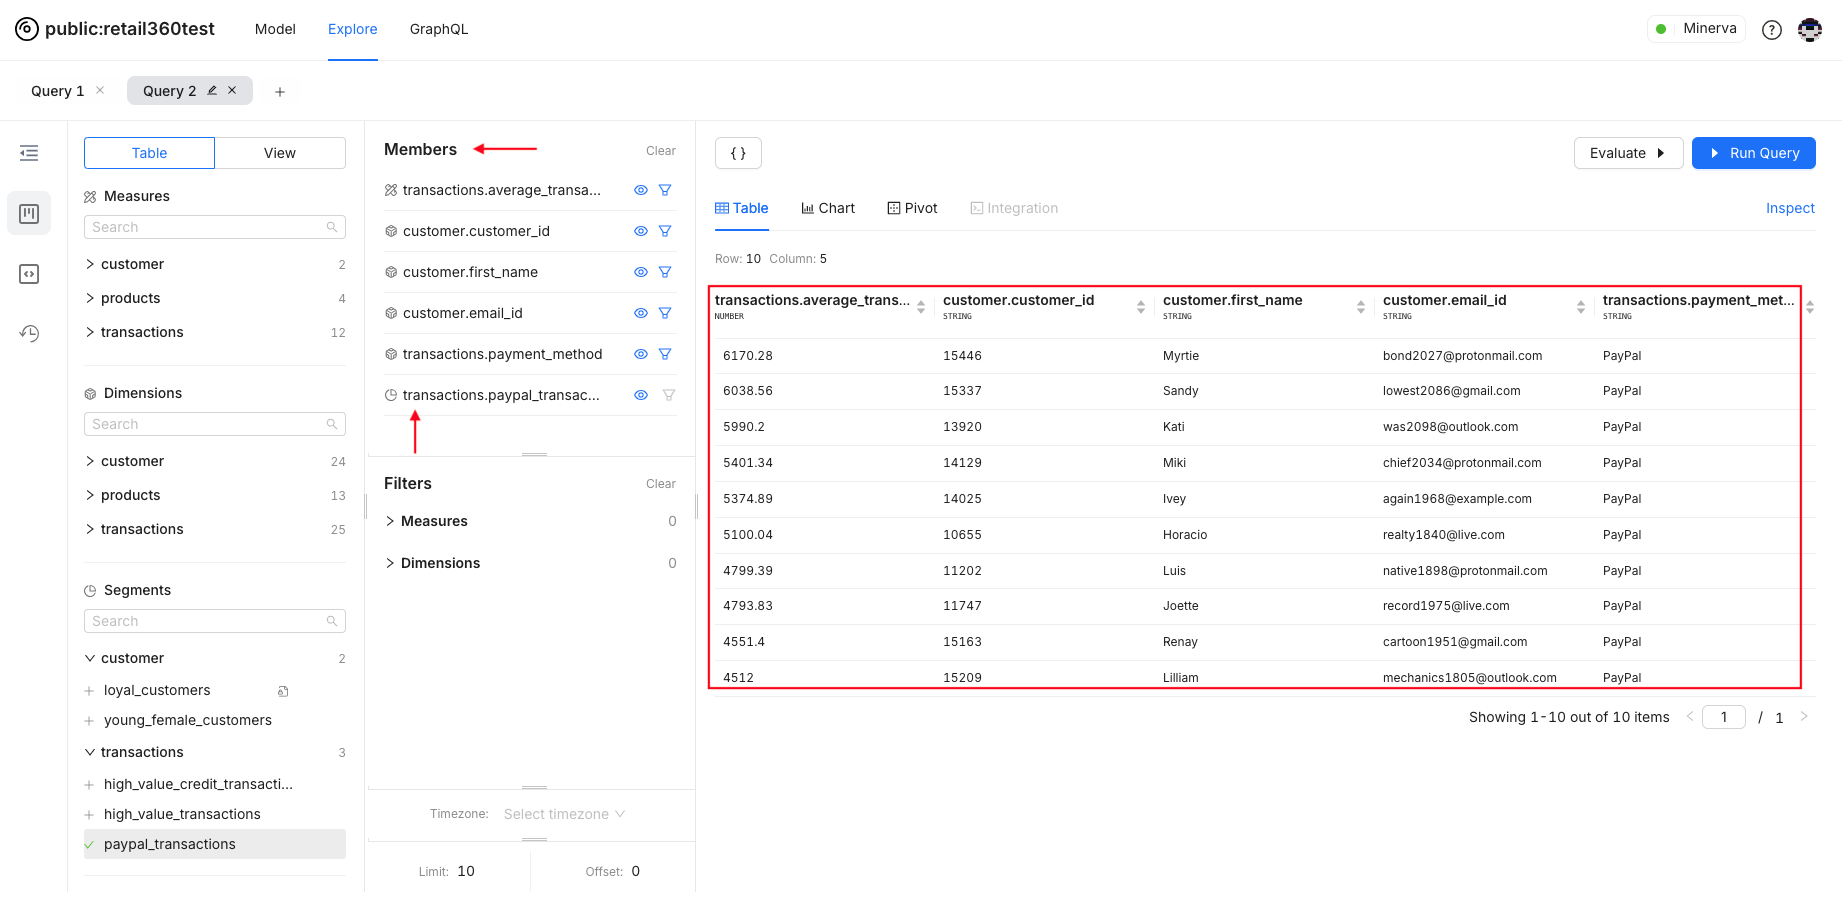
Drag and drop it into the members' list.
-
Run the query. The filter criteria defined in the segment will be applied and the query result will show only the relevant rows.
-
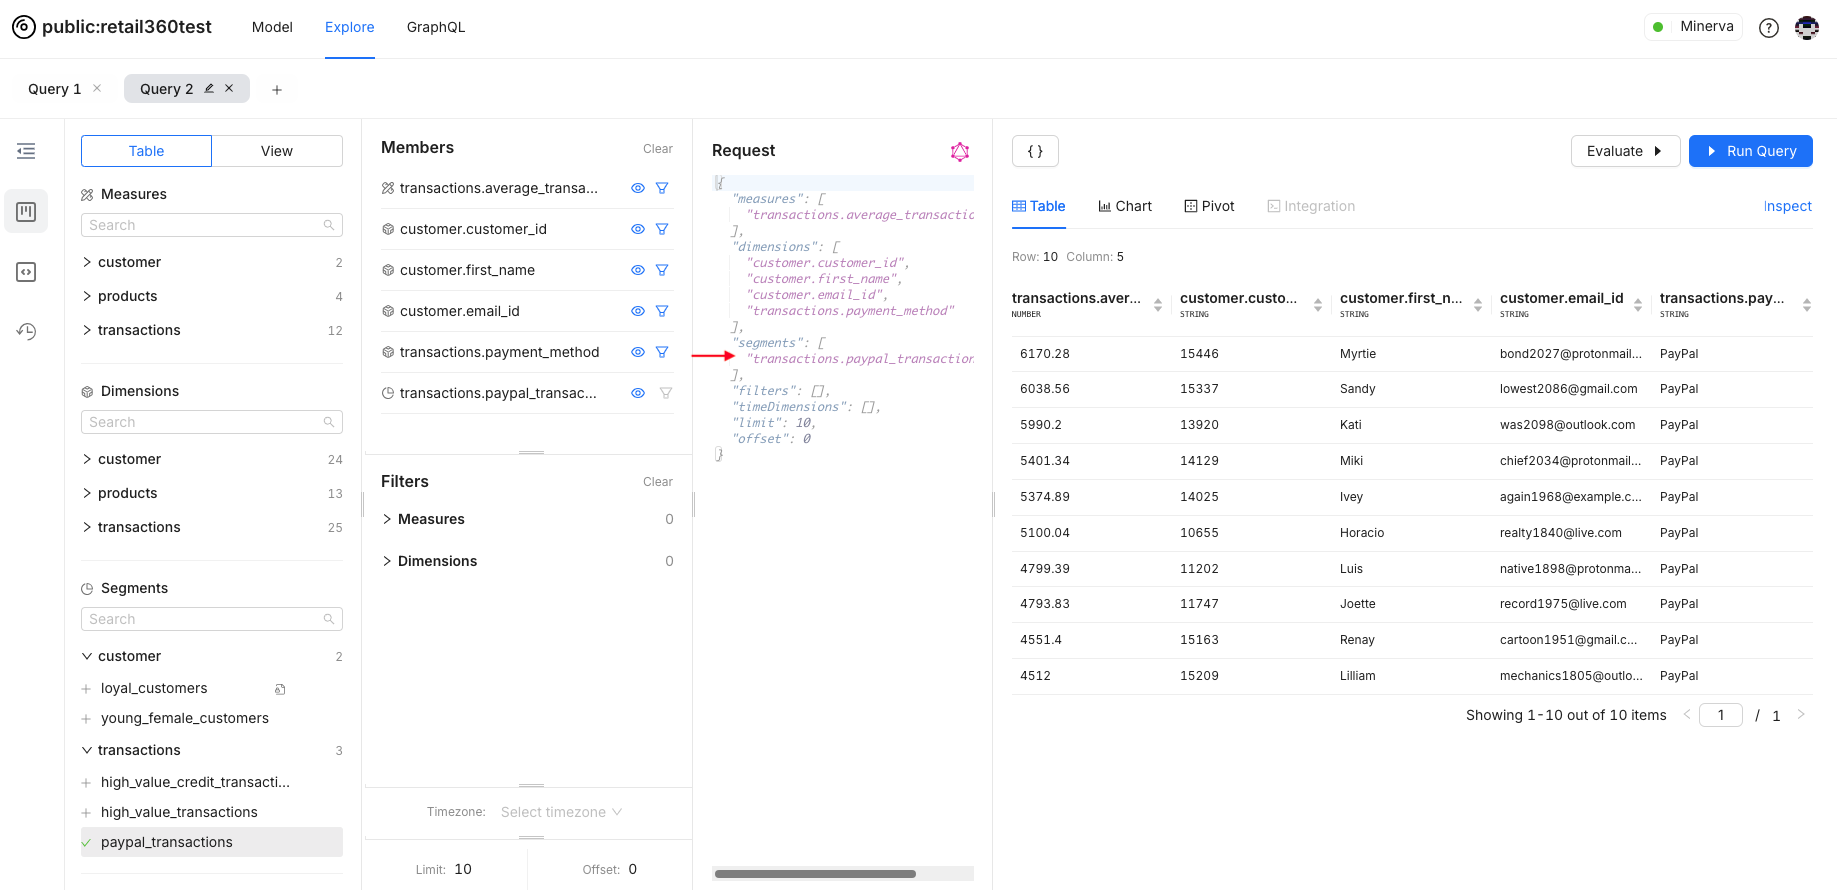
The query payload will look like the following.
Example Scenarios
Let’s walk through some practical use cases in the retail360 Lens using predefined segments. Suppose you want to analyze customer details that can be used for targeted promotions or analysis.
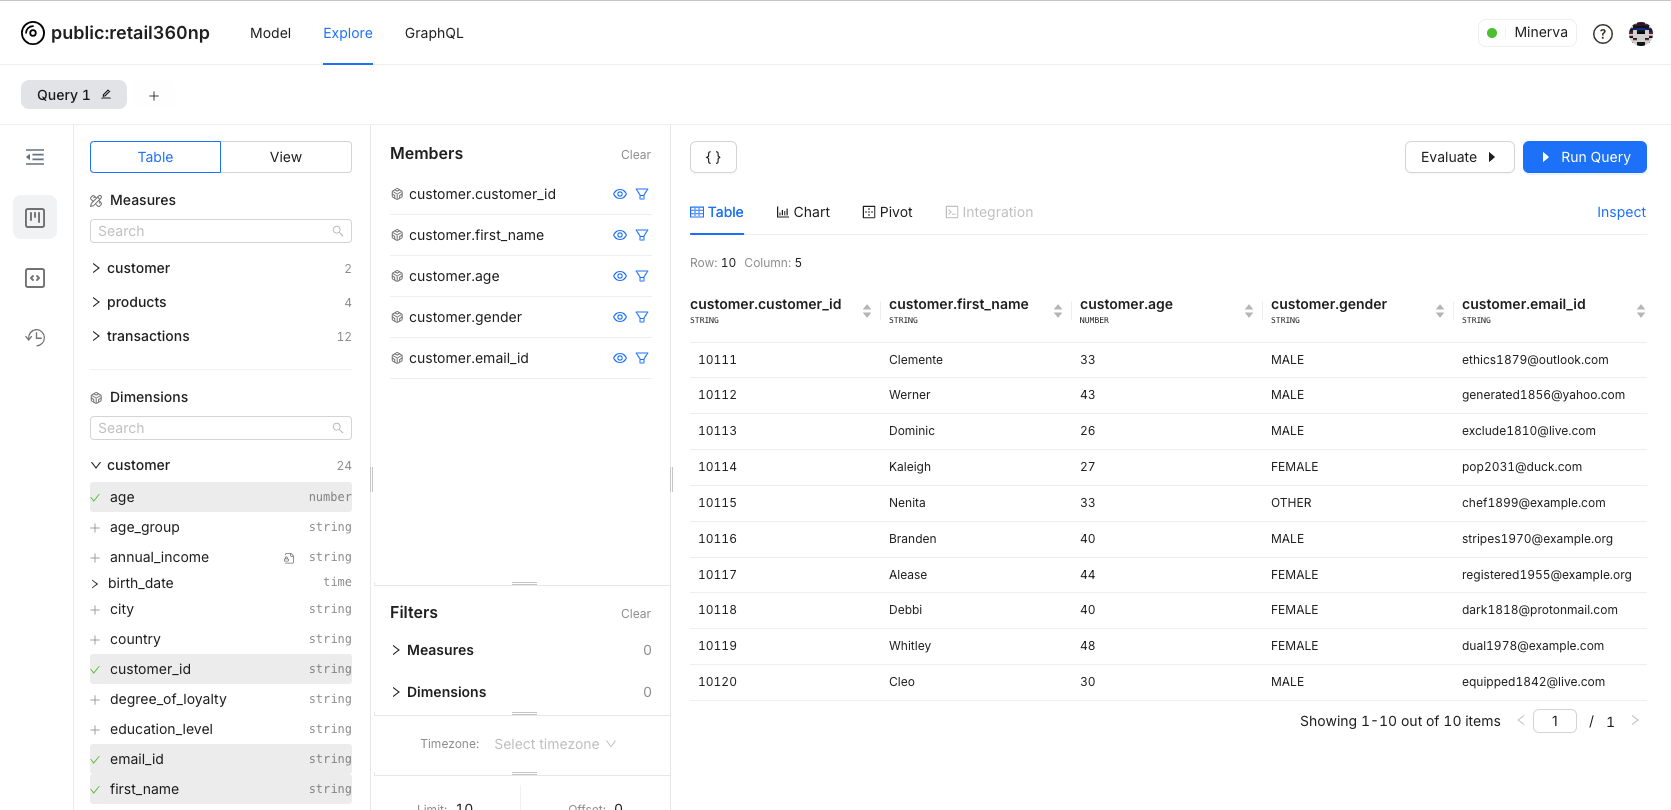
Segment 1: Young Women Customers
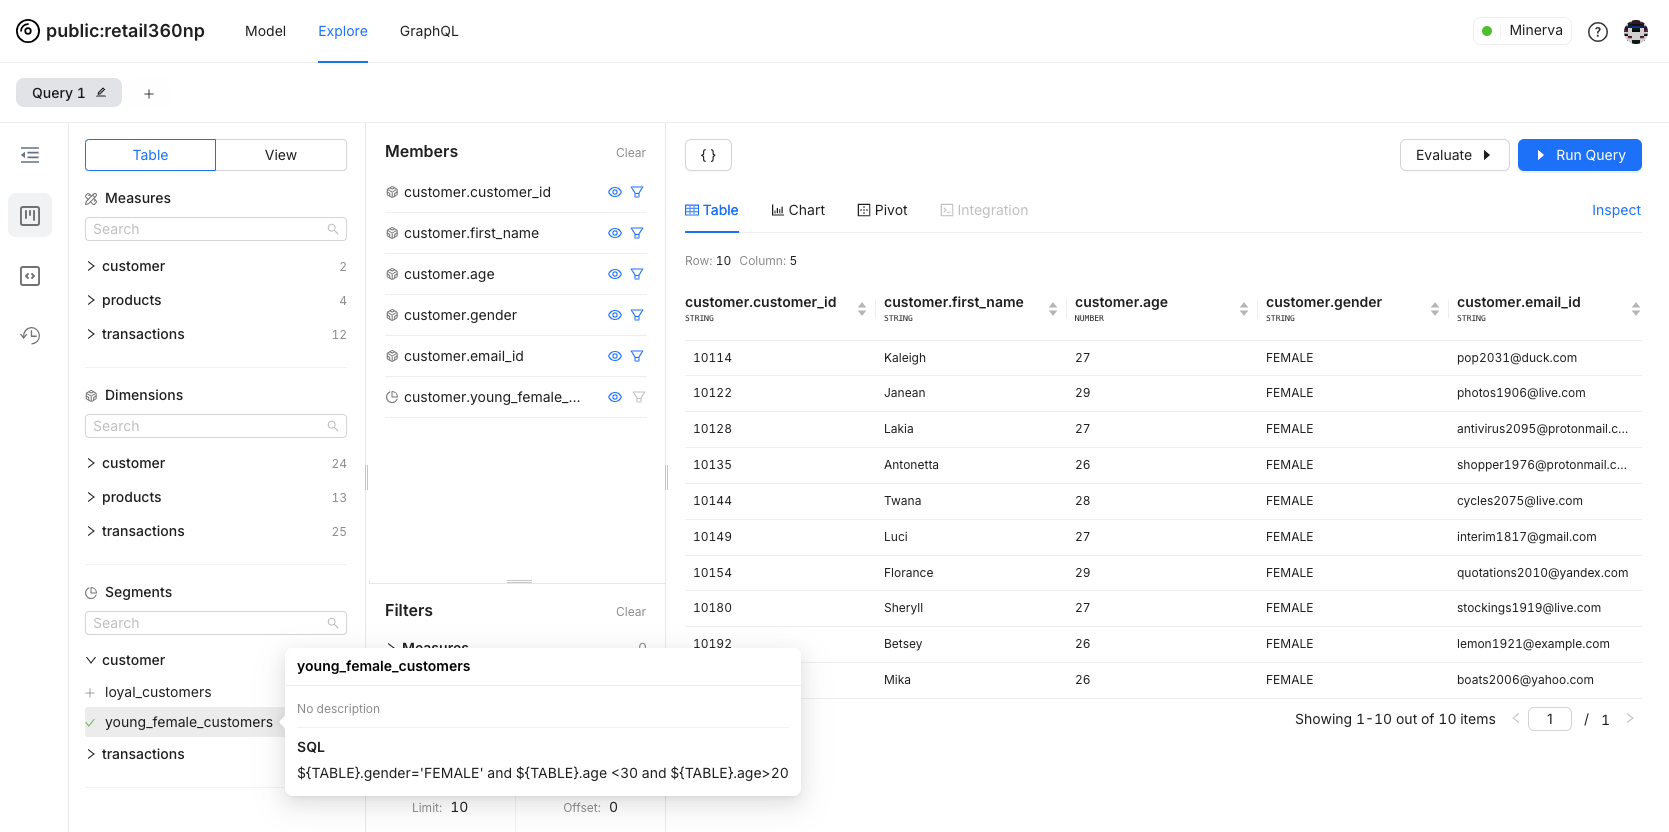
For this scenario, the segment young_female_customers is defined to filter customers based on gender and age, focusing on women between 20 and 30 years old.
- name: young_female_customers
  public: true
  sql: "{TABLE}.gender='FEMALE' and {TABLE}.age <30 and {TABLE}.age>20"
The query will return details of young female customers. The screenshot below demonstrates the output in the Lens Studio interface.
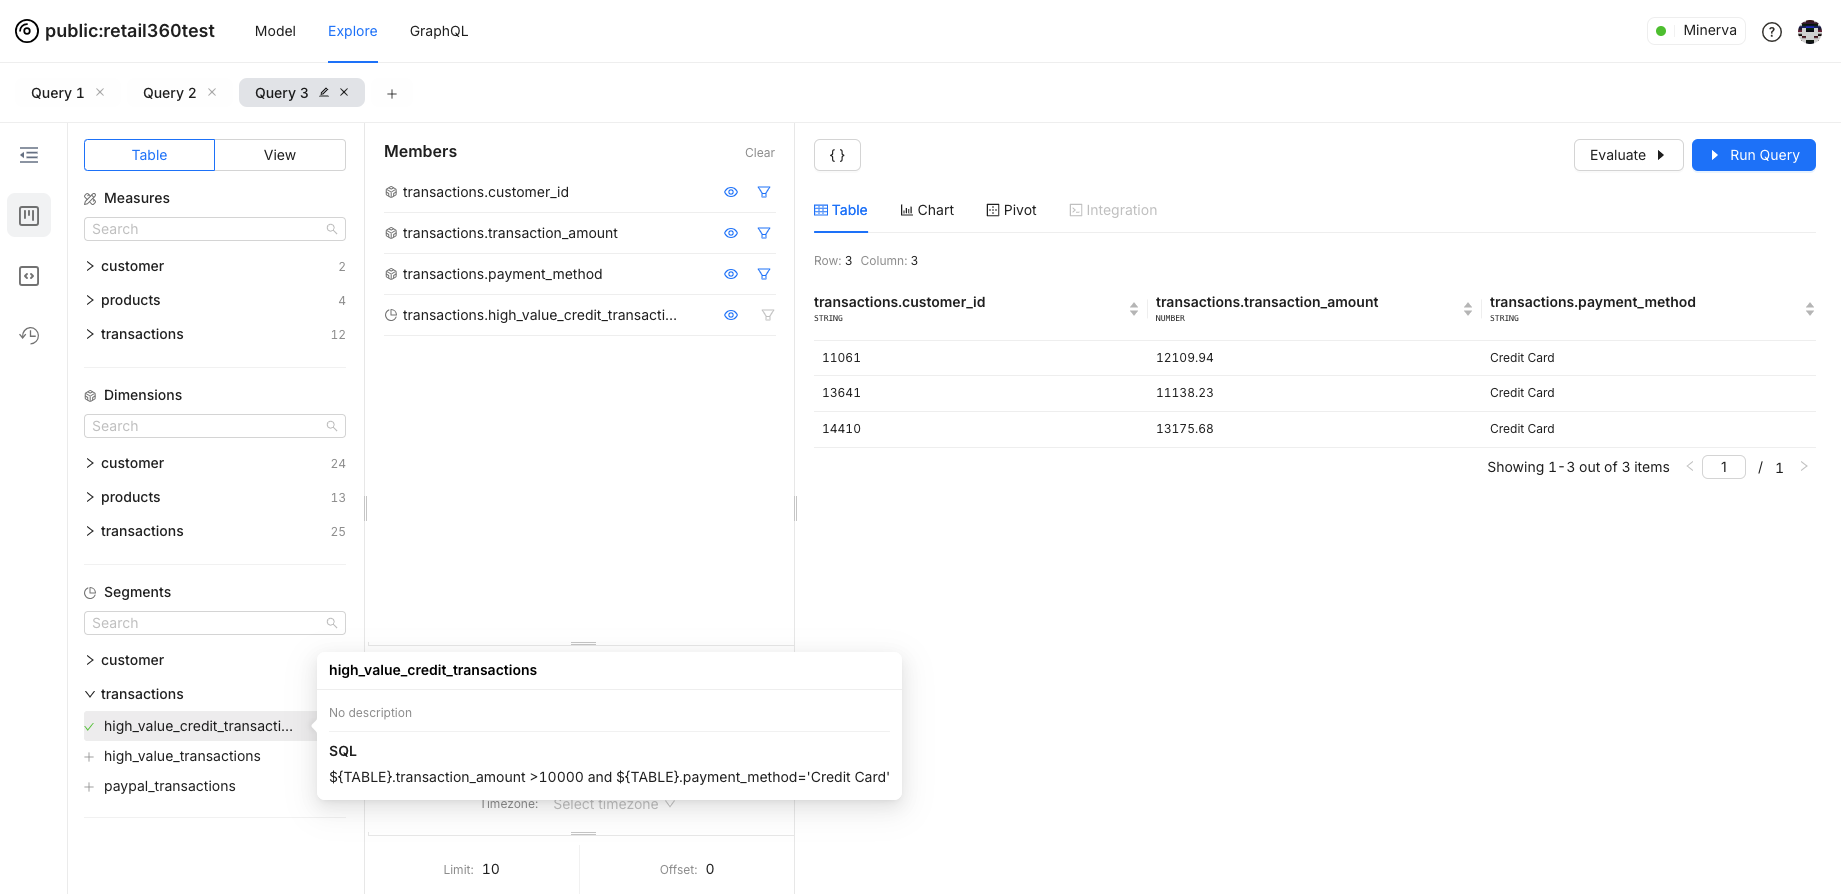
Scenario 2: High-value transactions done with credit card
Next, let’s look at the segment high_value_transactions, which filters transactions above 10,000 in amount.
- name: high_value_credit_transactions
  public: true
  sql: "{TABLE}.transaction_amount >10000 and {TABLE}.payment_method='Credit Card'"
Using this segment, you can easily identify high-value customers or spot trends in larger purchases. Below is the query to extract high-value transactions using credit cards.
Combining Segments
The segments are defined for separate tables but when applied together on Lens Studio interface, they create the query with combined filter criteria. You can further refine your analysis by combining multiple segments.
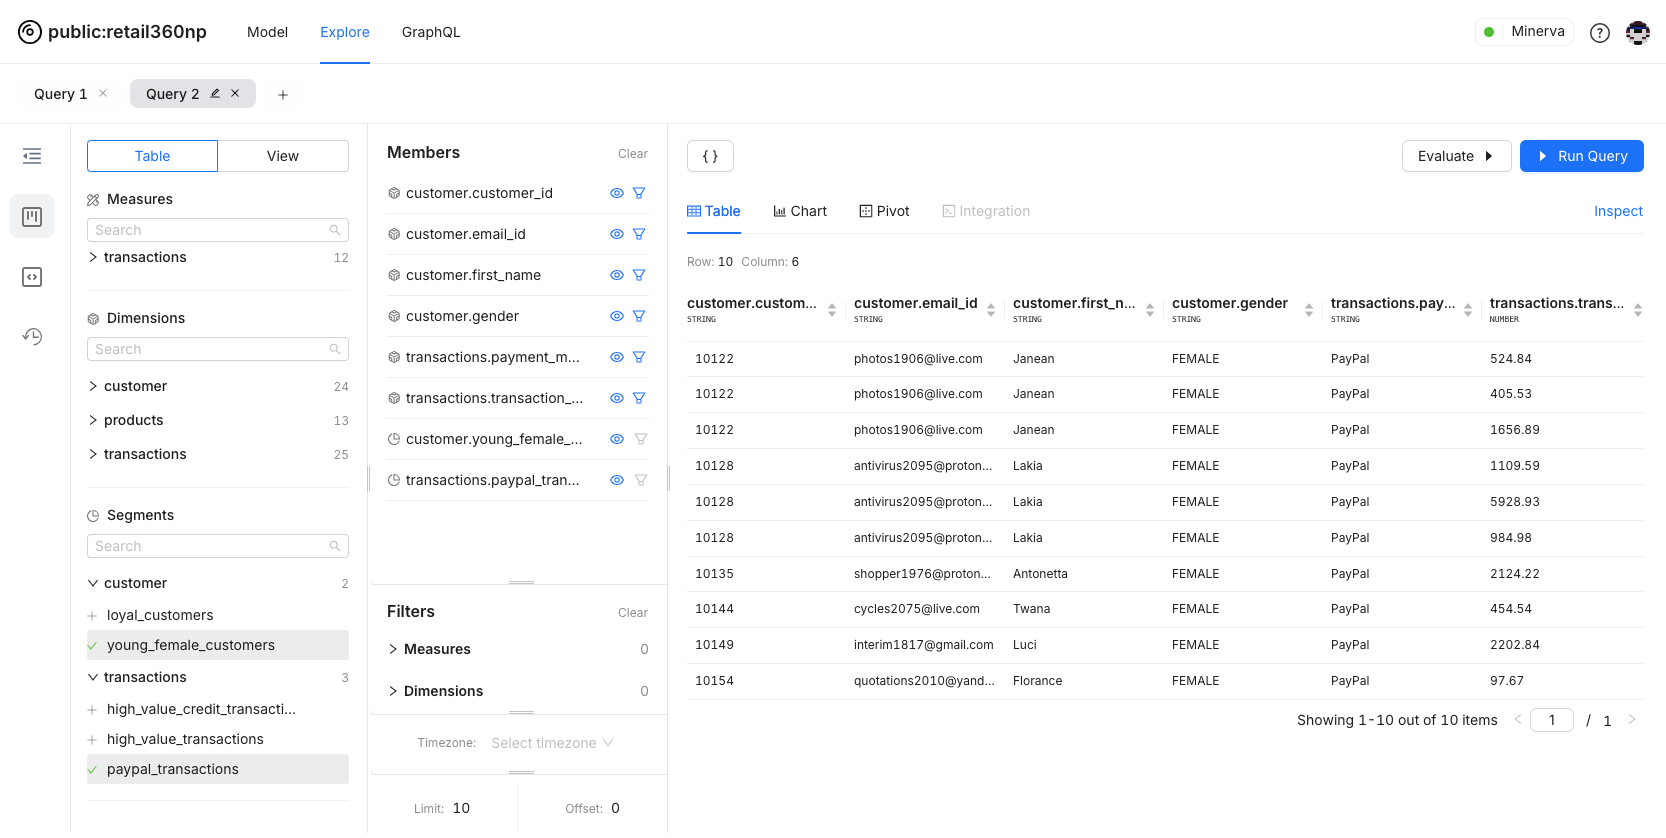
Here is the data for young female customers and their spending patterns.
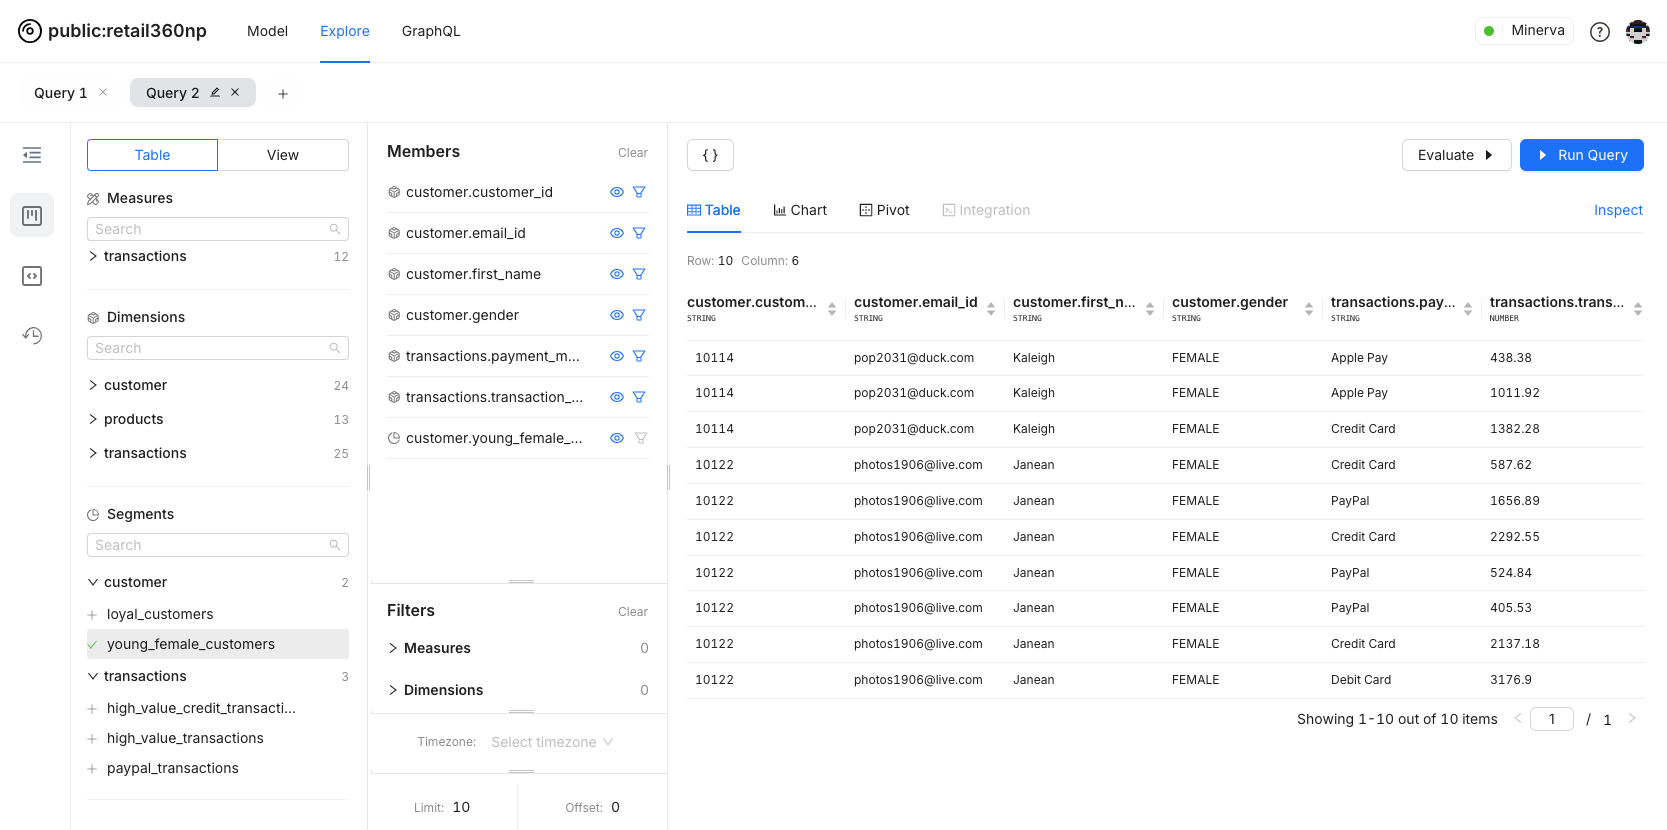
Applying multiple segments like "Young Female Customers" with "Payment Methods" lets you analyze specific groups for more targeted insights into customer behavior. The query below filters for young female customers who used PayPal:
{
  "measures": [],
  "dimensions": [
    "customer.customer_id",
    "customer.email_id",
    "customer.first_name",
    "customer.gender",
    "transactions.payment_method",
    "transactions.transaction_amount"
  ],
  "segments": [
    "customer.young_female_customers",
    "transactions.paypal_transactions"
  ],
  "filters": [],
  "timeDimensions": [],
  "limit": 10,
  "offset": 0
The screenshot below demonstrates this combined filtering:
Step 4: Managing User Group Access for the Segment
If you include or exclude user groups while defining segments in table manifest file, it will be automatically applied to the users of that particular group.
- name: young_female_customers
  public: true
  sql: "{TABLE}.gender='FEMALE' and {TABLE}.age <30 and {TABLE}.age>20"
  meta:
    secure:
      user_groups:
        includes:
          - type_analyst
        excludes:
          - default
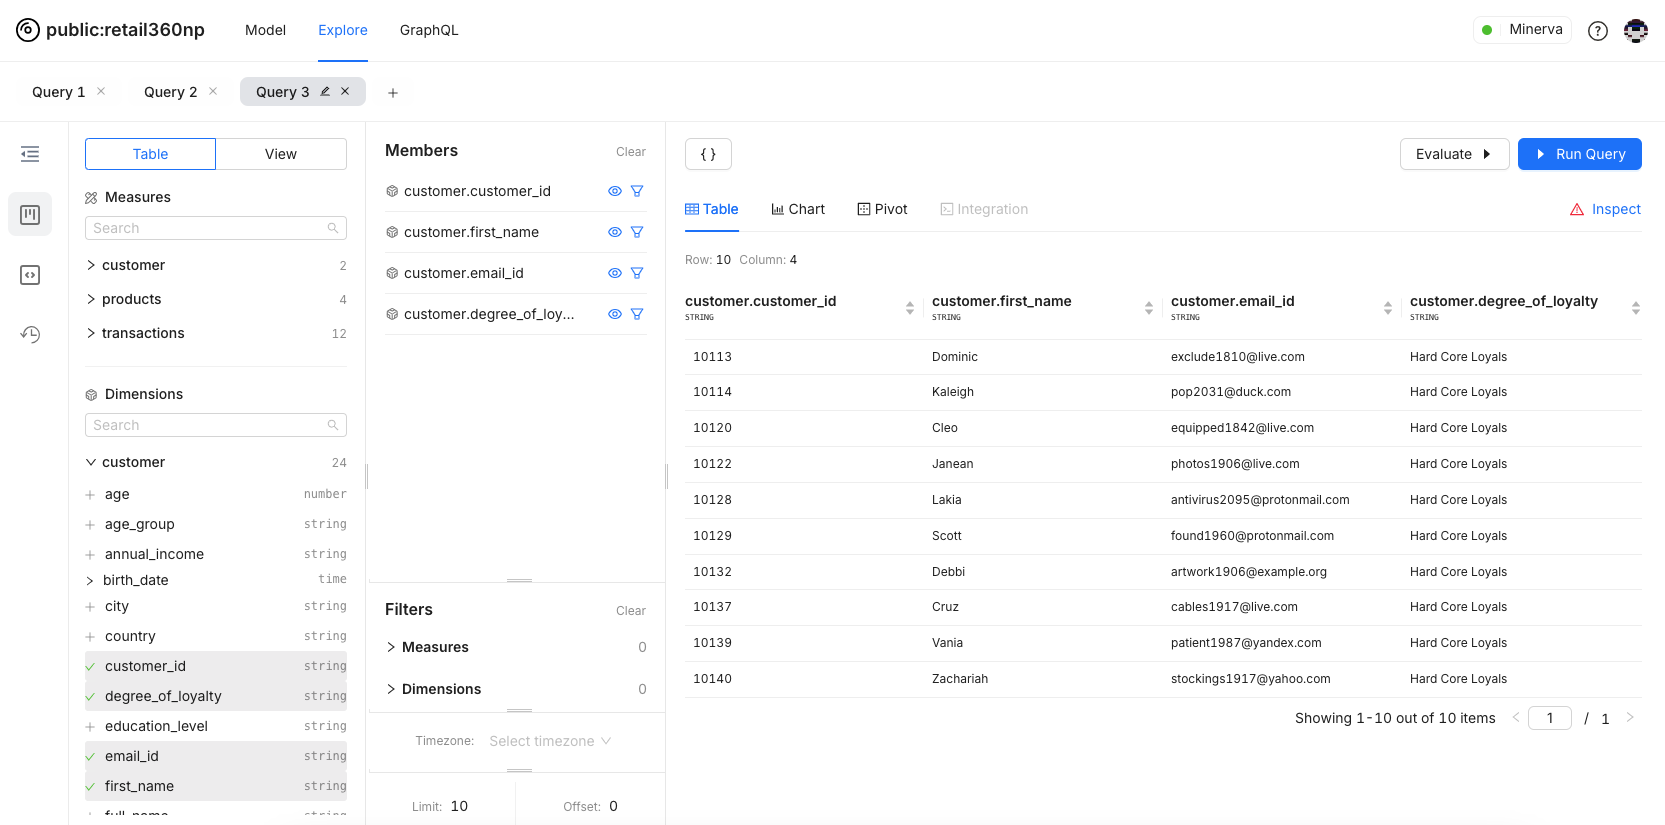
The query below confirms that the segment has been applied to users in the specified user group, as indicated by the red triangle.
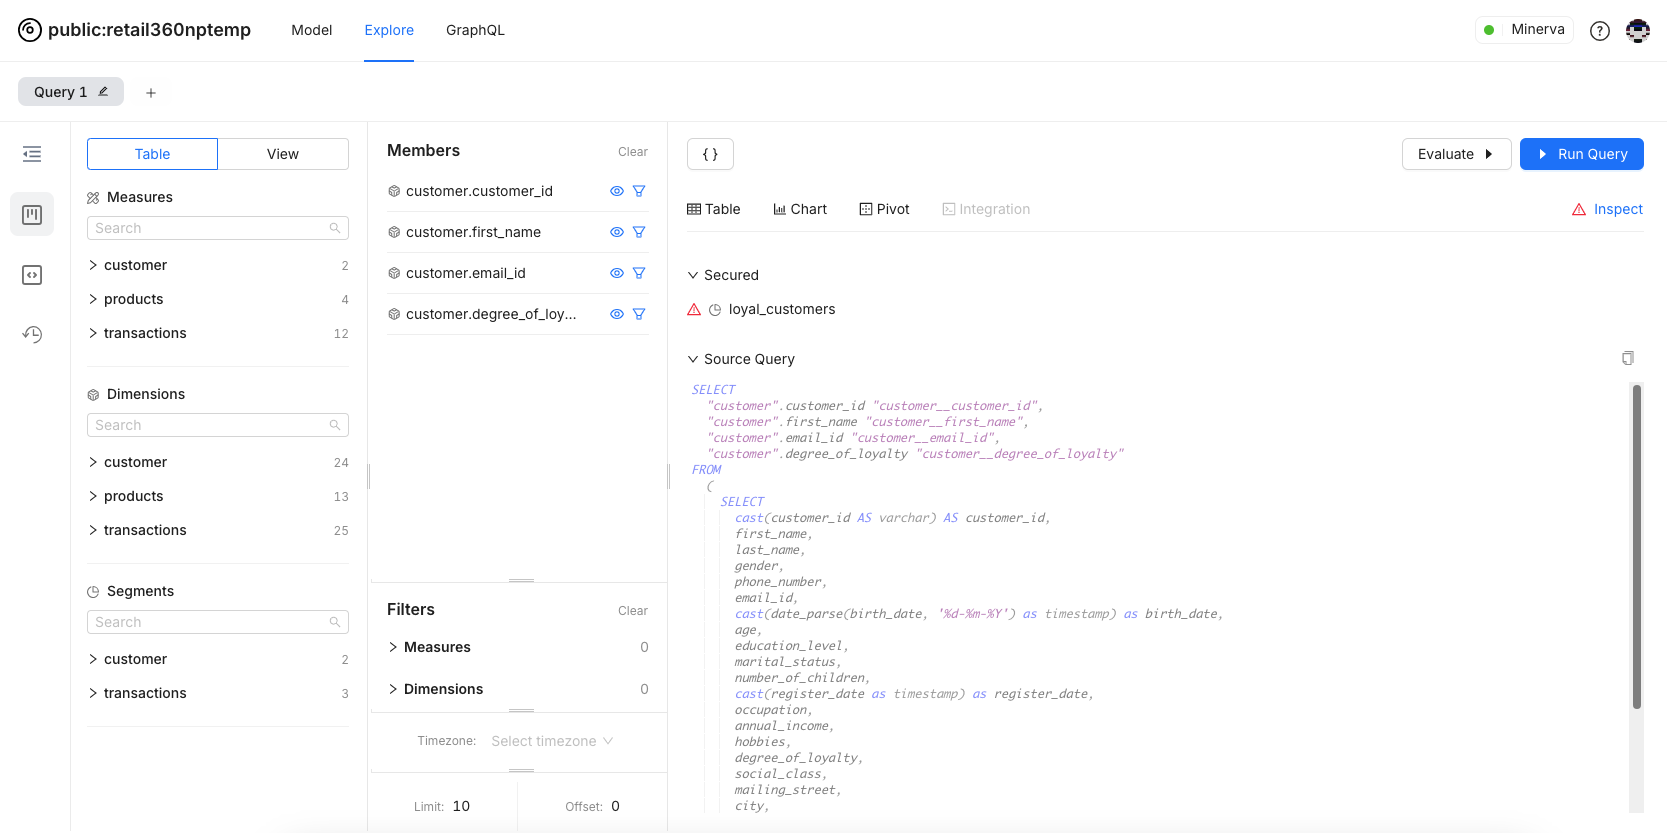
Click the red triangle to view the query payload. This reveals how the data is securely filtered based on the applied segment.
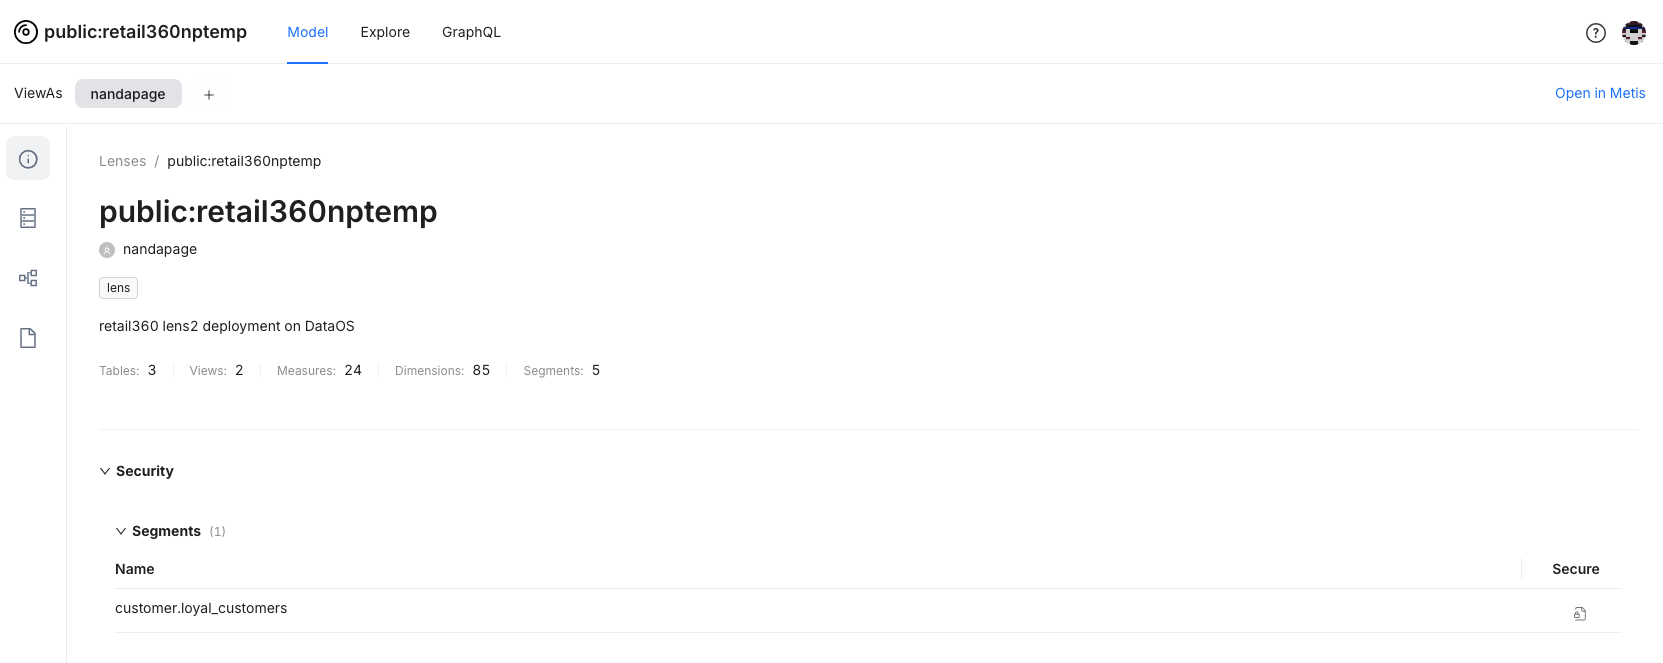
You can also see the details of user groups defined in segments. Click on Model →Overview.
