Testing Data Model Locally
Information
This guide offers a step-by-step approach to validating your SQL queries within the data model, enabling you to test them directly on your local machine. Testing your Lens model locally is a best practice, ensuring that the resulting tables and joins function as intended before deploying them in a production environment on DataOS.
Key Steps
Follow the below steps:
Pre-requisites
Before you begin, ensure the following tools are installed on your system:
- Docker: Runs Lens 2.0 in an isolated environment.
- Docker-compose: Configures multi-container Docker applications.
- Postman App / Postman VS Code Extension: For querying and testing Lens.
- VS Code Plugin (Optional): Assists in creating Lens views and tables.
Additionally, ensure your Lens project is set up with the required SQL and YAML files.
Refer to the Quick Guide: Creating Data Model (Lens) for more details.
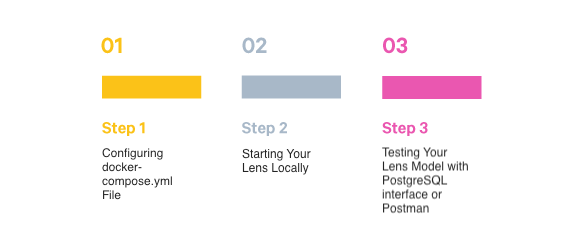
Step 1: Configuring docker-compose.yml File
When you download the Lens Project Template, it includes docker-compose.yml and the necessary folder hierarchy. This file is essential for testing your Lens setup locally.
This template is pre-configured with most of the necessary settings, so you only need to update a few fields to suit your specific needs.
Click here to see the docker-compose.yml file
version: "2.2"

x-lens2-environment: &lens2-environment

# DataOS

DATAOS_FQDN: <dataos_fqdn>.dataos.app #add the URL for the environment. Ensure you are passing the API key for this env

# Overview

LENS2_NAME: lens_name
LENS2_DESCRIPTION: "Purpose of the lens"
LENS2_TAGS: "lens2, ecommerce, sales and customer insights" #add tags for better discoverability
LENS2_AUTHORS: "author_name" #add the owner name here
LENS2_SCHEDULED_REFRESH_TIMEZONES: "UTC,America/Vancouver,America/Toronto"

# Data Source

# This defines env variables for connecting to the source via the depot

LENS2_SOURCE_TYPE: ${depot}
LENS2_SOURCE_NAME: ${depot_name}
LENS2_SOURCE_CATALOG_NAME: ${catalog_name}
DATAOS_RUN_AS_APIKEY: ******   #USER APIKEY

# Log

LENS2_LOG_LEVEL: error
CACHE_LOG_LEVEL: "trace"

# Operation

LENS2_DEV_MODE: true
LENS2_DEV_MODE_PLAYGROUND: false
LENS2_REFRESH_WORKER: true
LENS2_SCHEMA_PATH: model
LENS2_PG_SQL_PORT: 5432
CACHE_DATA_DIR: "/var/work/.store"
NODE_ENV: production

services:
  api:
    restart: always
    image: rubiklabs/lens2:0.35.18-50
    ports:
      - 4000:4000
      - 25432:5432
      - 13306:13306
    environment:
      <<: *lens2-environment

    volumes:
      - ./model:/etc/dataos/work/model
Modify the docker-compose.yml file to include your environment's URL, Lens metadata, and source details, ensuring the setup is tailored to your specific needs.
-
Environment URL:
-
Lens Meta Info:
-
Source Details: Add the environment variables for connecting to the data source.
Environment variable for connecting via Depot
  # Data Source
  # This defines env variables for connecting to the source via the depot
  LENS2_SOURCE_TYPE: depot
  LENS2_SOURCE_NAME: depot_name #add the name of the depot
  DATAOS_RUN_AS_APIKEY: ****** # Add the user API Key for the env
Environment variable to connect via Minerva or Themis
  # Data Source
  # This defines env variables for connecting to the source via the Minerva cluster
  LENS2_SOURCE_TYPE: minerva #If you want to connect via Themis, change the source type to Themis
  LENS2_SOURCE_NAME: cluster_name #add the cluster name
  LENS2_SOURCE_CATALOG_NAME: catalog_name #add the catalog name
  DATAOS_RUN_AS_APIKEY: ******
4. Verify Service Configuration:- Ensure that the image tag is up to date or is the same as the one you pulled in the prerequisite stage.
Step 2: Starting Your Lens Locally
After completing the Lens setup and defining the Lens model, start Lens locally:
You can start Lens locally by running the following command in your terminal.
Output
You should see an output similar to this, indicating the Lens server has started locally:
lens2-api-1  | Loaded  /app/scripts/config.js
lens2-api-1  | 🔥 Table Store (0.35.40) is assigned to 3030 port.
lens2-api-1  | 🔗 Lens2 SQL Service (PostgreSQL) is listening on 0.0.0.0:5432
lens2-api-1  | 🚀 Lens2 API server (0.35.41-05) is listening on 4000
Now that your Lens is up and running on your local machine, it's time to test the creation of tables and ensure the joins are functioning correctly.
Step 3: Testing Your Lens Model
To ensure your Lens model functions as expected, start by running a series of validation tests. Begin with basic checks to verify that all SQL queries are correctly defined and executed. Next, review the results to confirm that your model accurately reflects the intended logic and performance requirements.
Validating Lens Model Using PostgreSQL Interface
Lens exposes a PostgreSQL interface that allows you to query Lens Tables and Views in PostgreSQL dialect.
-
Now use PostgreSQL API to interact with your Lens. Make sure your queries align with the PostgreSQL dialect. Use the following connection details to interact with your Lens:
-
Connection Options:
- PostgreSQL Client (psql): Execute queries from the command line.
- VS Code Extension (PostgreSQL Client): Connect and query Lens directly in VS Code.
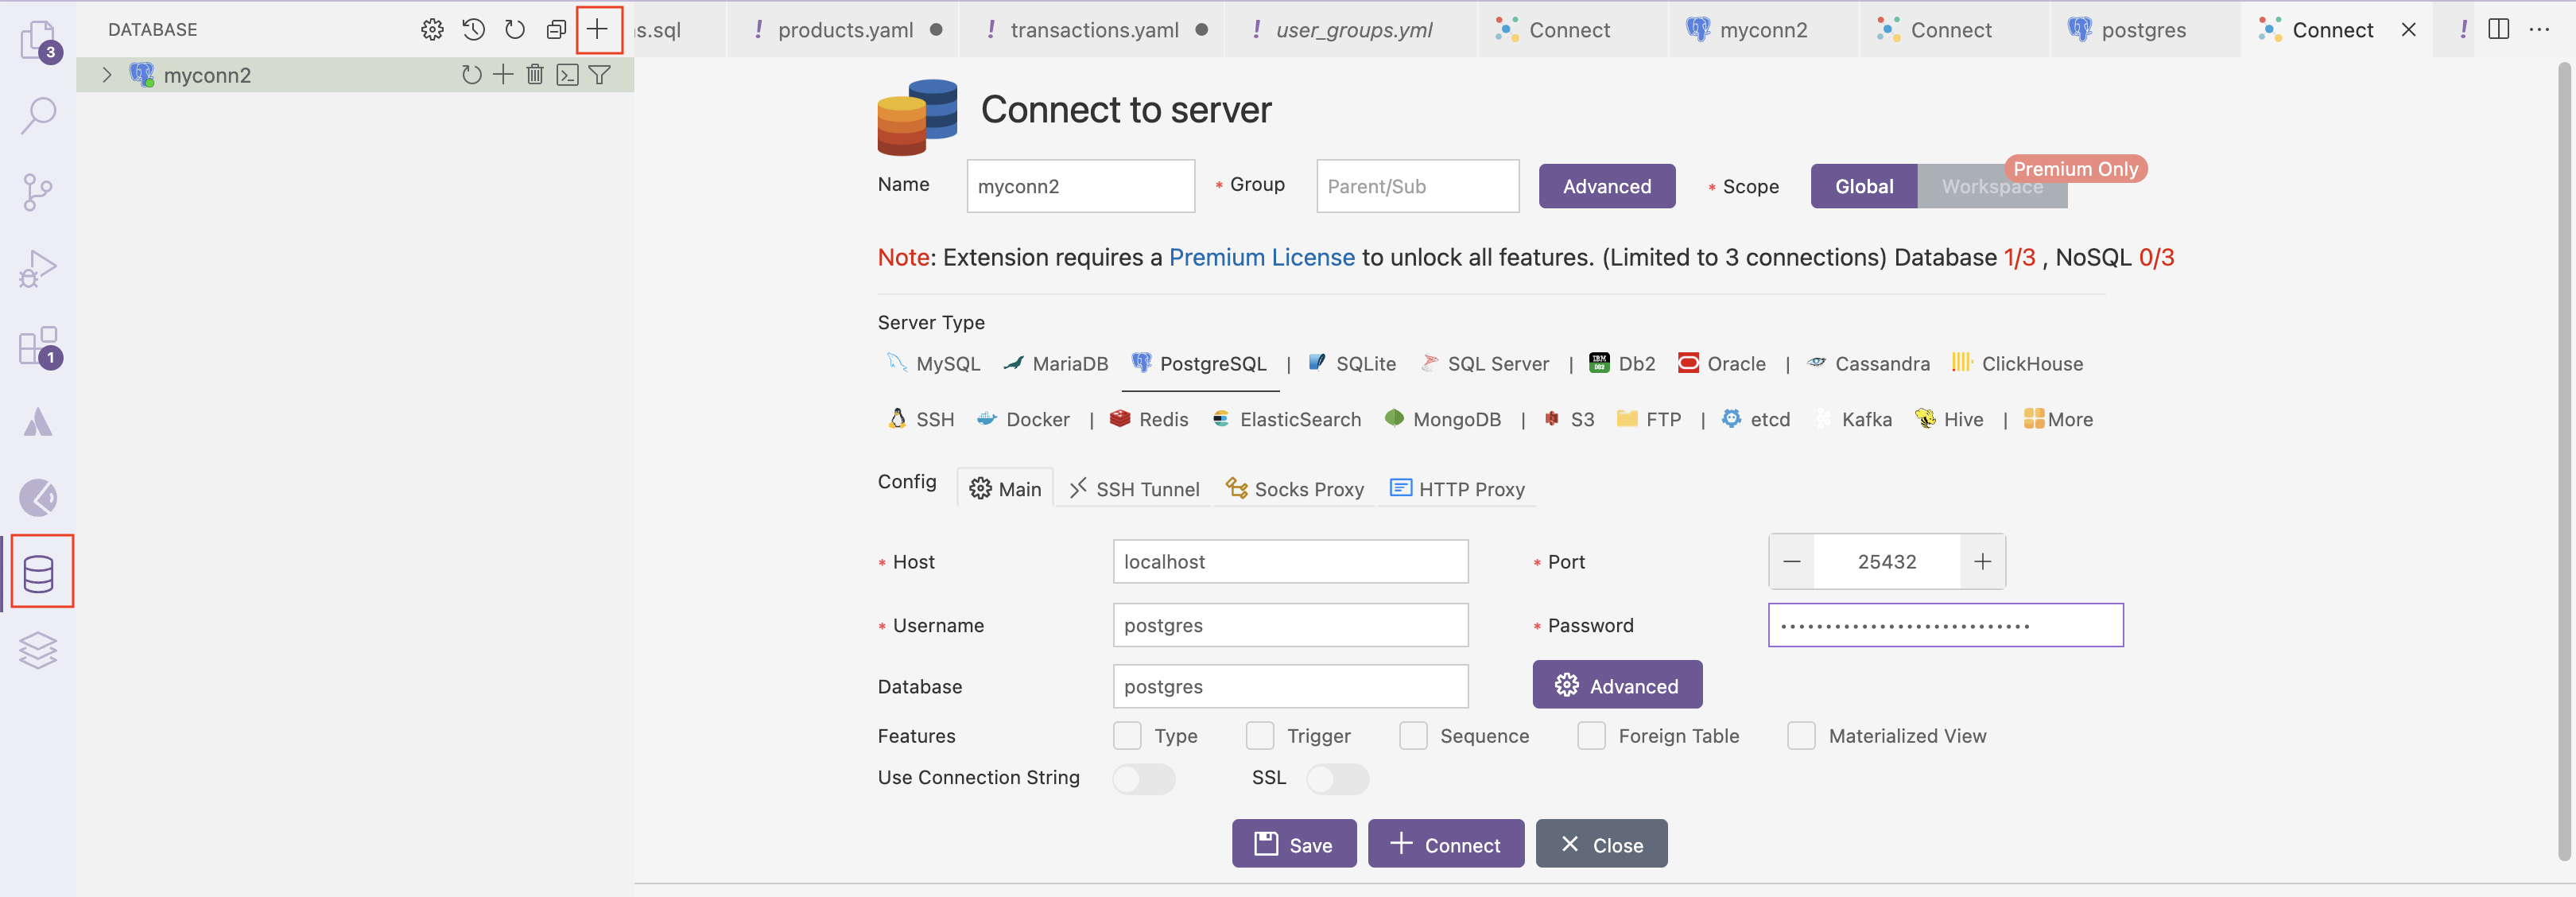
Once the connection is a success you can start executing the queries in the terminal. This is to ensure that all the SQLs are correctly written and the resulting tables and joins are accurate.
postgres=> \d
                List of relations
Schema |         Name         | Type  |  Owner
--------+----------------------+-------+----------
public | customer             | table | postgres
public | product_analysis     | table | postgres
public | products             | table | postgres
public | transaction_analysis | table | postgres
public | transactions         | table | postgres
(5 rows)
You can see the tables and business views defined in your data model listed here in the output.
To verify, run a query to check the output data.
Validating Lens Model Using Postman
Postman is a tool that allows you to query and test the Lens environment by sending API requests through an intuitive interface. It allows you to execute a query using JSON Payload.
Follow the Postman Installation Guide to install Postman on your local system.
Verifying Installation
To ensure that Postman is installed correctly and ready for use:
-
Open Postman:
- Launch the application. You should see the main interface where you can create requests and organize them in collections.
-
Create a Simple Request (optional):
- To test if Postman is functioning correctly, try sending a simple GET request to a public API endpoint like
https://api.publicapis.org/entries. This action should return a list of public APIs as a response, indicating that Postman is set up properly.
- To test if Postman is functioning correctly, try sending a simple GET request to a public API endpoint like
Using Postman in VS Code
-
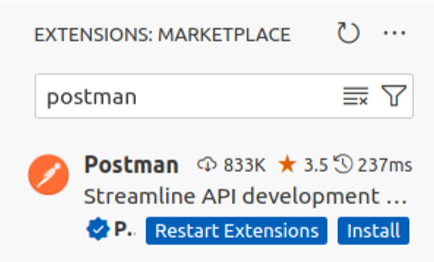
Install Postman VS Code Extension.
Search for "Postman" in the VS Code Extensions Marketplace and install the Postman extension.
-
Open the extension within VS Code to start creating and sending requests directly from the editor.
-
Upload Lens API Collection.
To use Lens API endpoints, upload the Lens2-APIs.postman_collection.json file.
-
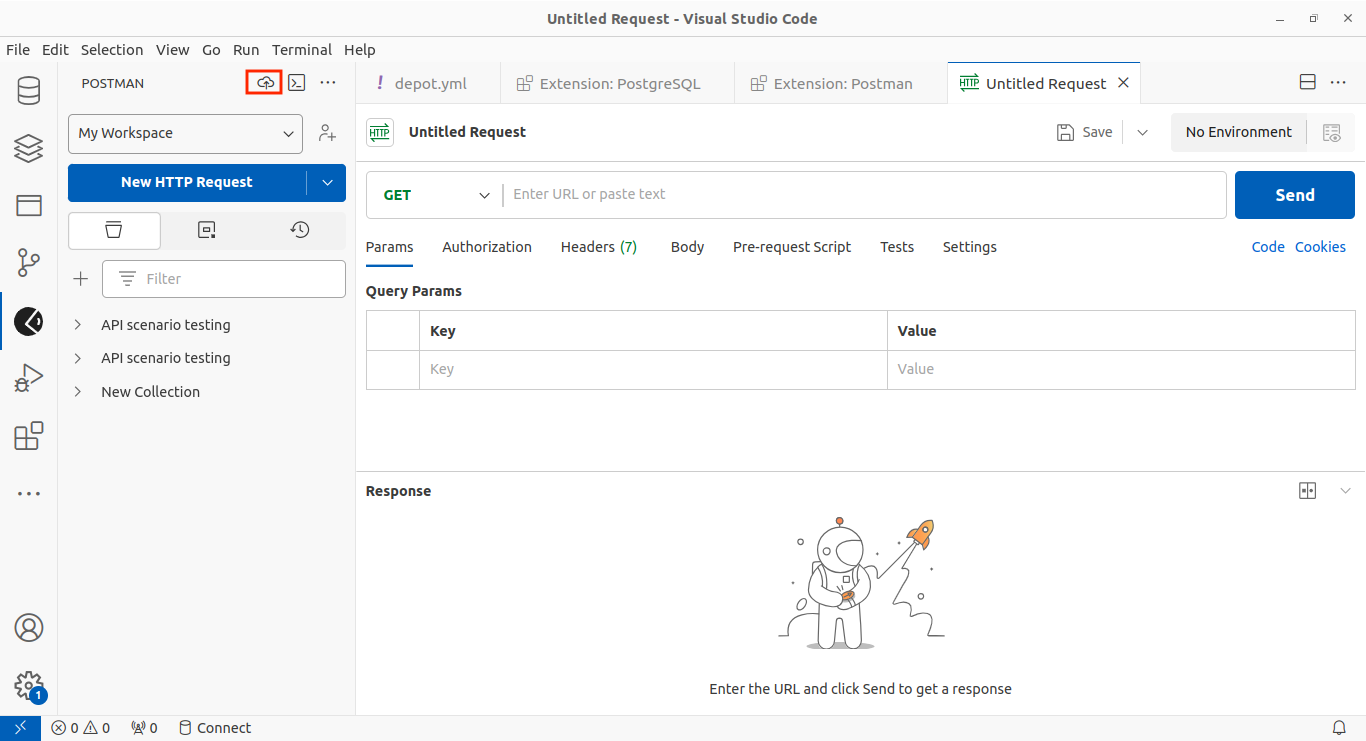
Start a New HTTP Request.
In the Postman extension view, click on the "New HTTP Request" button.
-
Fetch metadata and data.
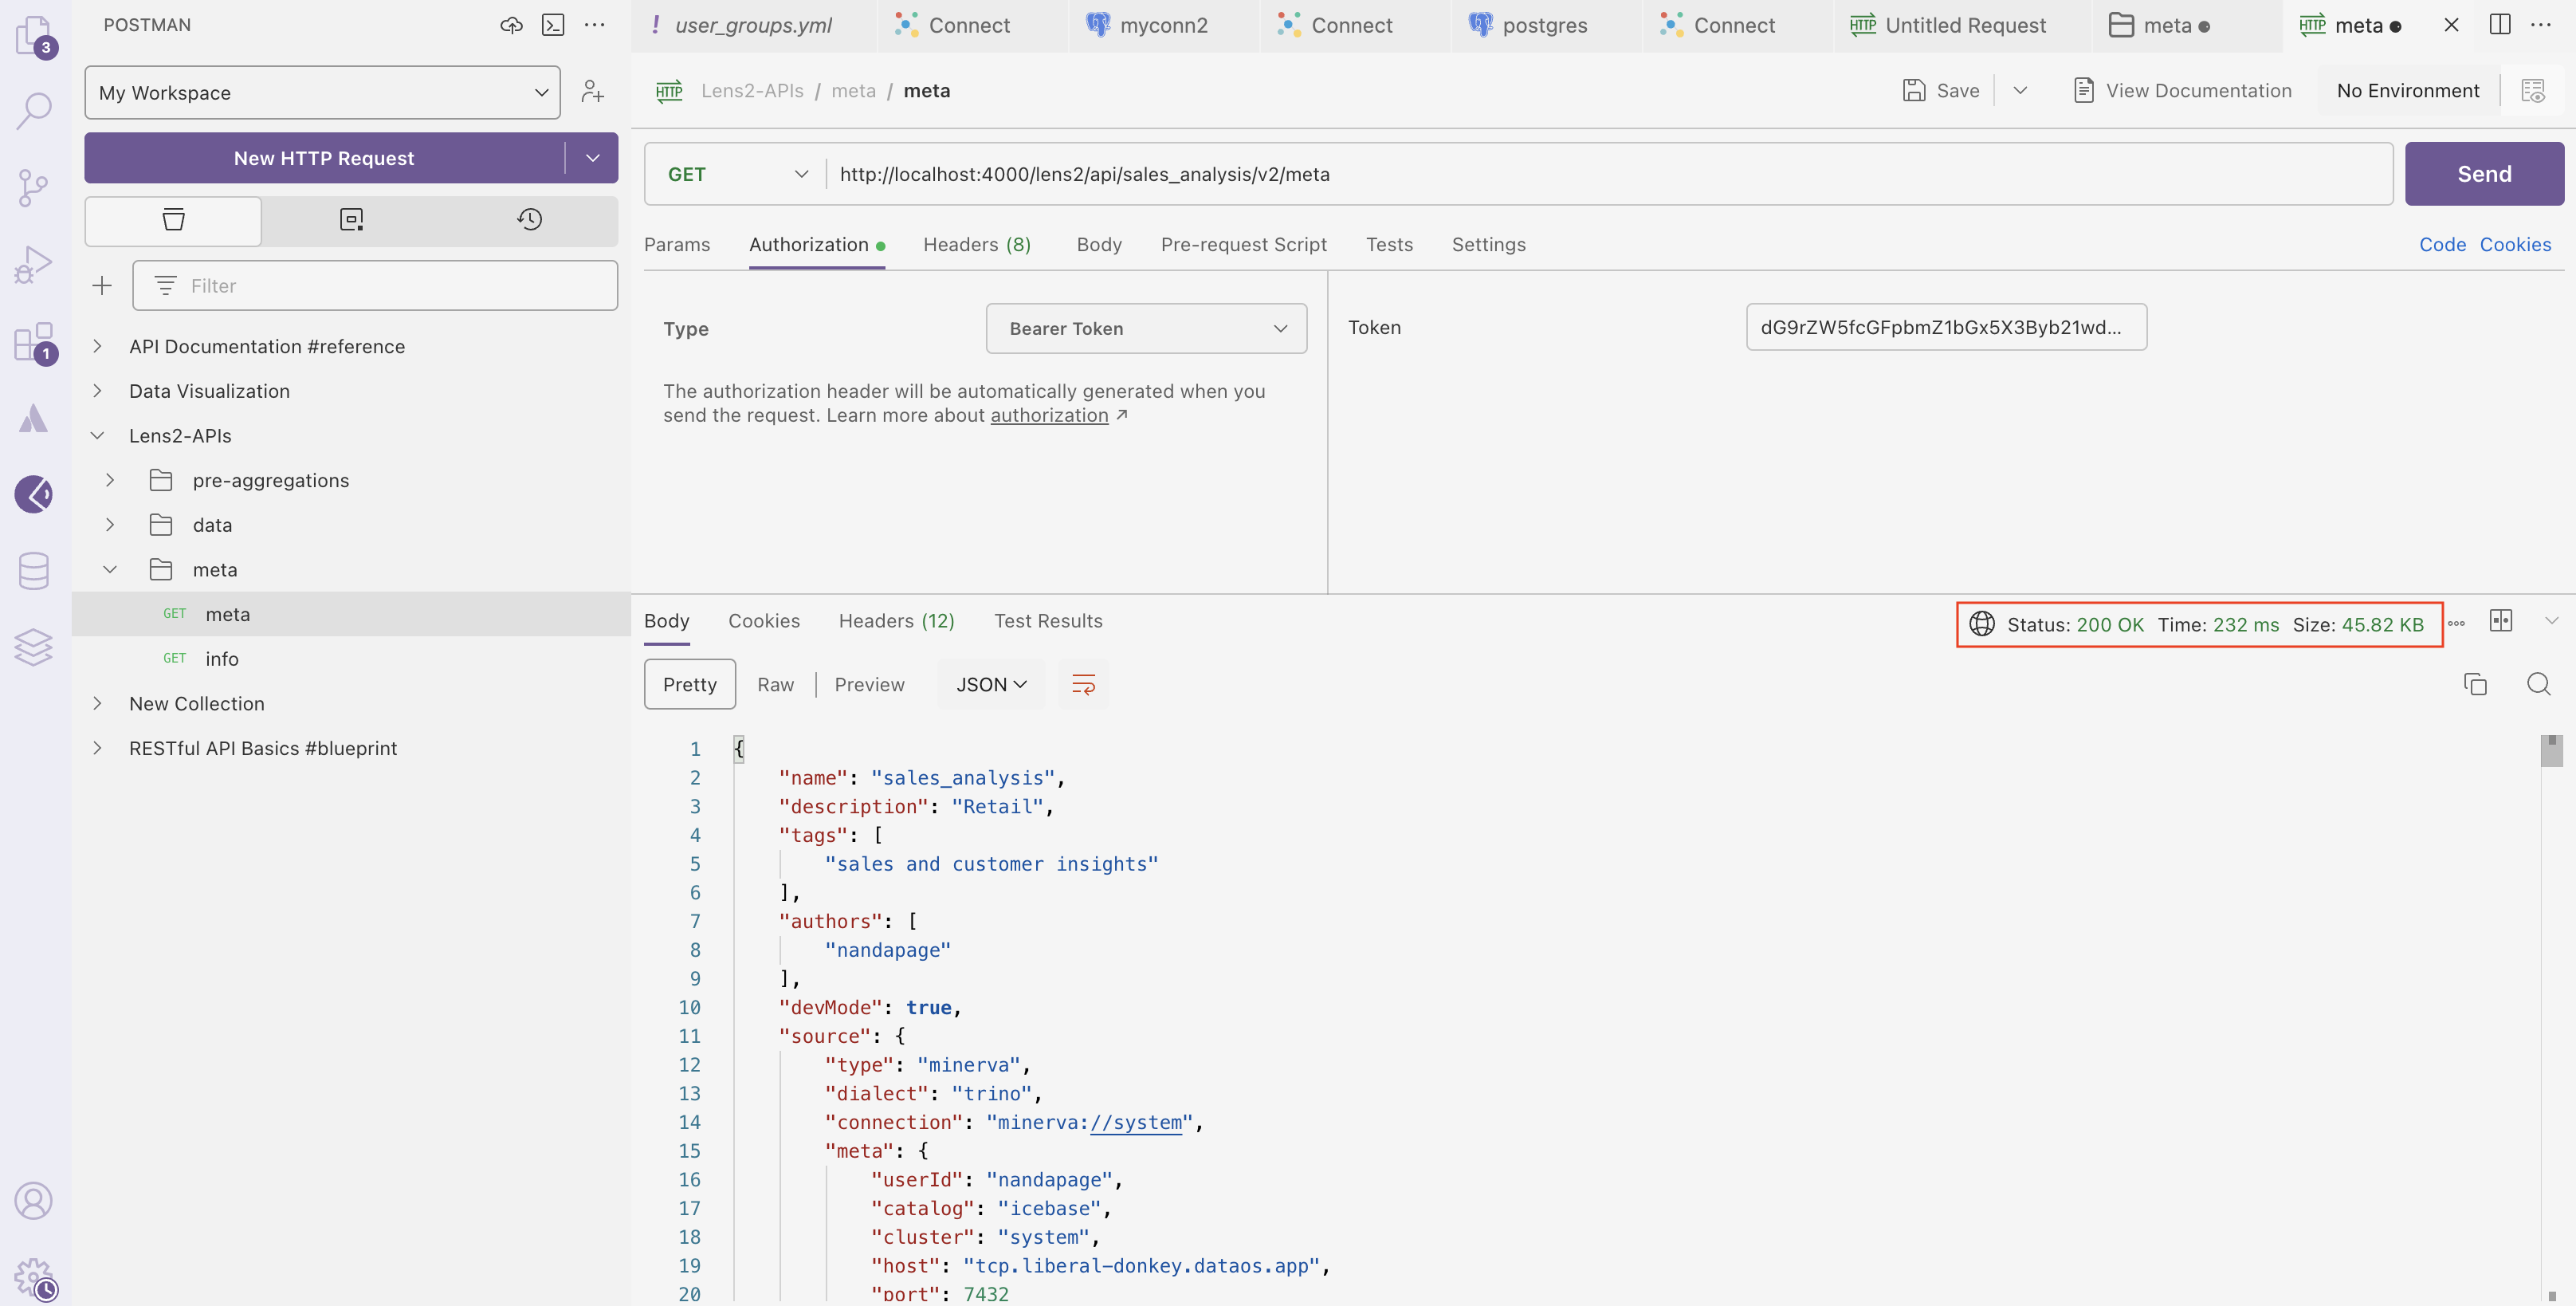
Provide the following information:
- Authorization: Use your DataOS API key.
- Lens Name: Include the Lens name in the URL.
- Click on the Send button.
In this example, we successfully fetched the metadata of the Lens model. A "200 OK" status confirms that the metadata retrieval was successful.
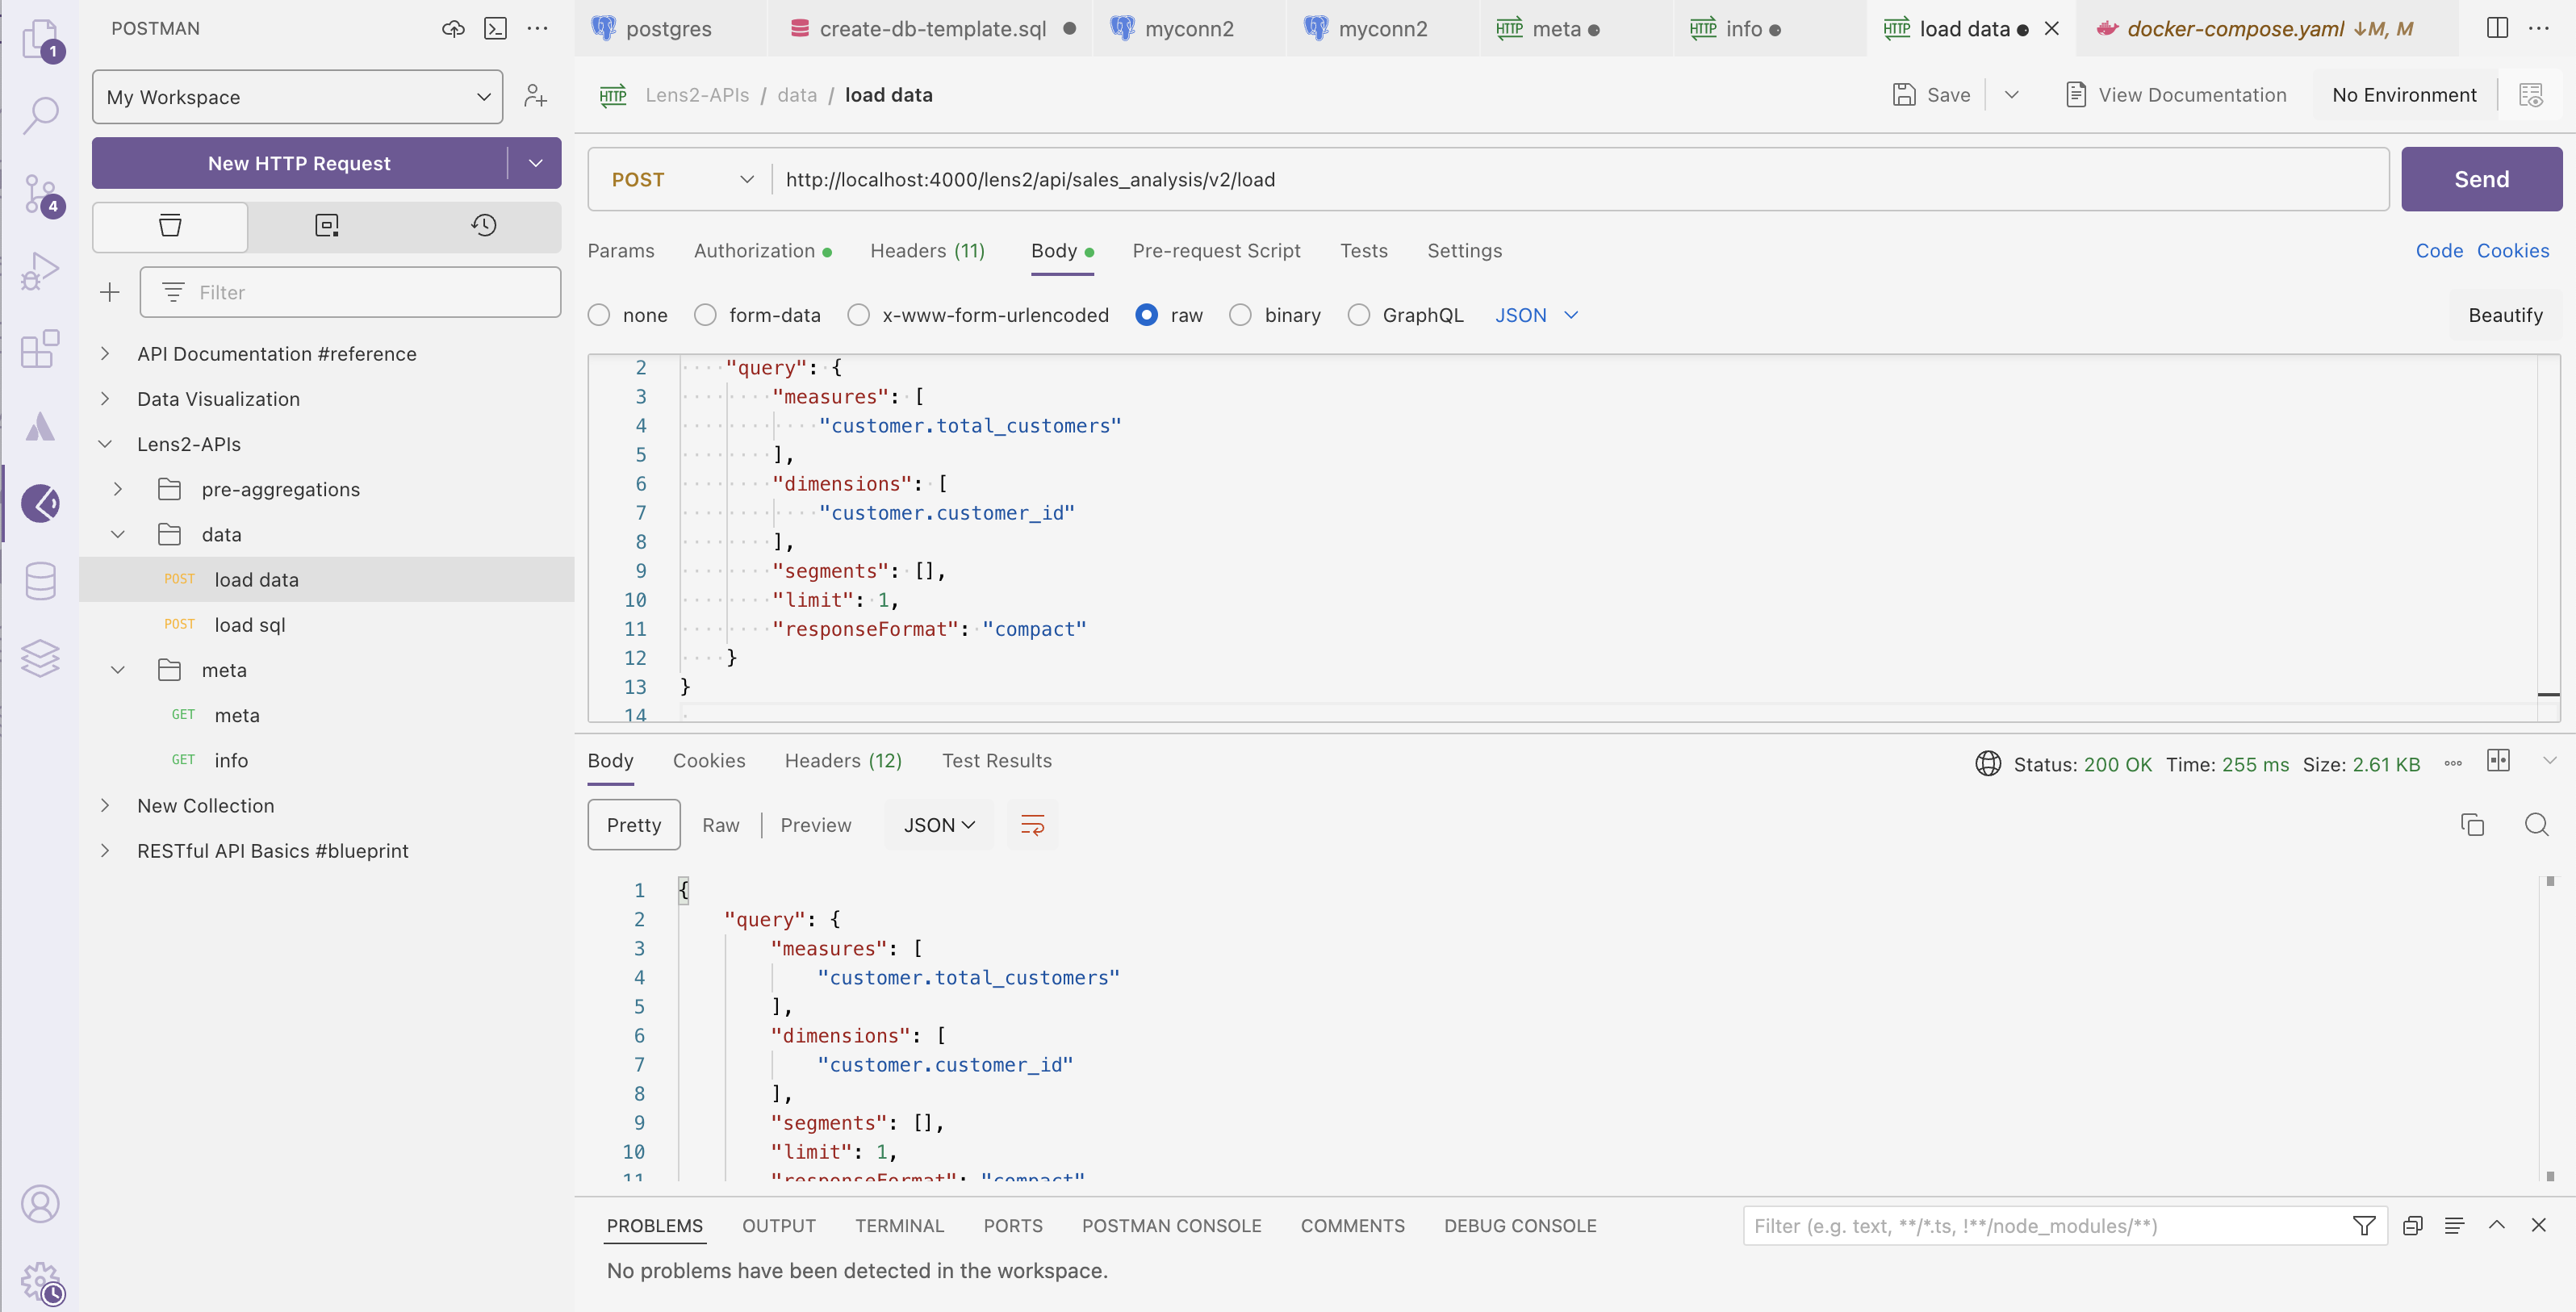
Next, let's retrieve data from the Lens model. In the request body, paste the following query.
{
    "query": {
        "measures": [
            "customer.total_customers"
        ],
        "dimensions": [
            "customer.customer_id"
        ],
        "segments": [],
        "limit": 1,
        "responseFormat": "compact"
    }
}
Since the Lens model is functioning correctly, we received the desired output with a success status.
Next Steps