Scanning Metadata using Depot
Information
This guide explains the steps to create a Scanner Workflow using DataOS Depot to connect to the metadata source and extract the metadata of various entities. It enables you to scan all datasets referenced by a Depot.
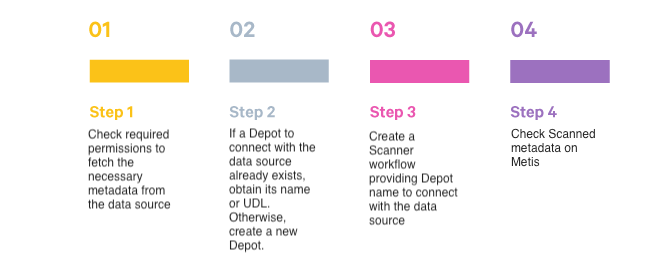
Quick Steps
Follow the below steps:
Scanner Workflow using a Depot
You need to provide the Depot name or address to establish a connection to the data source.
Source Data in Snowflake
For illustration purposes, we will connect with the Snowflake data source.
Step 1: Check Required Permissions
-
To scan metadata from the Snowflake source system, the Snowflake user must have USAGE privileges on required schemas.
-
To run the Scanner workflow, a user must have Metis admin access or a grant for the “Run as Scanner User” use case.
-
Ensure the Depot for Snowflake is created and you have Read access. If it does not exist, then create a Depot.
Step 2: Create a Depot to Connect with Snowflake
We will connect with a data source by creating a Depot and then will use the Depot to scan the metadata for the entities.
-
Create a Depot manifest file. Here is the Depot YAML containing the
warehouse,URL, anddatabaseto connect to Snowflake. The Depot enables access to all schemas in the configured database.version: v1 name: snowflaketest type: depot tags: - connect - snowflaketest layer: user depot: type: SNOWFLAKE description: "Snowflake Sample data" spec: warehouse: COMPUTE_WH url: nu75519.central-india.azure.snowflakecomputing.com database: SNOWFLAKE_SAMPLE_DATA external: true source: SnowflakeTestSource connectionSecret: - acl: rw type: key-value-properties data: username: iamgroot password: ********* -
Apply this YAML file on DataOS CLI
Step 3: Write Scanner Workflow with Filter Patterns
Let us build a Scanner workflow to scan the data source. The workflow includes the depot name and filter patterns. Filter patterns enable you to control whether or not to include databases/schemas/tables as part of metadata ingestion.
-
Provide the workflow properties, such as version, name, description, tags, etc., in the YAML file.
-
Provide the Depot name or address(Universal Data Link) to connect to the data source.
-
Specify
schemaFilterPatternandtableFilterPatternto filter schemas/tables which are of interest. -
Use
includes:andexcludes:to specify schema/table names or a regex rule to include/exclude tables while scanning the schema.
version: v1
name: snowflake-scanner-test
type: workflow
tags:
  - snowflake-scanner-test
description: The workflow scans the schema of tables and registers their metadata
workflow:
  dag:
    - name: scanner2-snowflake
      description: The job scans schema from sanity snowflake Depot tables and registers their metadata on metis2
      spec:
        stack: scanner:2.0
        compute: runnable-default
        stackSpec:
          depot: snowflaketestsource
          sourceConfig:
            config:
              schemaFilterPattern:
                includes:
                  - TPCH_SF1$
              tableFilterPattern:
                includes:
                  - region
                  - supplier
                  - Customer
                  - ORDERS
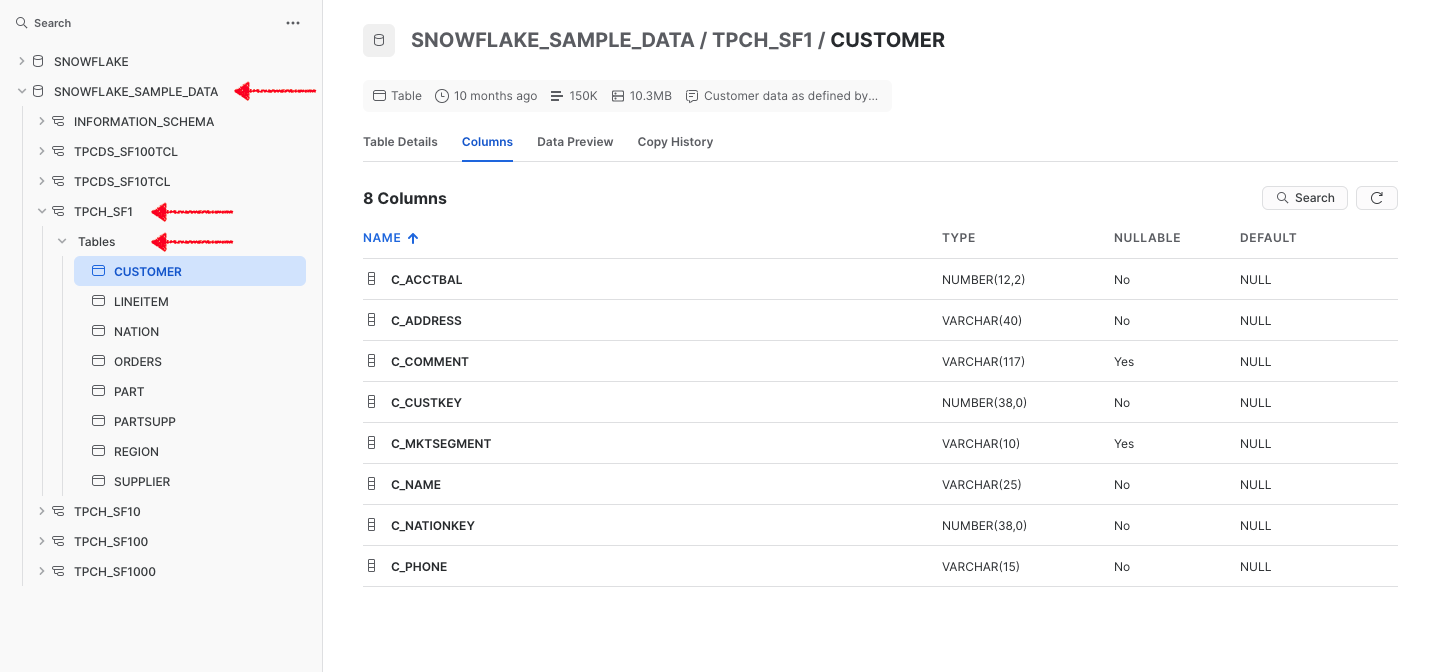
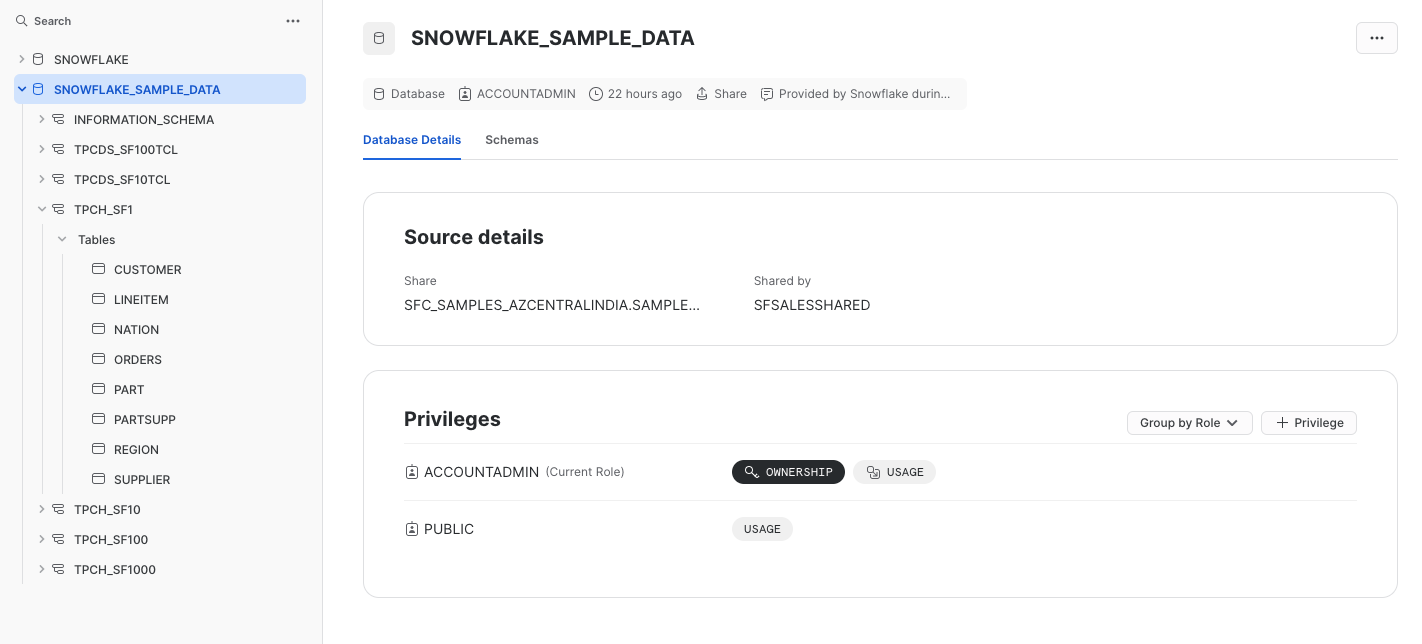
Step 4: Check Metadata Source Created on Metis
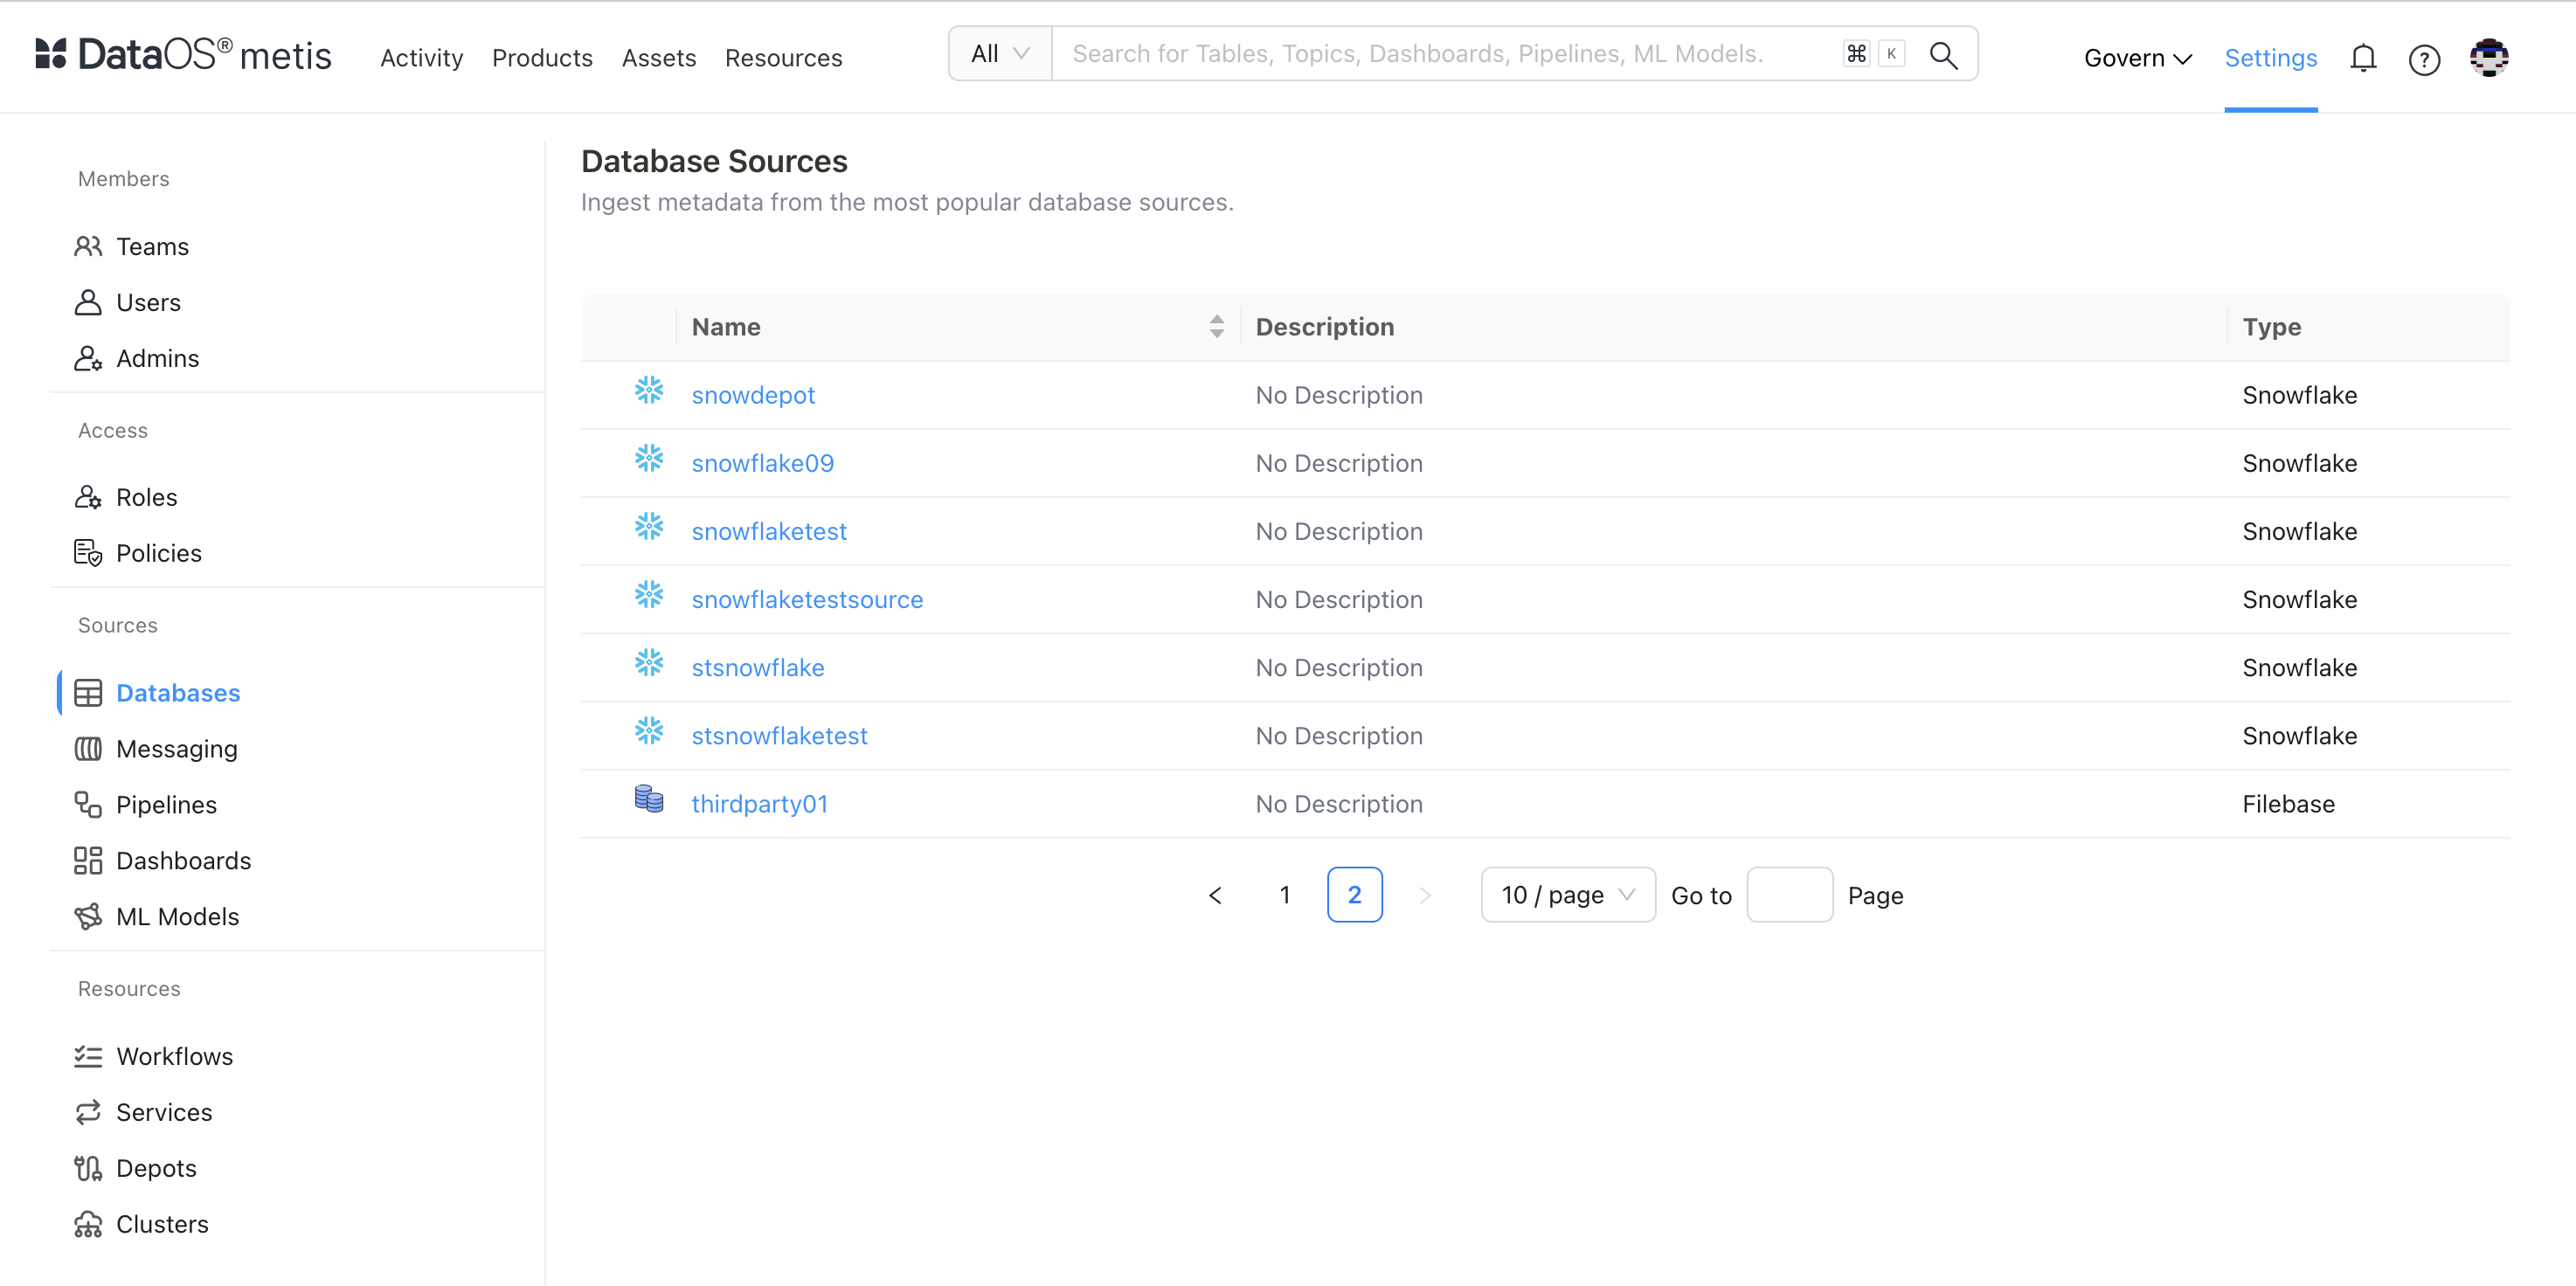
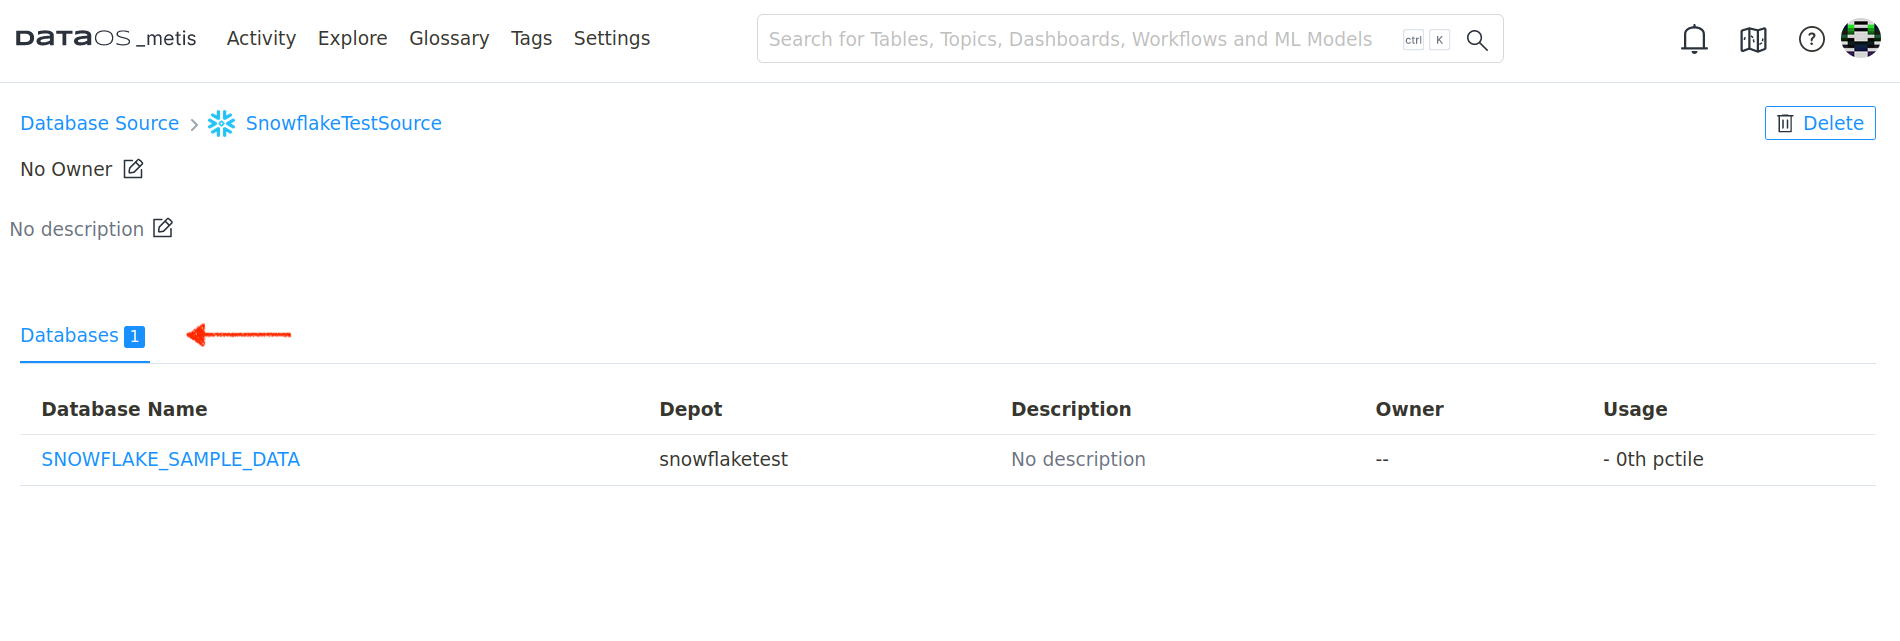
On Metis UI, go to Settings > Databases to access it.
Scanned Database
Click on the database.
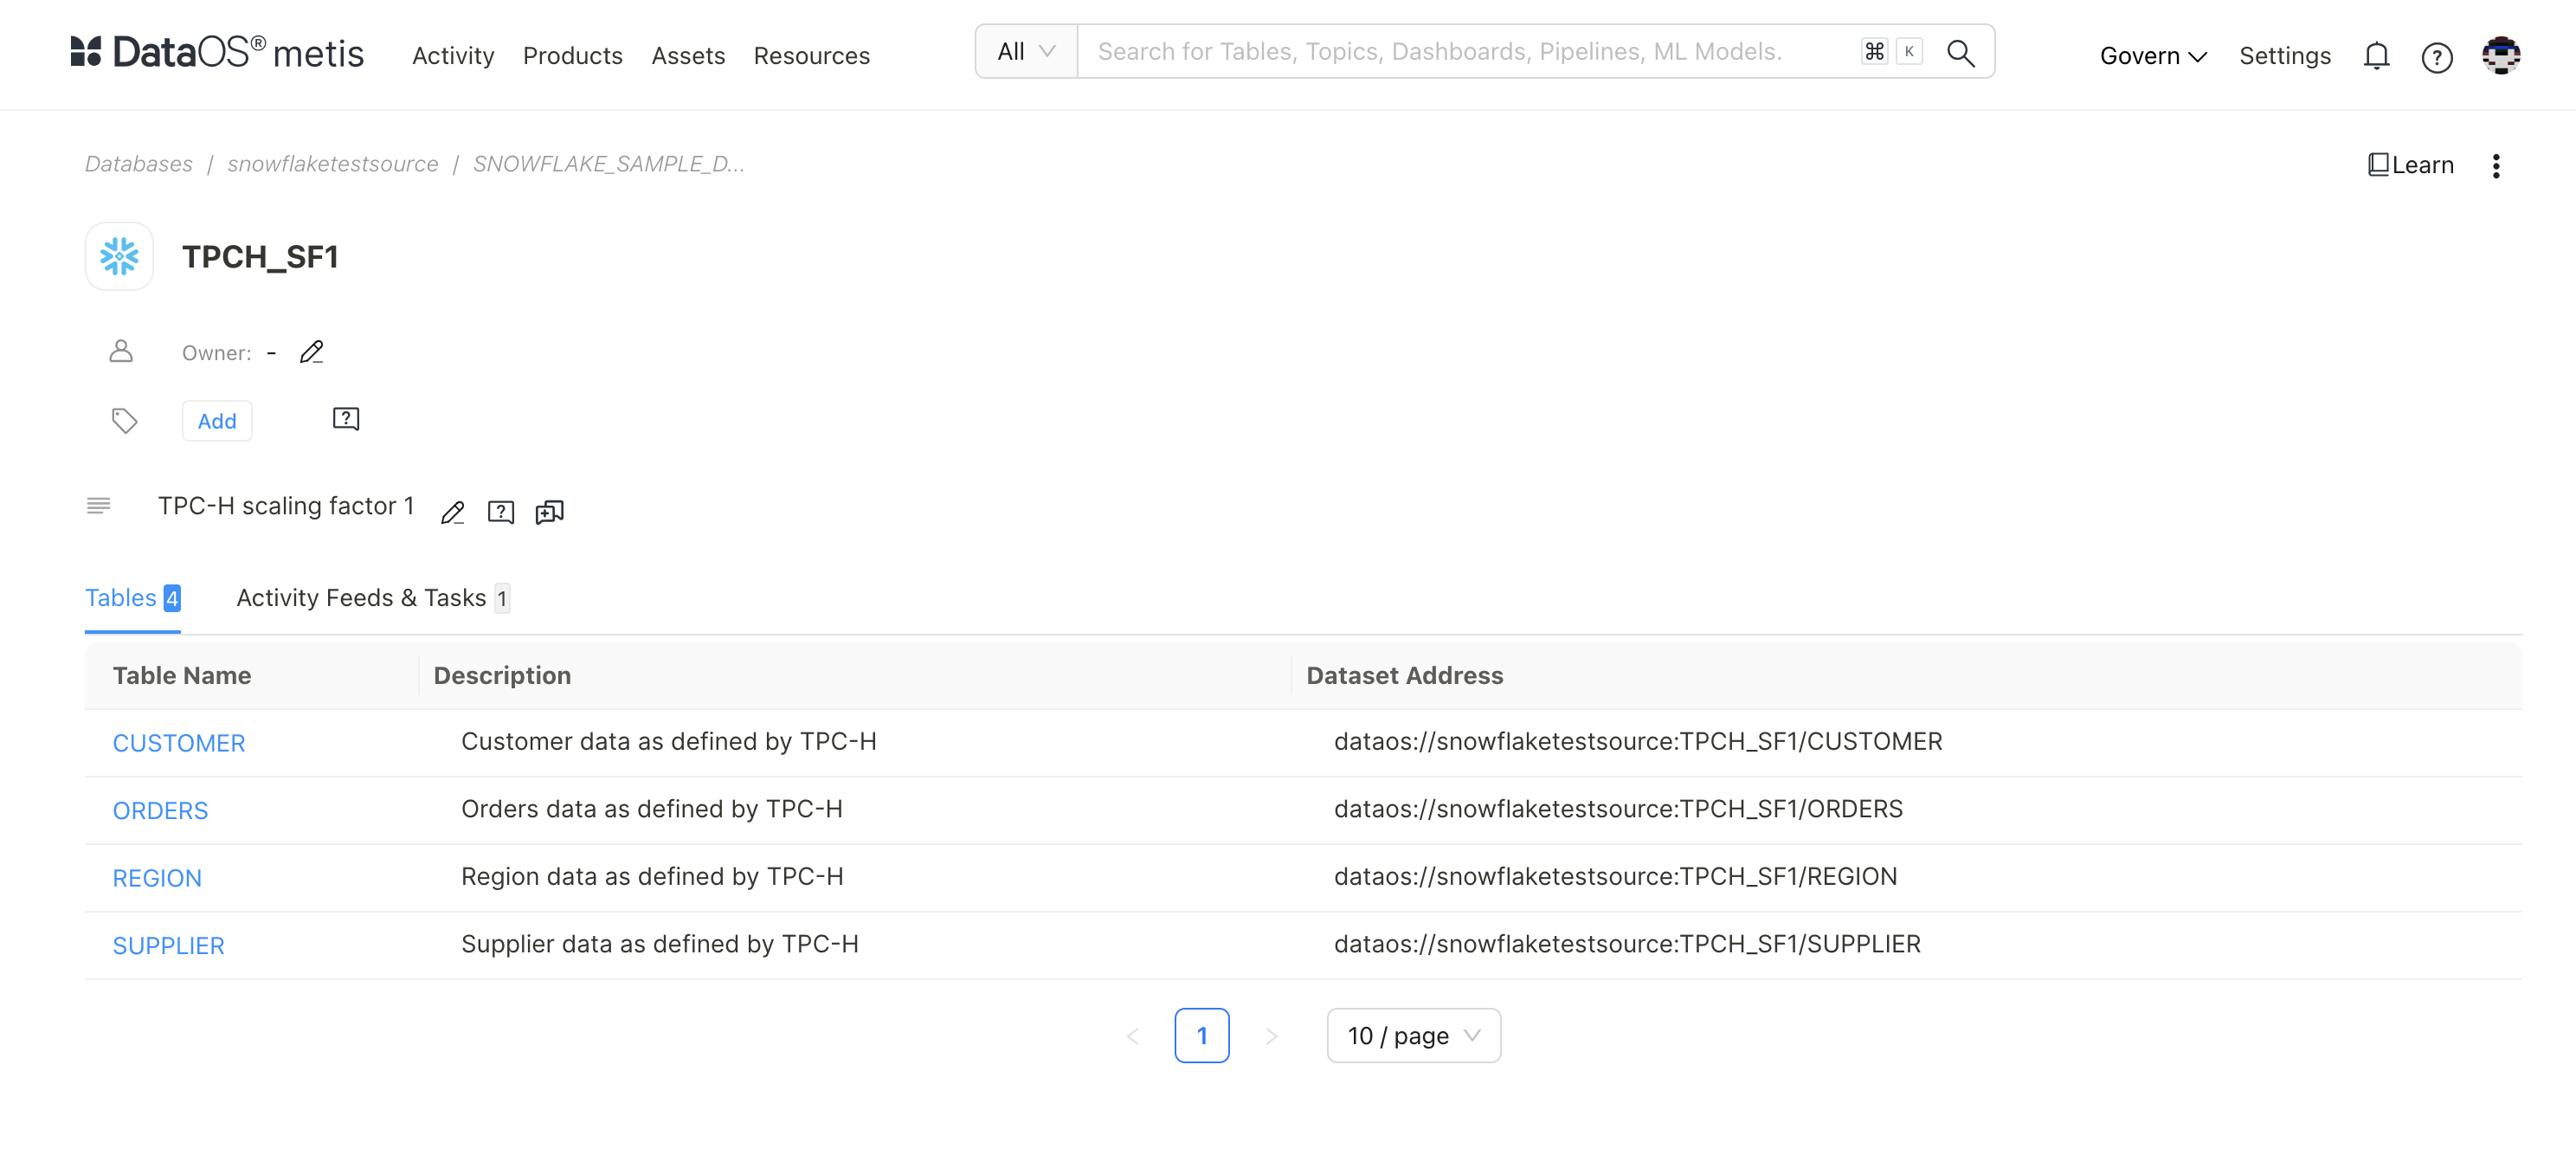
Scanned Tables on Metis using includes Filter Pattern
sourceConfig:
  config:
    schemaFilterPattern:
      includes:
        - TPCH_SF1$
    tableFilterPattern:
      includes:
        - region
        - supplier
        - Customer
        - ORDERS
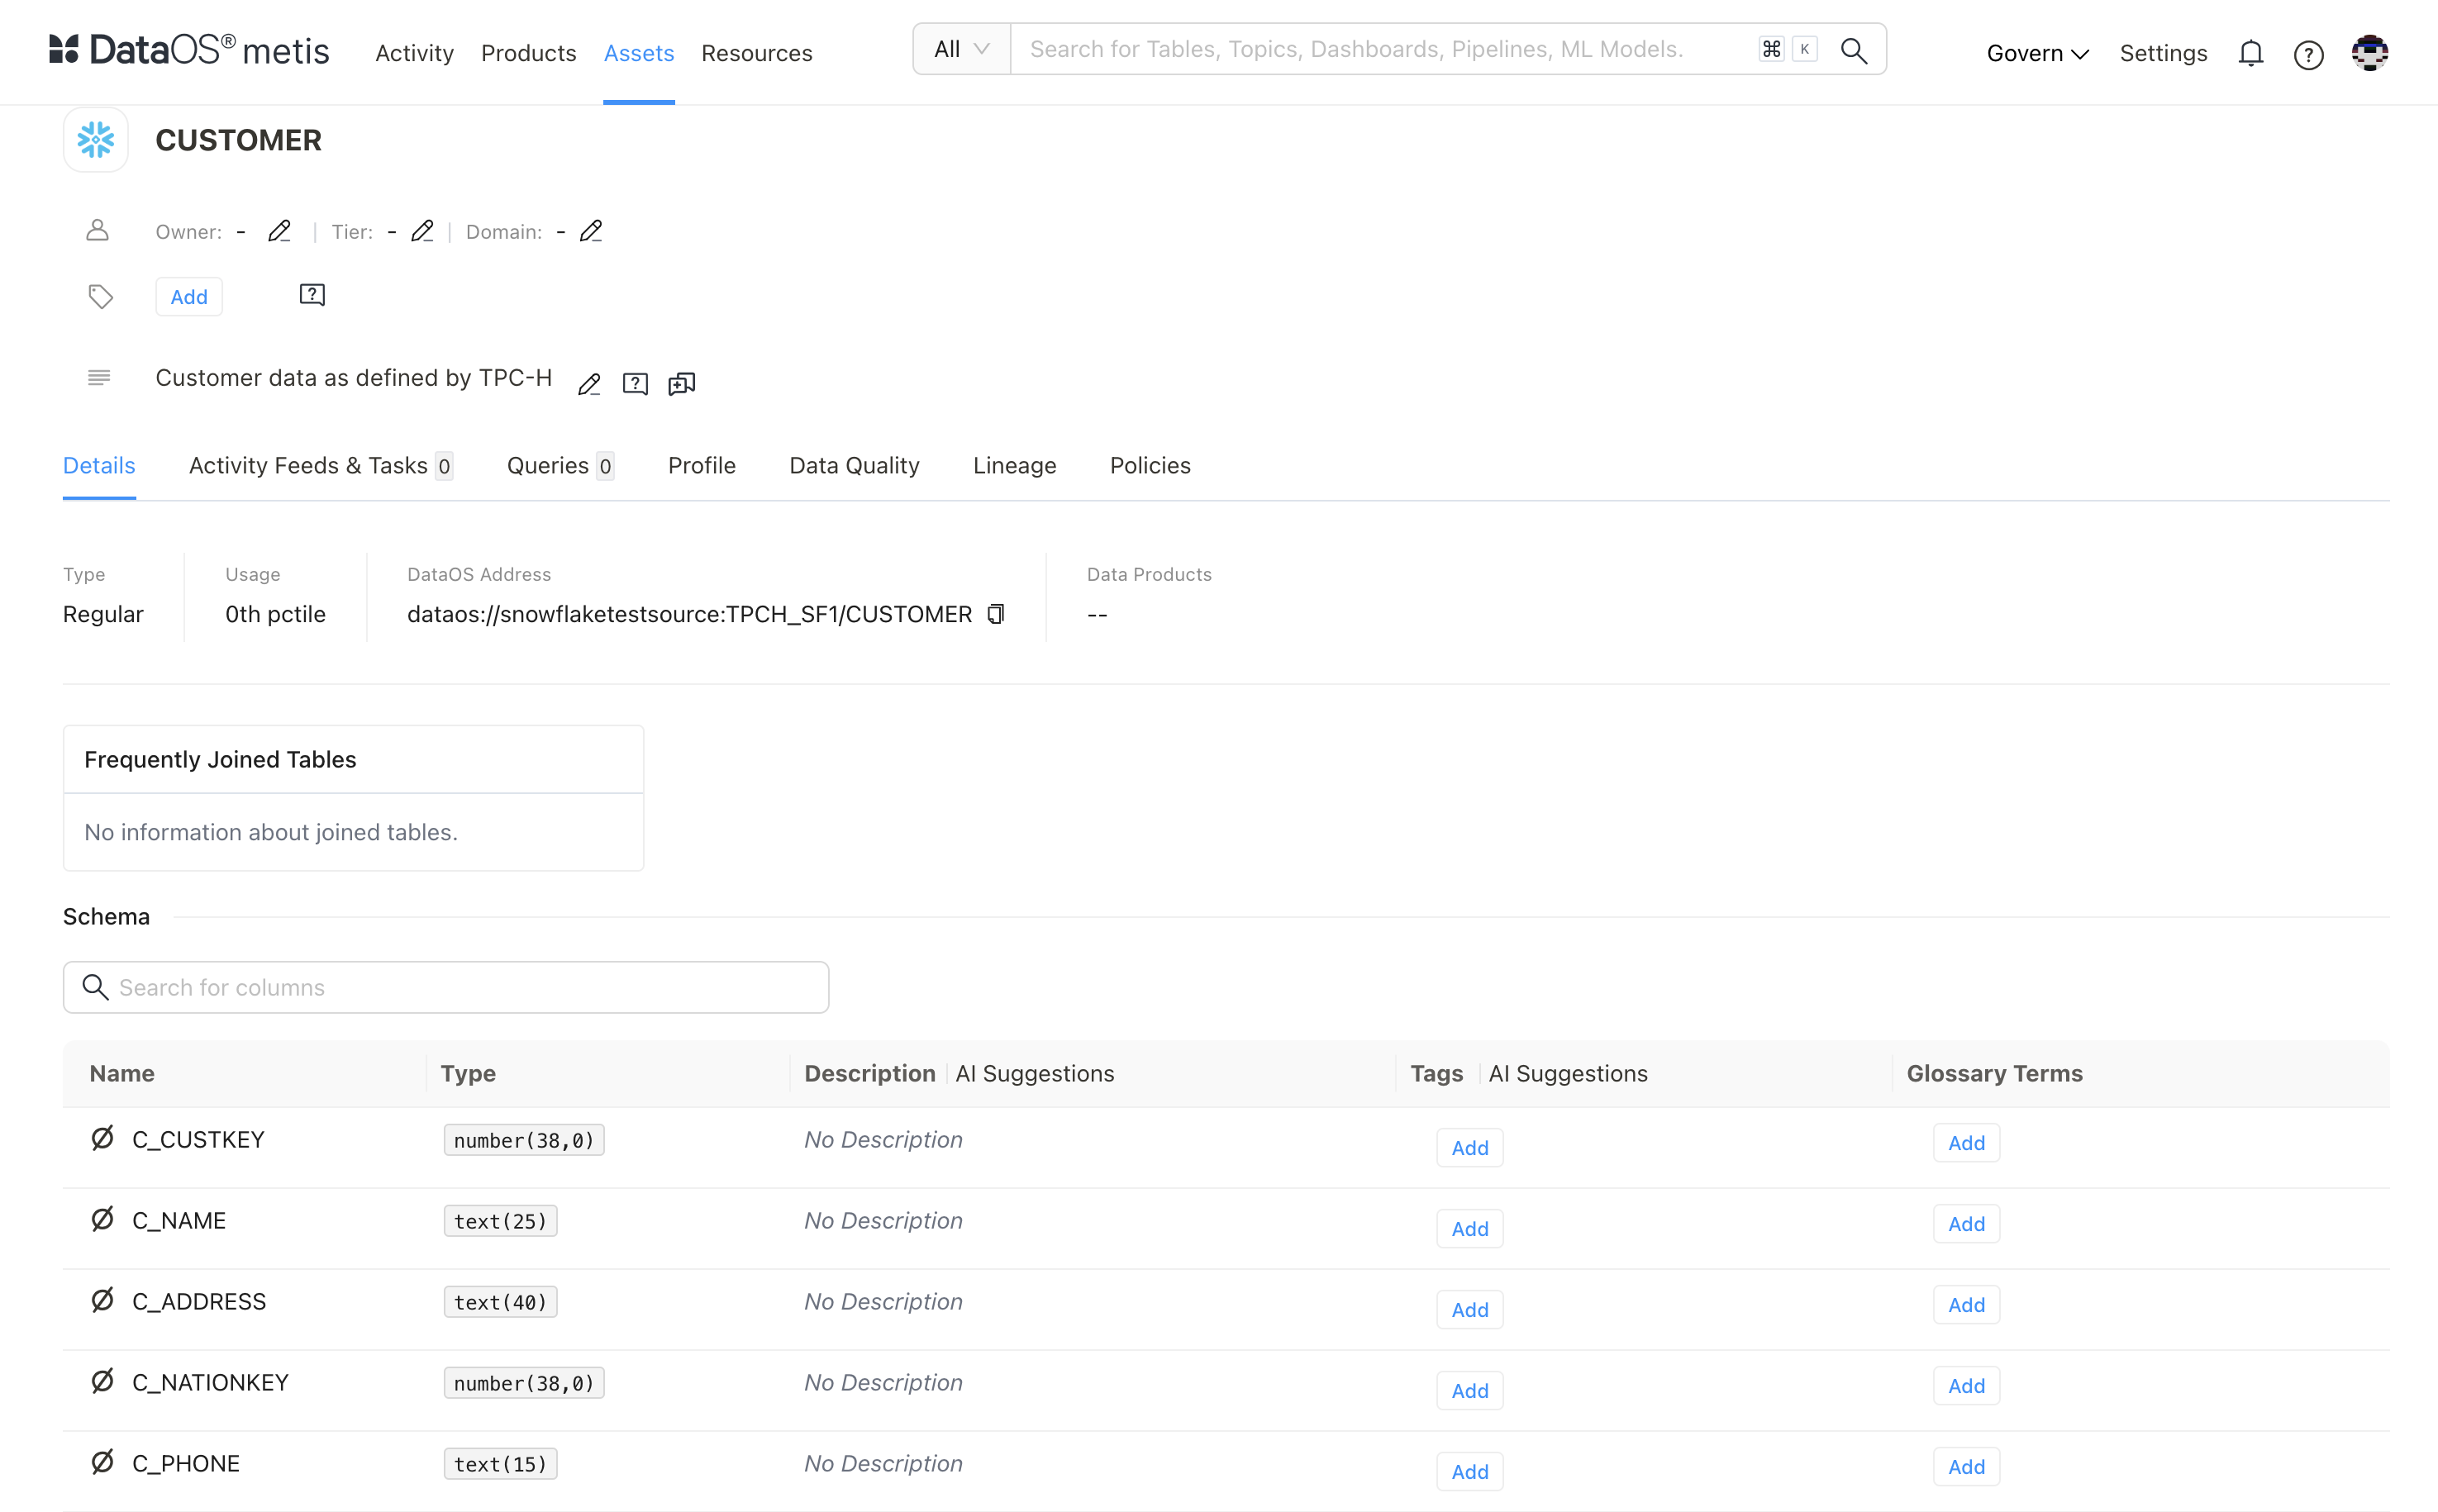
Schema of the Scanned Customer Table (validate with the source)
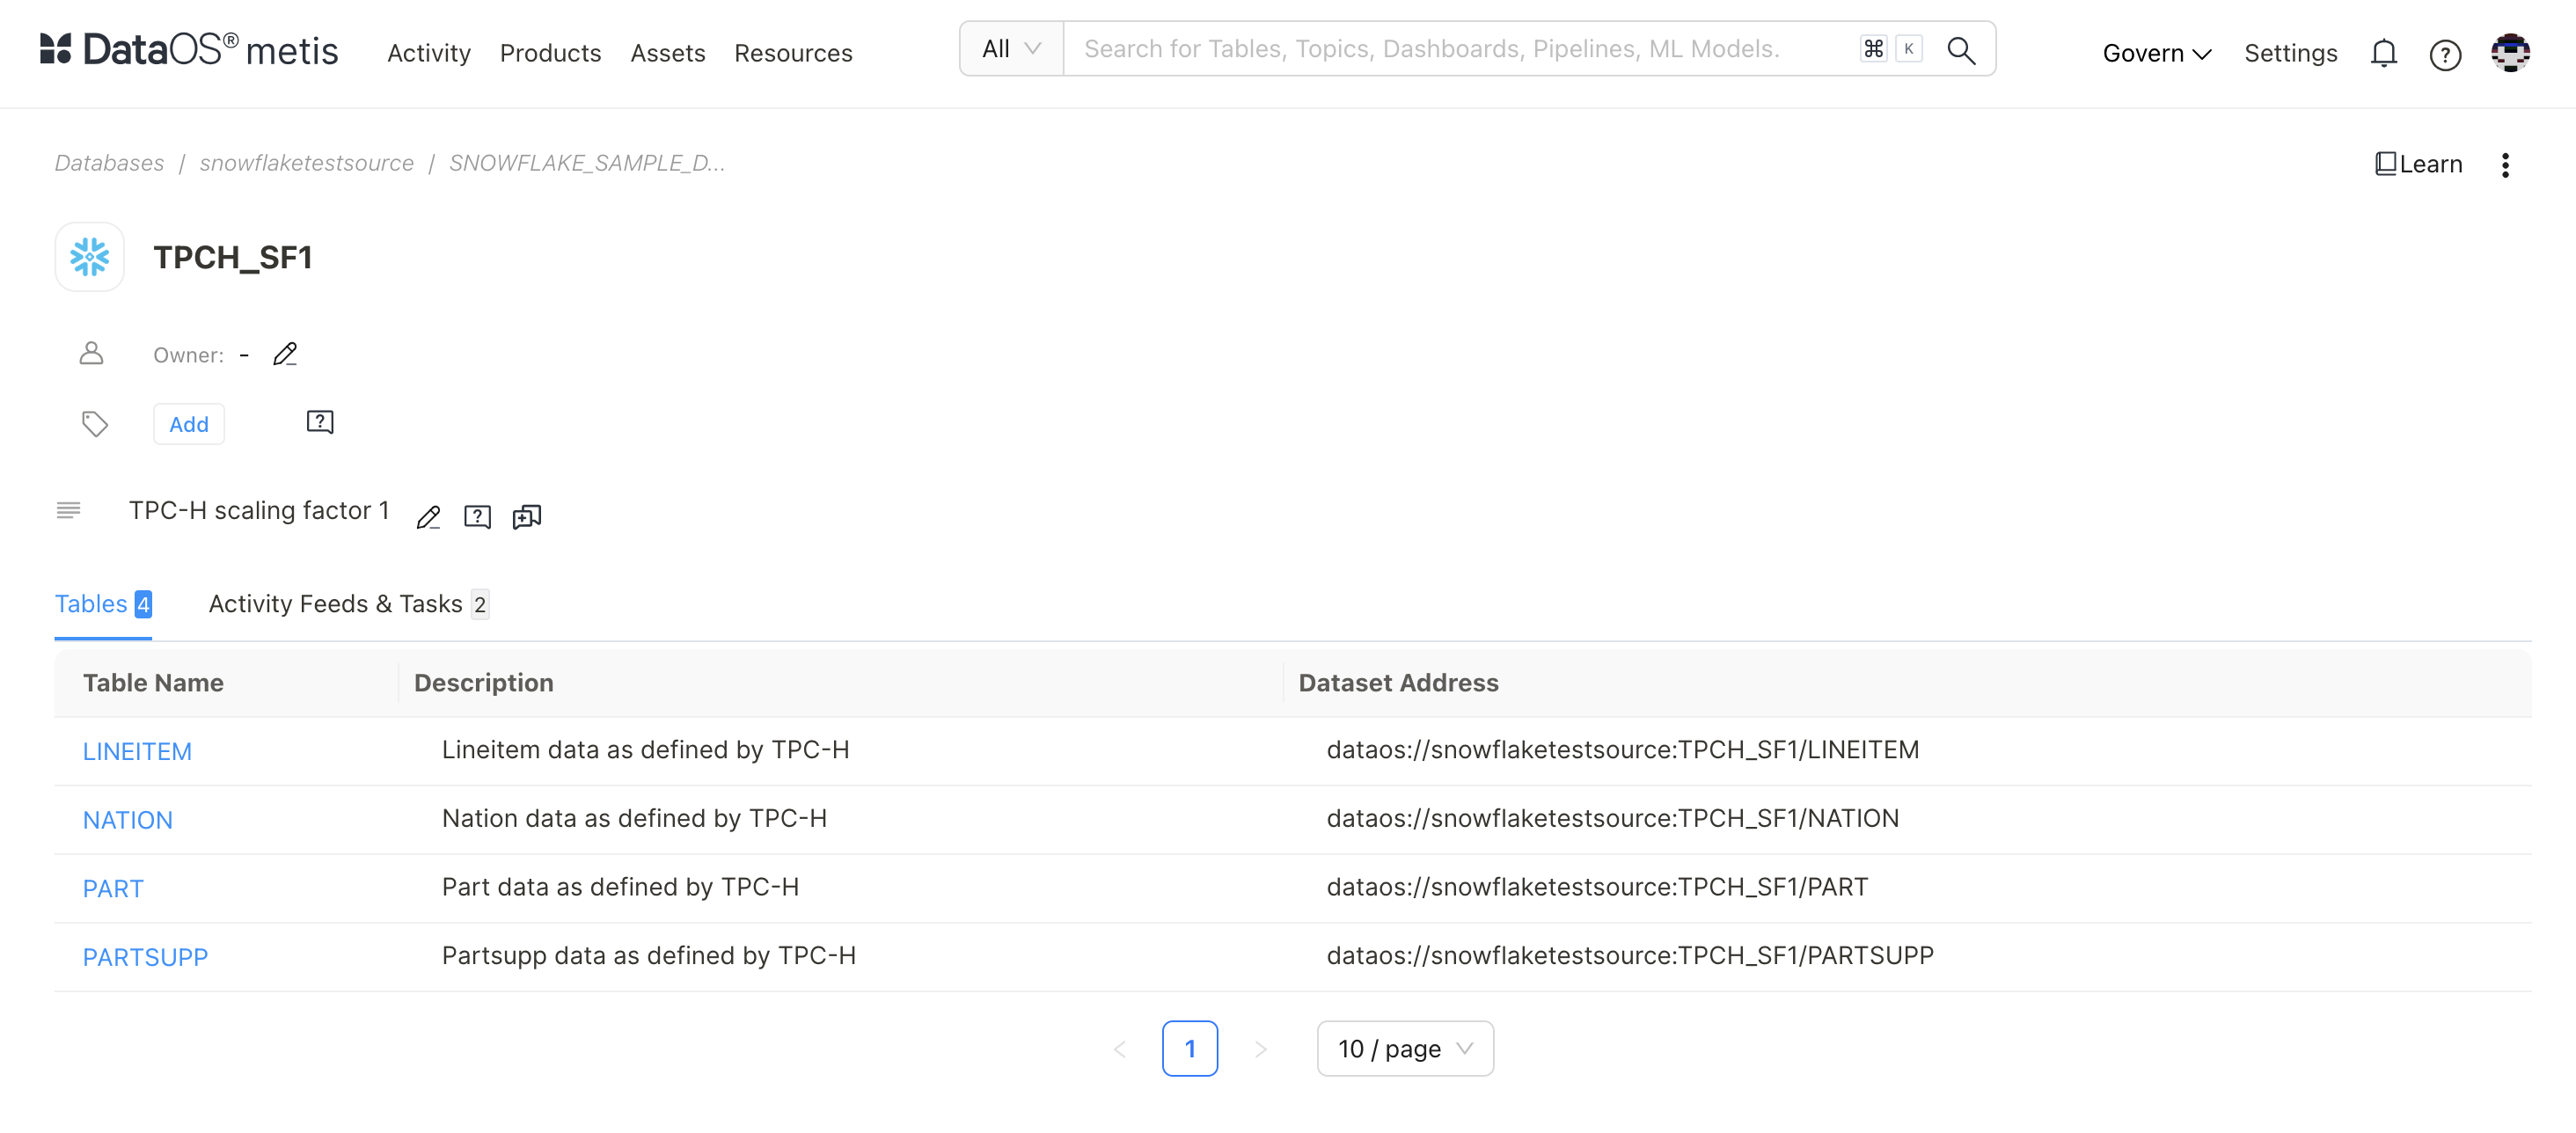
Scanned Tables on Metis using excludes Filter Pattern
sourceConfig:
  config:
    schemaFilterPattern:
      includes:
        - TPCH_SF1$
    tableFilterPattern:
      excludes:
        - region
        - supplier
        - Customer
        - ORDERS
The metadata for all other tables was scanned.
More Examples with regex Filter Pattern
-
To scan all the schemas in the SNOWFLAKE_SAMPLE_DATA database.
-
To scan the table
CUSTOMERwithin any schema present in the SNOWFLAKE_SAMPLE_DATA database. -
To scan the table with the name
CUSTOMERwithin theTPCH_SF100schema present in the SNOWFLAKE_SAMPLE_DATA database.
To know more about how to specify filters in different scenarios, refer to Filter Pattern Examples.
Scheduling Scanner Workflow Run
Scanner workflows are either single-time run or scheduled to run at a specific cadence. To schedule a workflow, you must add the schedule property defining a cron in workflow section.
workflow:
  title: scheduled Scanner Workflow
  schedule:
    cron: '*/2 * * * *'  #every 2 minute  [Minute, Hour, day of the month ,month, dayoftheweek]
    concurrencyPolicy: Allow #Forbid/Replace
    endOn: 2024-11-01T23:40:45Z
    timezone: Asia/Kolkata