Exploring Lens on Catalog (Metis)
Information
Welcome to the quick start guide for exploring your Lens on Catalog! Lens is a DataOS Resource, and upon deployment, its metadata is registered with the Catalog, Metis. This includes information on Lens components, historical runtime data, and operational details. Metis provides an aggregated view of the Lens Resource, facilitating monitoring and troubleshooting of various Lens services when necessary.
We have created an example Lens for analyzing retail data. This Lens lets you gain insights into various aspects of retail operations.
Step 1: Accessing Your Lens Model
-
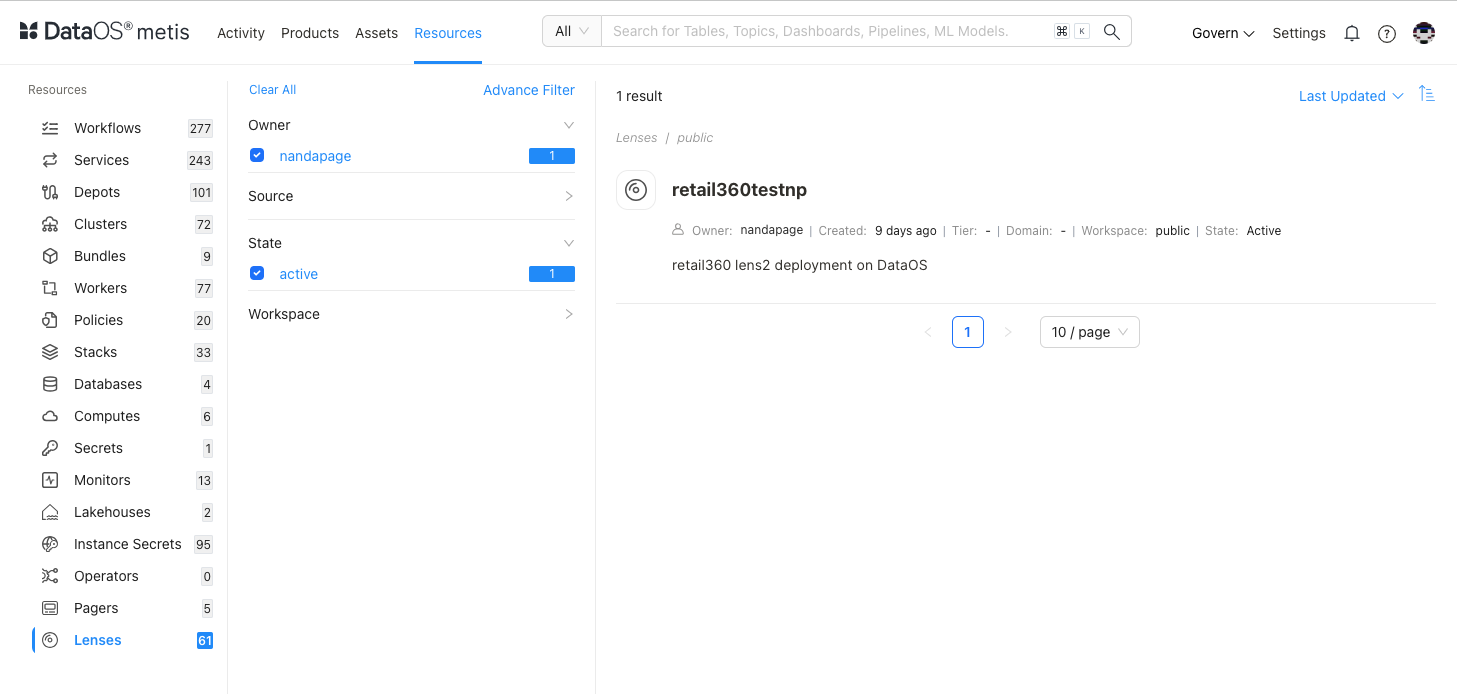
To begin exploring, open the Metis app and navigate to Resources > Lens. This section lists all the deployed Lenses, each designed to give detailed insights into specific areas of the business.
-
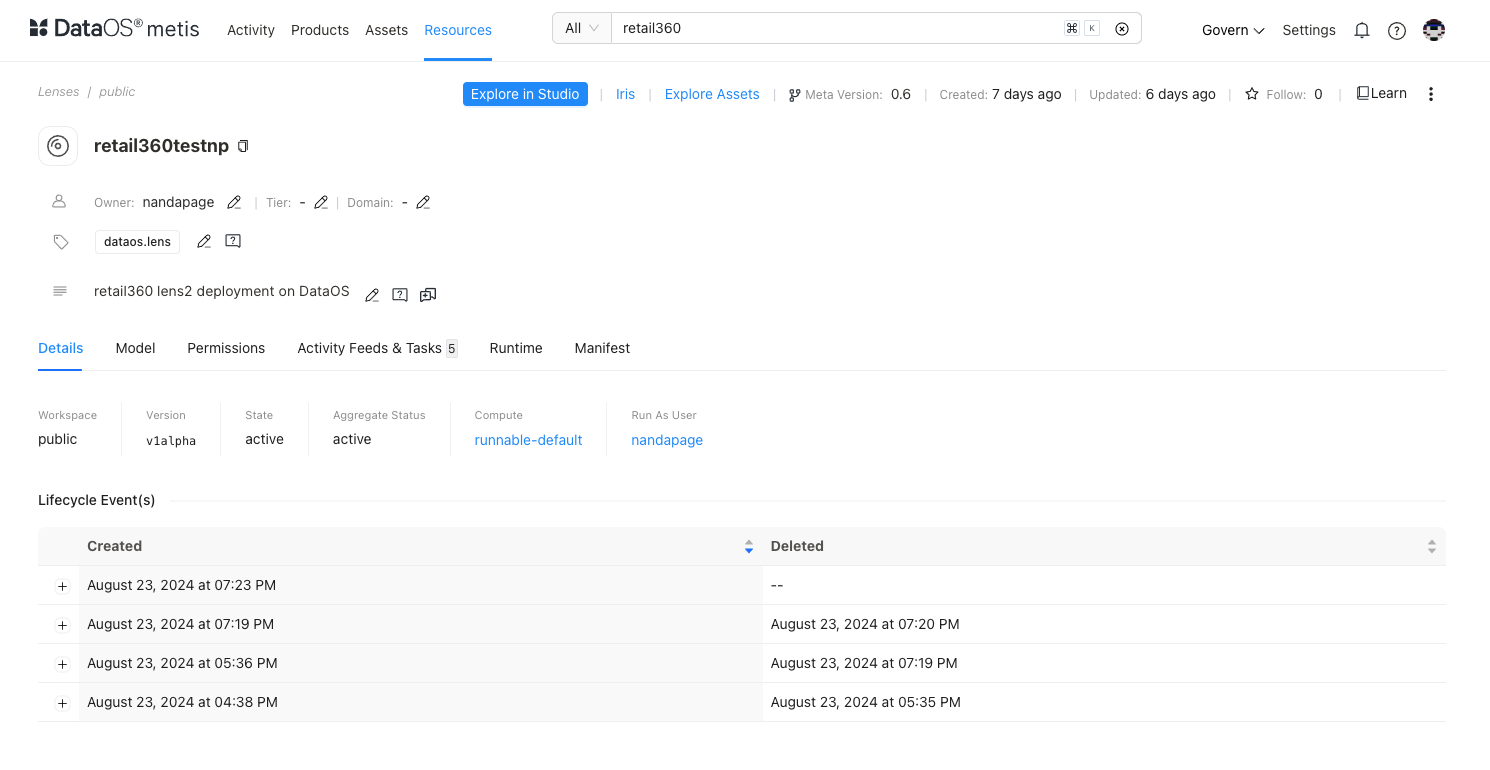
Once you locate the example retail data Lens, click on its name. This action will take you to a detailed view which includes essential information such as the Lens's name, owner, version, and its current state. You can explore various tabs. Each tab provides insights into Lens model, permissions, activity logs, and lifecycle events, including creation and deletion timestamps.
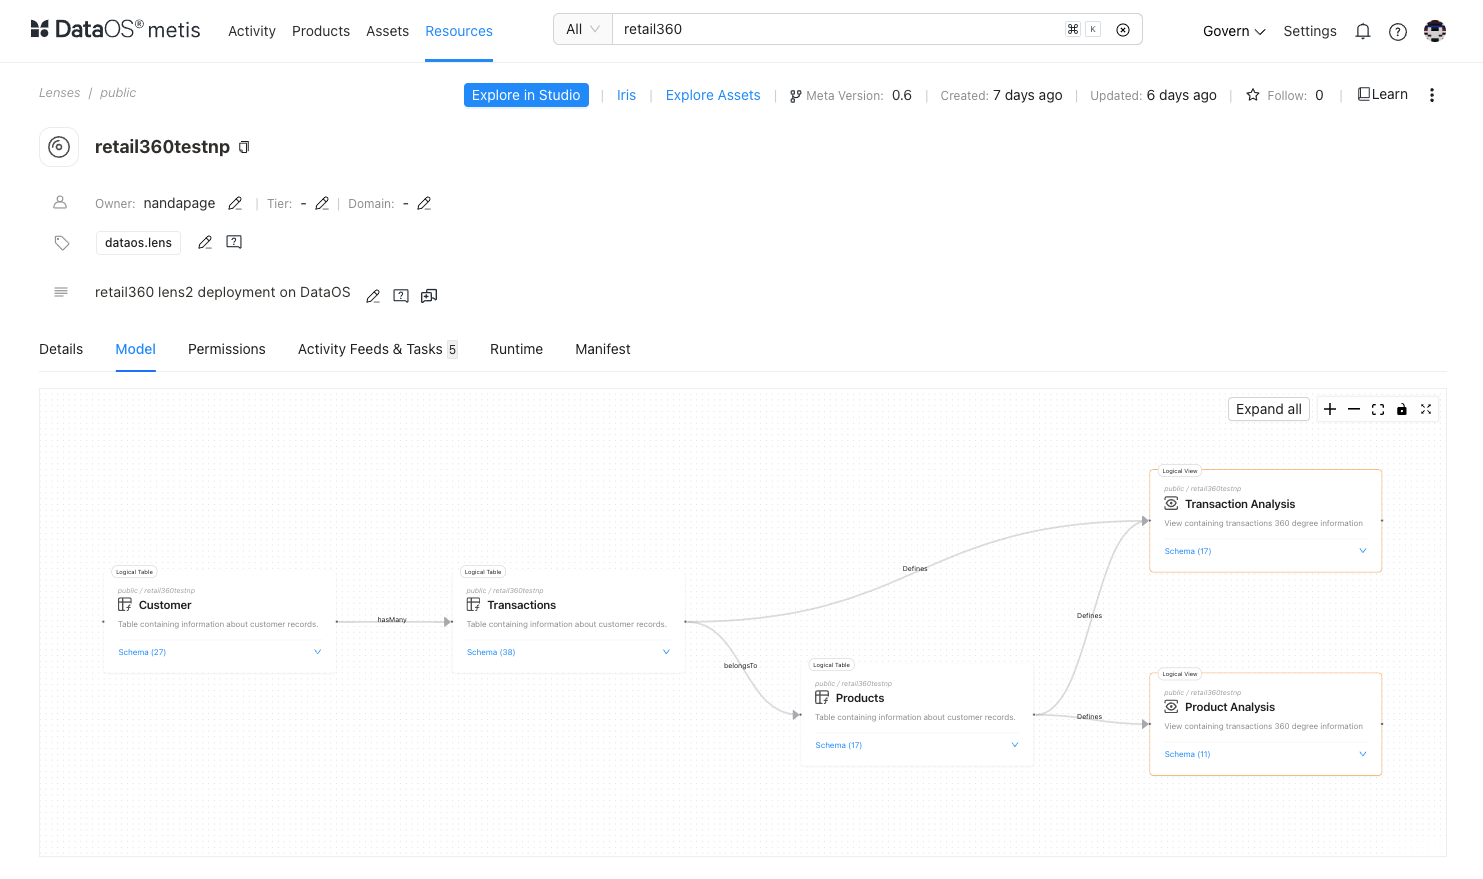
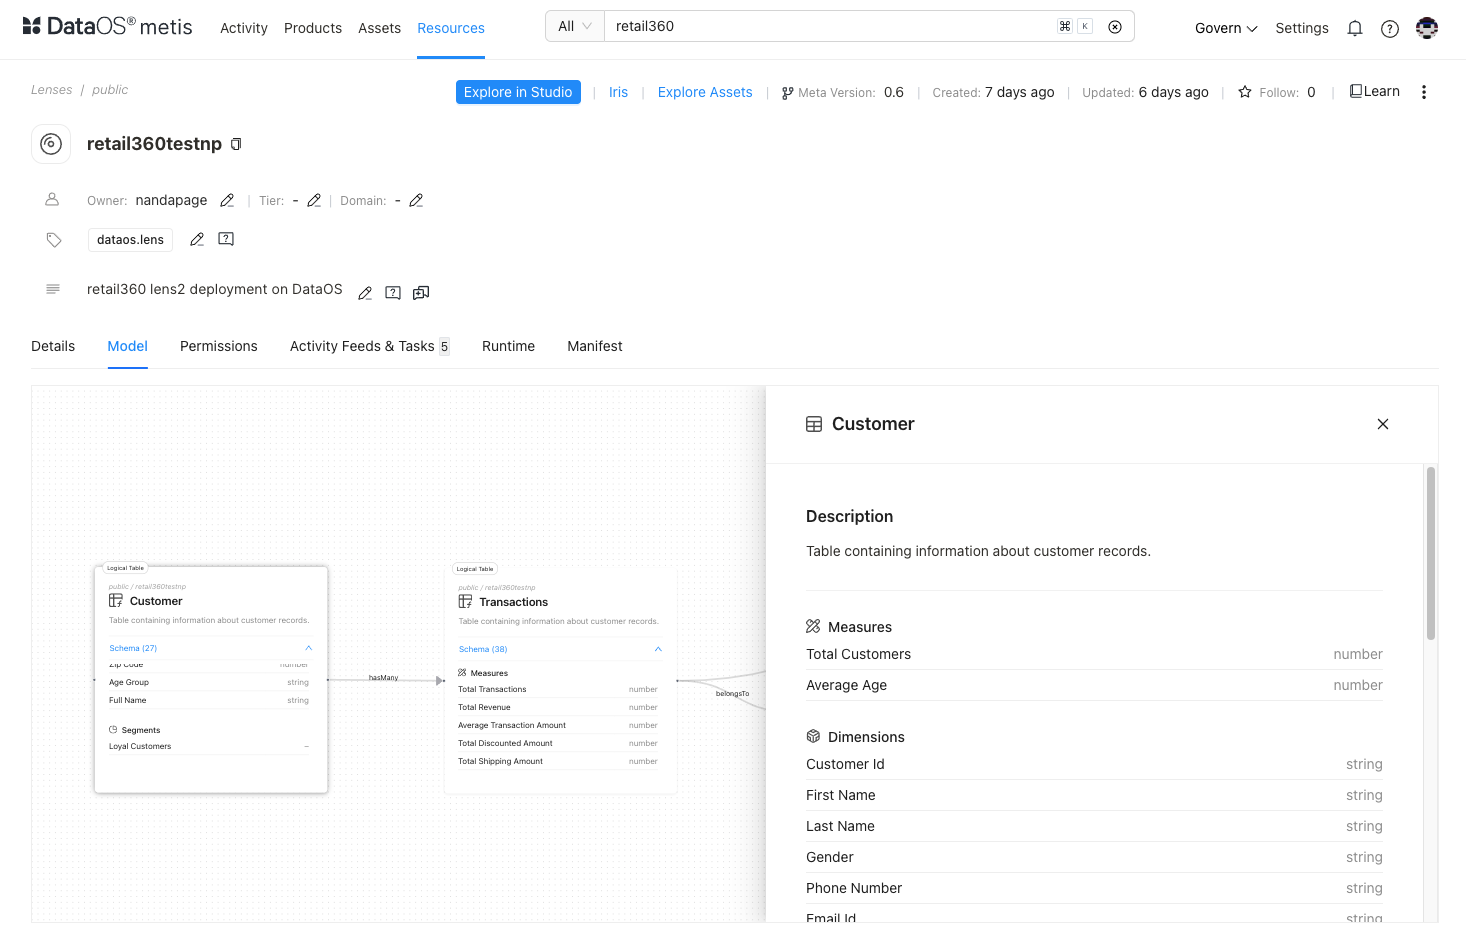
Step 2: Exploring the Lens Model
Check out the Lens model to see the structure and connections within your data. This view highlights the logical tables and business views, helping you visualize how data relationships are formed and how they drive the tracking of important metrics.
- Understand Relationships: View how different tables/views are connected.
- Navigate Through Tables: Click on different logical tables to explore their content and how they relate to one another.
- Identify Key Metrics: Focus on key metrics that drive your retail insights.
Step 3: Analyzing Logical Tables and Fields
Dive deeper into the logical tables to understand the specific fields available for analysis. Each field represents a piece of data that you can use to build queries for insights.
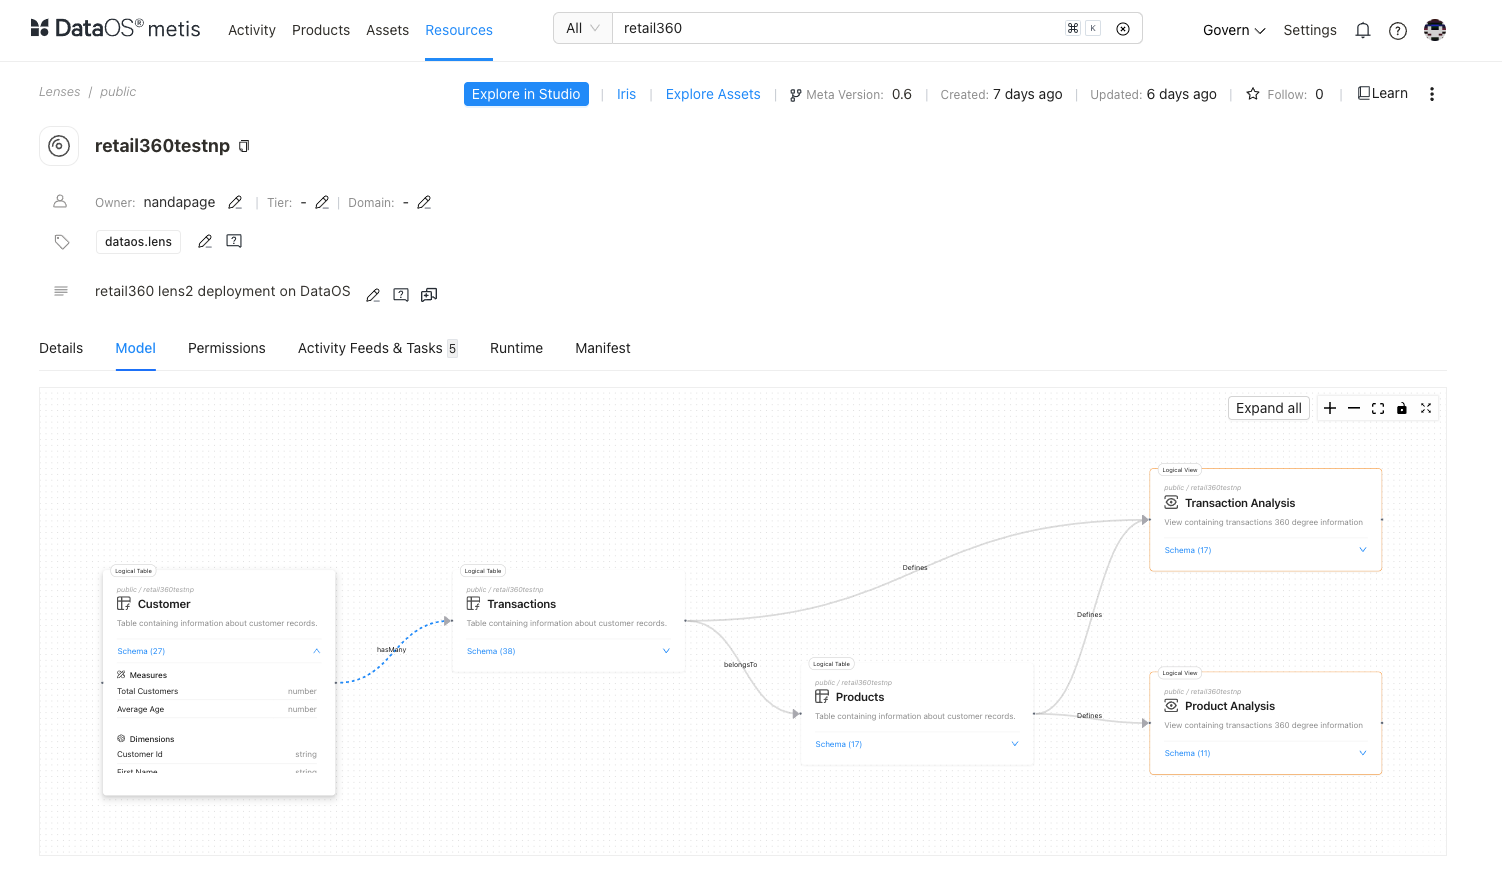
Check table dimensions, measures, segmentation.
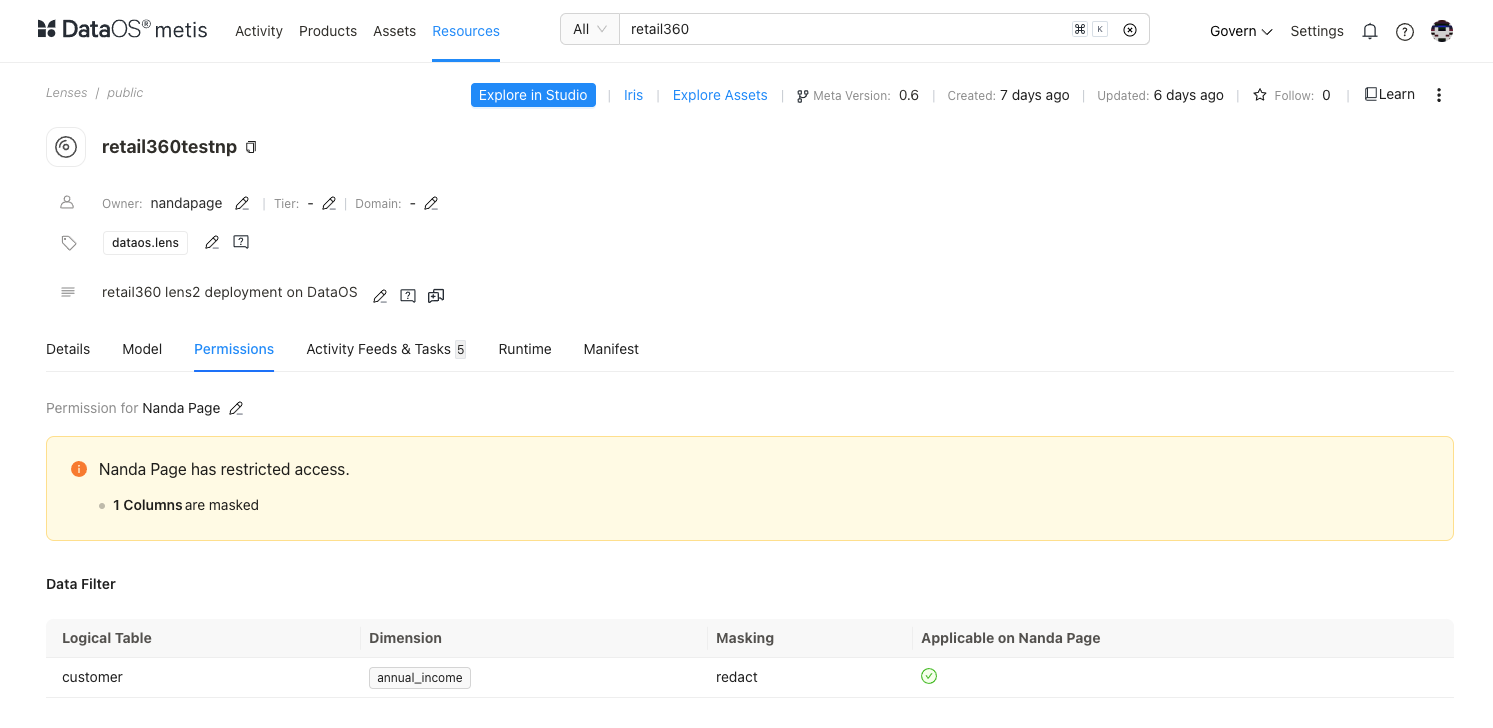
Step 4: Viewing Lens Permissions
Ensuring the right people have access to the right data is crucial. In the Lens permissions section, you can view permissions. Permissions are given for user groups, ensuring that data is secure and only accessible to authorized individuals.
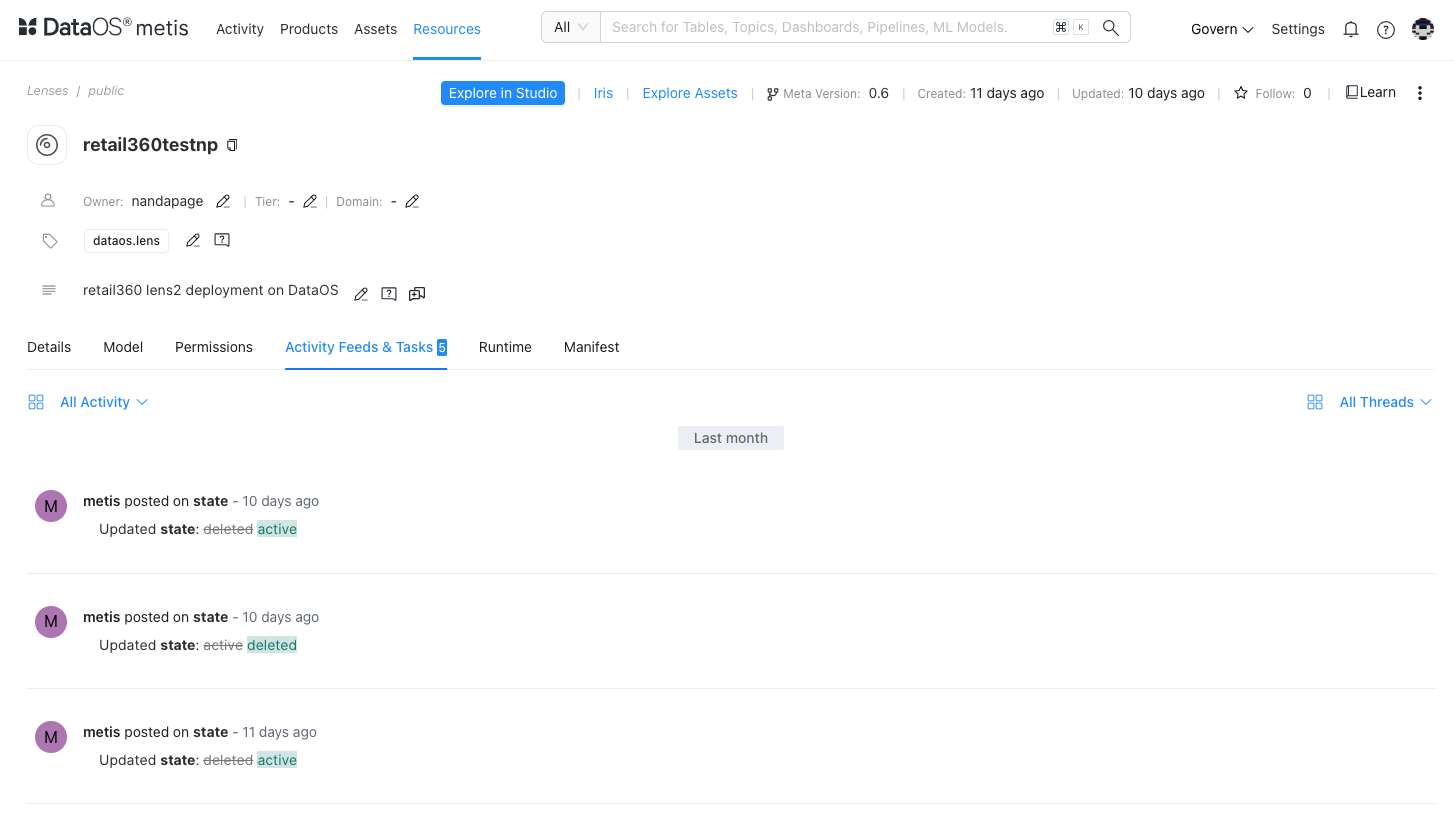
Step 5: Reviewing Lens Activity and Updates
This option lets you see summaries of data change events around your Lens whenever it is modified. You can view the latest updates, conversations, and tasks assigned in the ‘All Activity’ section.
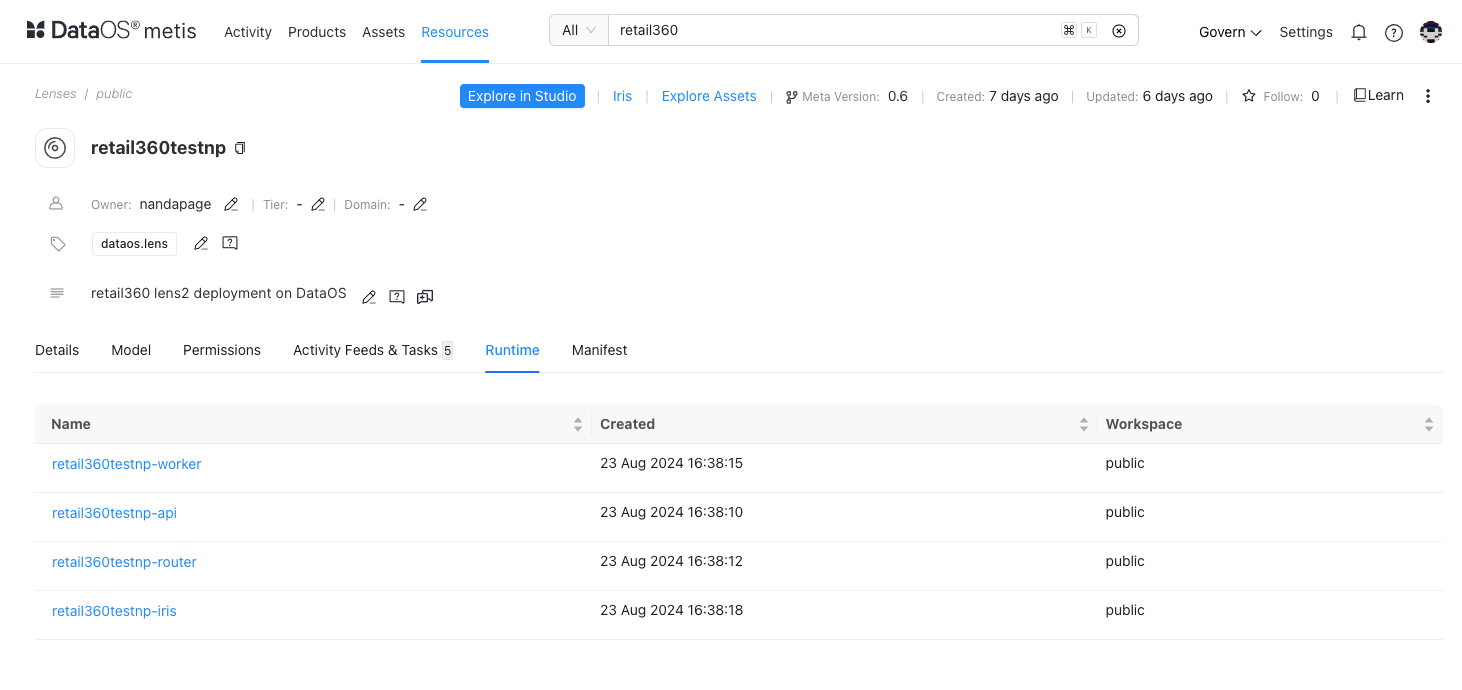
Step 6: Examining Runtime and Performance
For those who want to dive deeper into the operational aspects, the runtime section provides insights into the runtime information of various Lens Services. You can access runtime logs for troubleshooting and analysis.
A typical deployment of a Lens Resource includes the following components:
- API Instances: These handle incoming requests and execute business logic. Configured in the Lens manifest, they query raw data from databases. They have access to both data and model schema.
- Workers: Created by the Worker section in the Lens manifest, these Workers process subqueries from the Router and interact with distributed storage for data operations. Workers communicate through the Router.
- Router: This service, defined in the Lens manifest, manages queries between API instances and Workers, handles metadata, and plans query distribution. Lens only interacts with the Router.
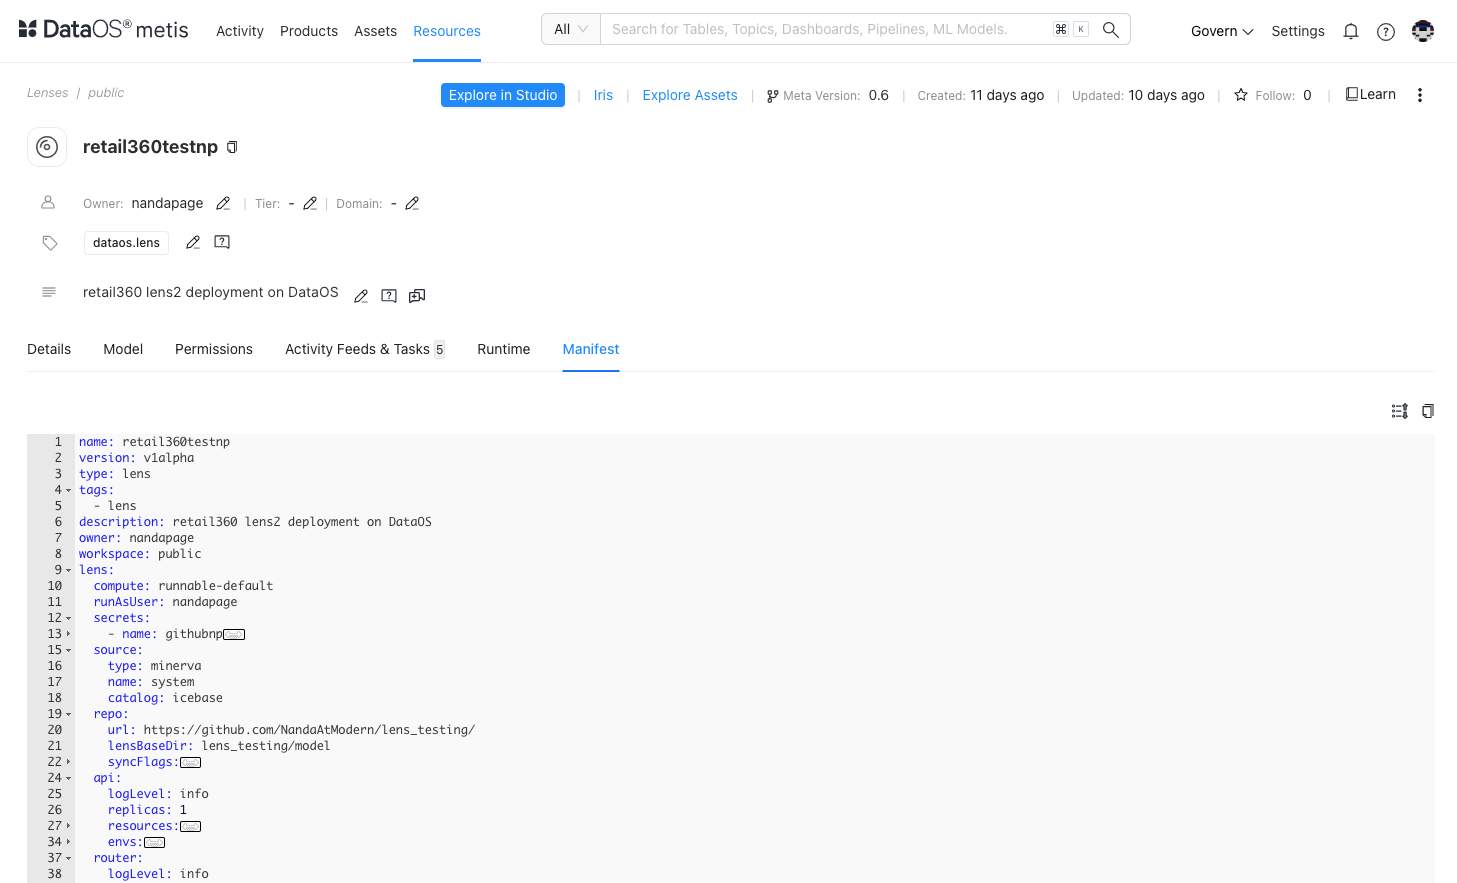
Step 7: Lens Manifest
This tab displays details about the manifest, a YAML file that outlines your Lens model’s configuration. It includes metadata, service settings (such as log levels, resource requests and limits, and replicas), compute settings, source connection type, and repository URL with the base directory for Lens models.
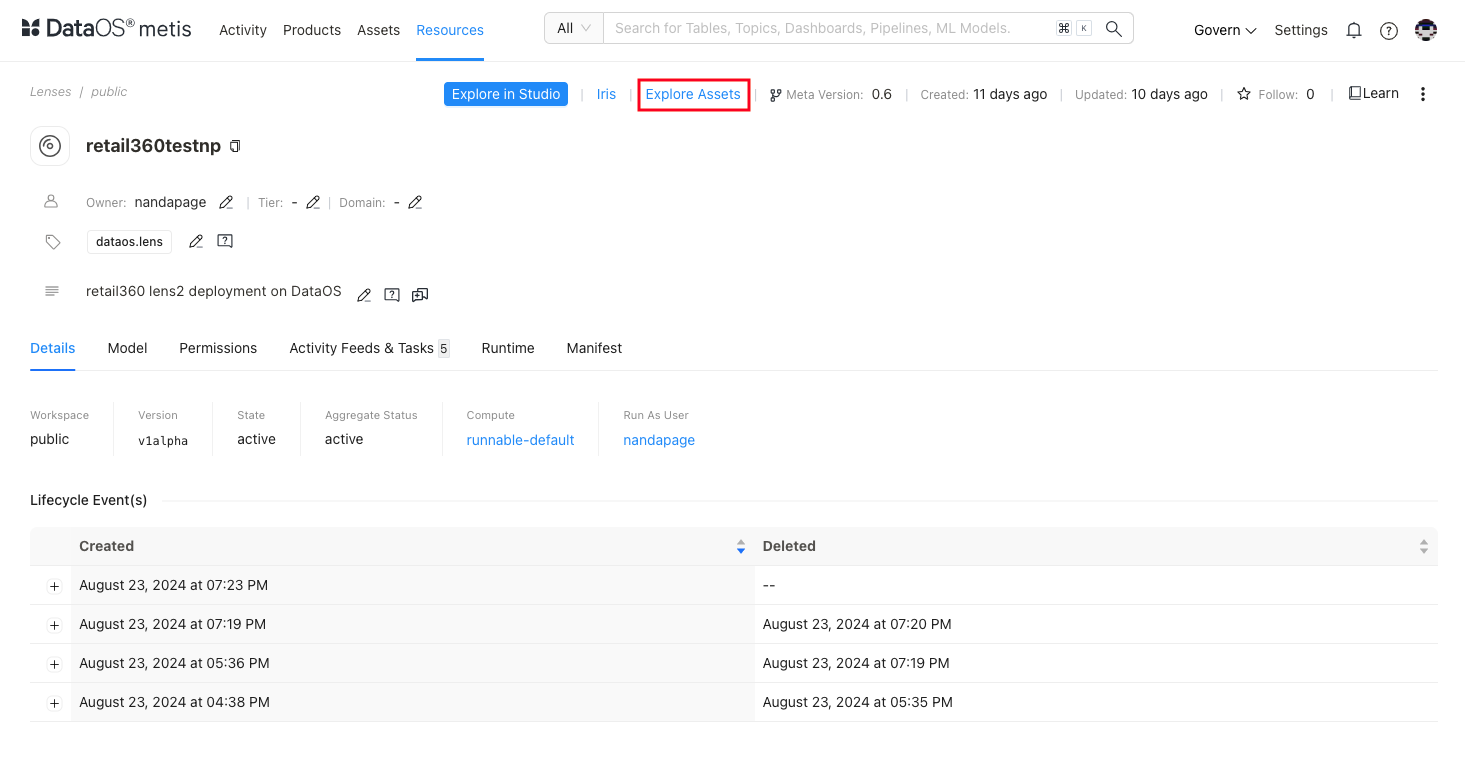
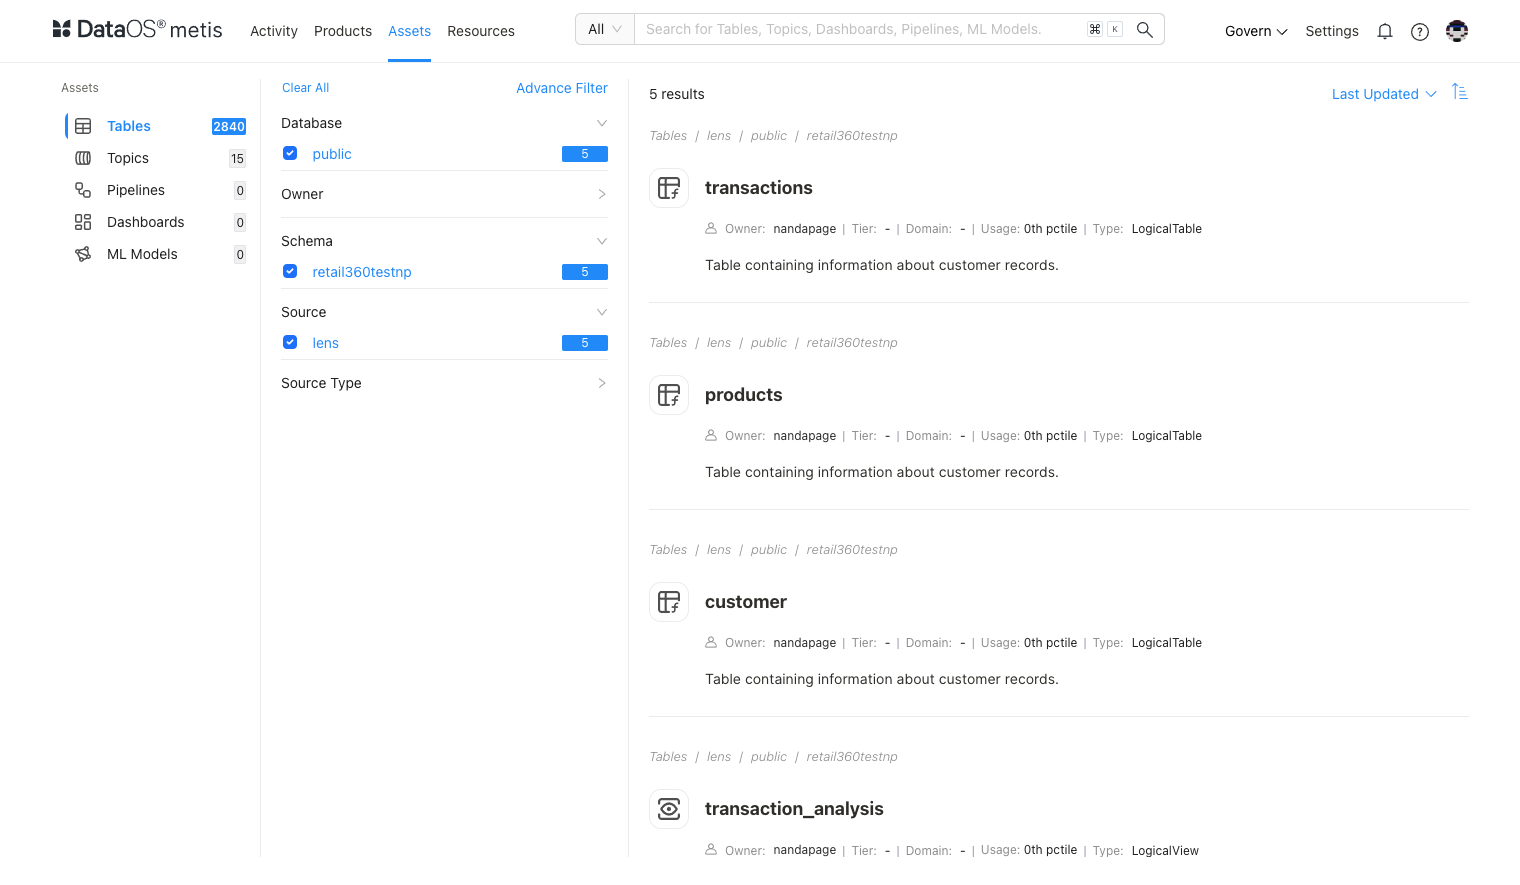
Step 8: Exploring Assets
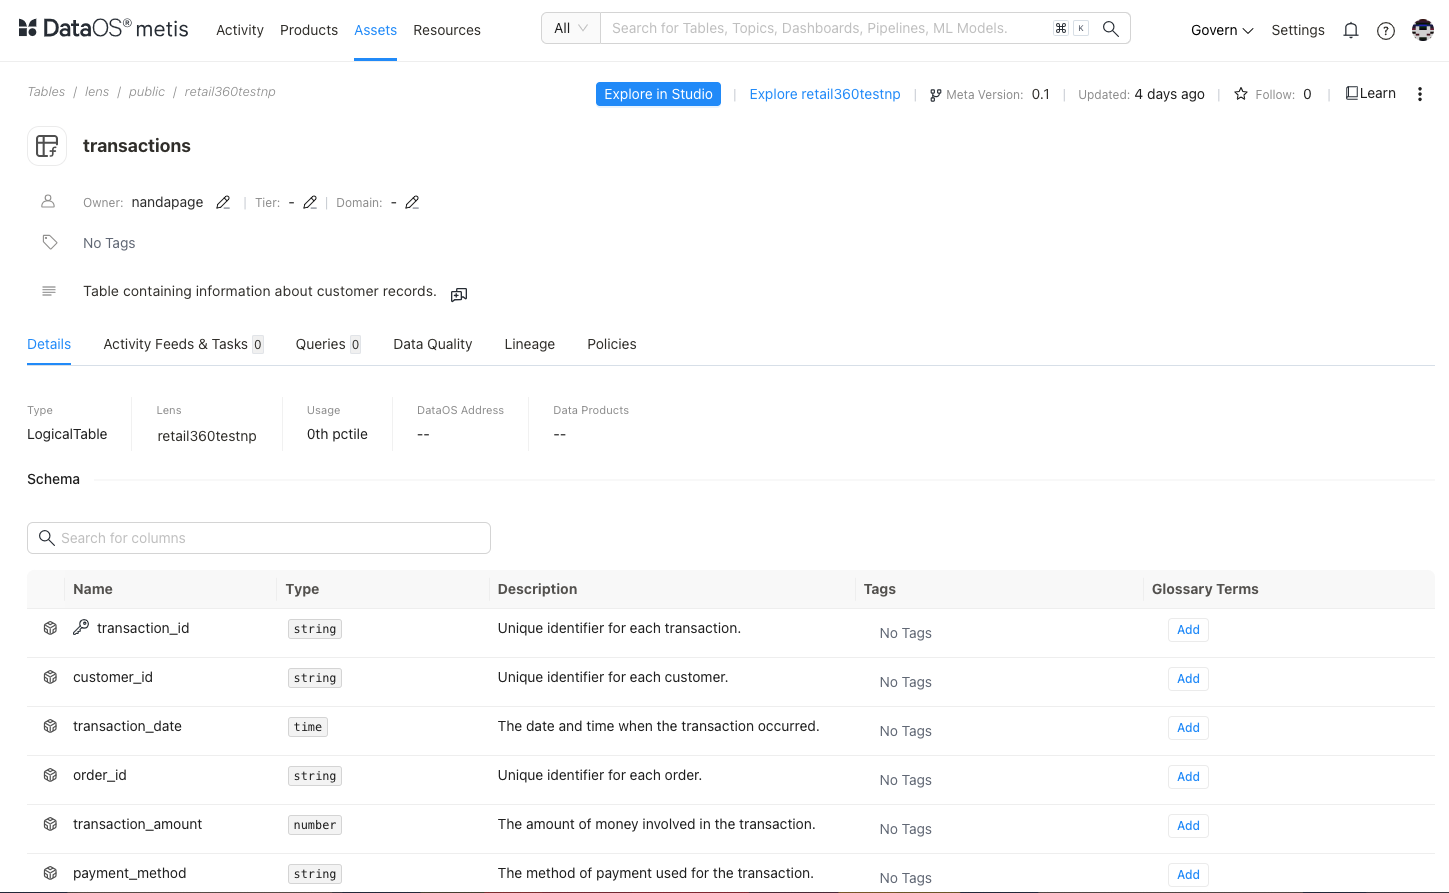
This option allows you to explore all the logical tables and business views connected to the Lens. You can view the source physical table that the logical table is derived from and the business view created using that logical table.
-
Click on Explore Assets. You’ll find a comprehensive list of all logical tables and business views associated with your Lens.
-
Click on the specific logical table/view to see its details.
-
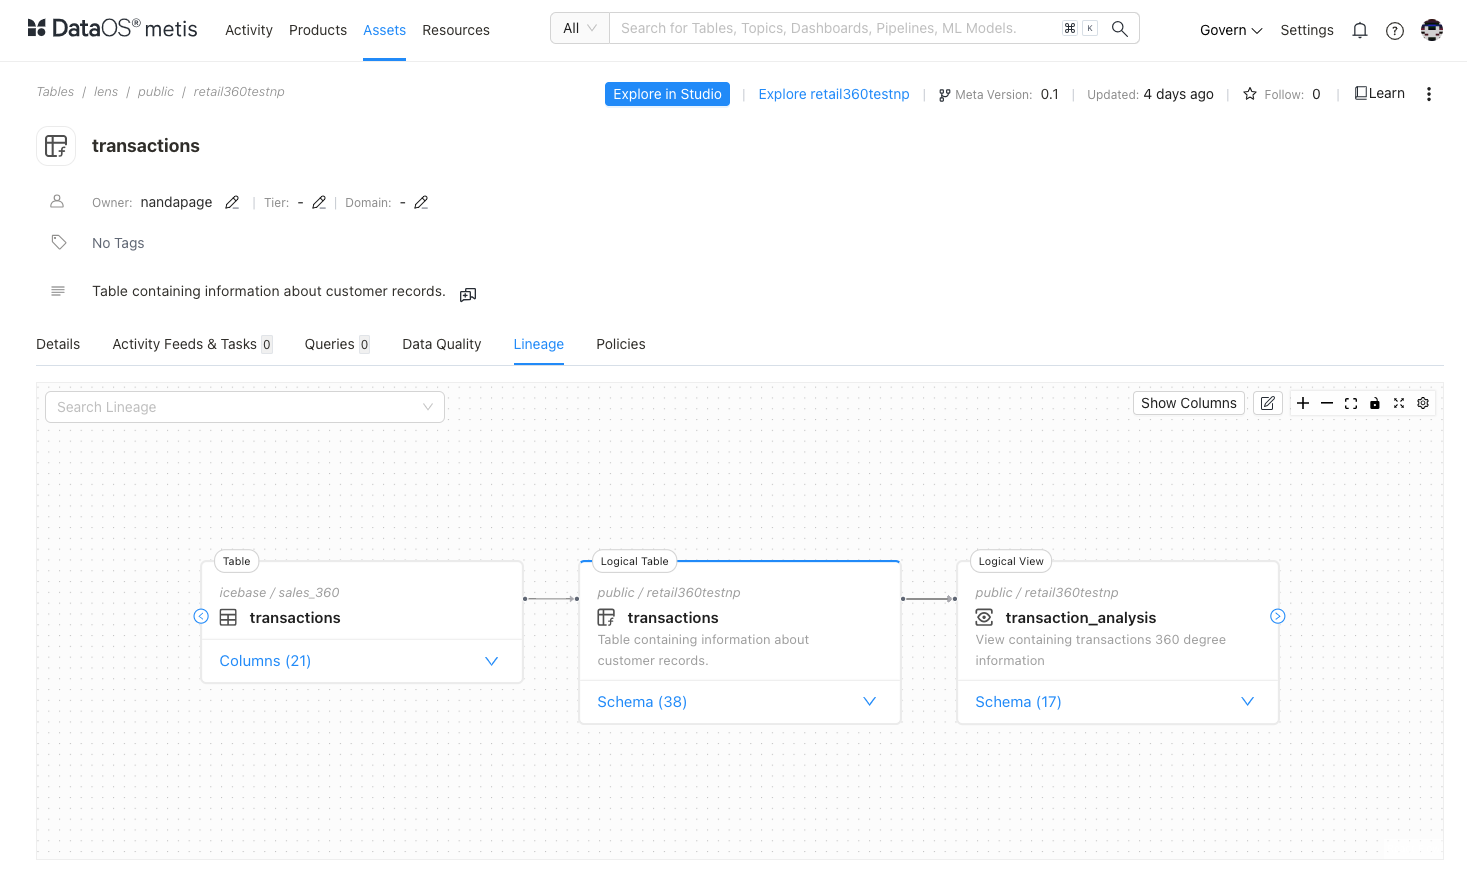
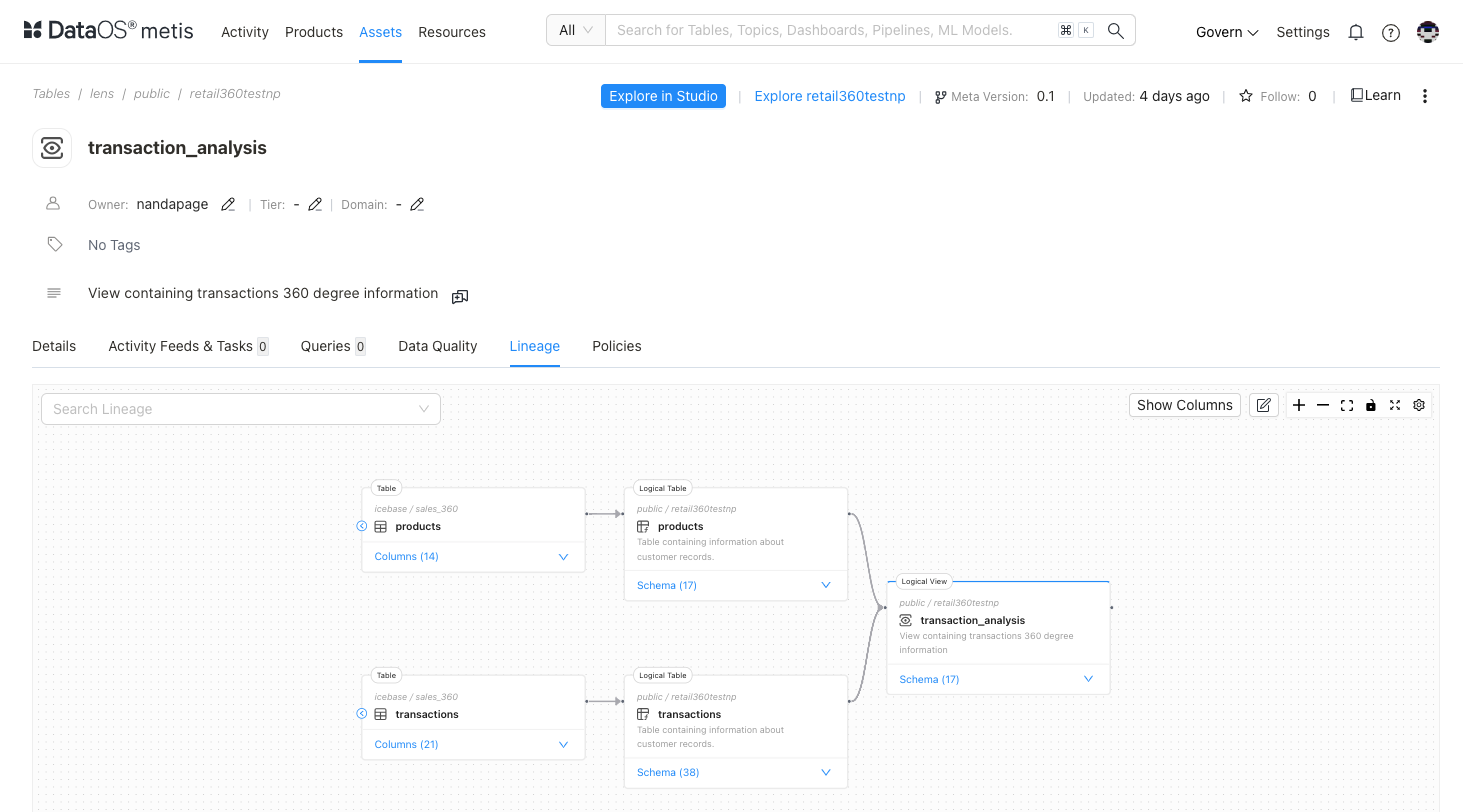
Click on the lineage to understand its journey. This feature allows you to trace the complete path of each logical table and business view, starting from the source physical tables. You can follow how data from these physical tables is transformed and utilized to create downstream business views, offering a clear picture of data integration and its flow within the Lens.
Lineage of Logical Table defined in Lens
Lineage of Logical Business View defined in Lens
Next Steps
To examine the data model from diverse perspectives, explore your Lens in the Studio. Studio makes it easy to analyze data across multiple dimensions, enabling you to slice and dice information to reveal valuable insights.