Deploying Your Data Model
Information
Ready to deploy your Lens model on DataOS? This quick guide will walk you through the process, ensuring a smooth and secure deployment. Let's get your Lens Resource up and running in no time!
Key Steps
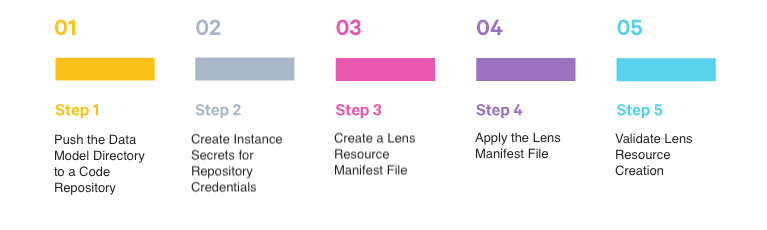
Follow the below steps to deploy your data model in production.
Pre-requisites
Before you begin, ensure you have the following:
- A directory containing your data model.
- Access to a hosted code repository (like Bitbucket, GitHub, AWS CodeCommit).
- Operator-level access permissions.
Step 1: Push the Data Model Directory to a Code Repository
First, push your local Lens model directory to a preferred hosted code repository.
Need help? Check out the relevant guides for Bitbucket, GitHub, or AWS CodeCommit.
Important Update: Secrets are optional for public repositories. If your repository is public, you can skip Step 2 entirely and go directly to Step 3. If it's private, continue to Step 2.
Step 2: Create Instance Secrets for Repository Credentials
For private repositories, you’ll need to create an Instance Secret to secure your credentials:
-
Create an Instance Secret manifest file:
Define your Instance Secret in a manifest file. Below is a YAML template for GitHub:
# RESOURCE META SECTION name: githubrnp # Secret Resource name (mandatory) version: v1 # Secret manifest version (mandatory) type: instance-secret # Type of Resource (mandatory) description: github read secrets for code repository layer: user # DataOS Layer (optional) owner: ${ownername} # INSTANCE SECRET-SPECIFIC SECTION instance-secret: type: key-value acl: r data: # Data (mandatory) GITSYNC_USERNAME: ${USERNAME} GITSYNC_PASSWORD: ${PASSWORD} -
Apply the Instance Secret manifest:
Deploy the manifest using the
applycommand. Replace${manifest-file-path}with the path to your YAML file. -
Verify Instance Secret creation:
Ensure your Instance Secret was created successfully with the
getcommand:
Step 3: Create a Lens Resource Manifest File
Now that you've got your model ready, it's time to bring it all together by setting up a Lens manifest file. This file is your blueprint for configuring your Lens Resource on DataOS. Let's break down each section so you know exactly what to do.
Here's what it includes:
1. Meta Section
This section is where you give your Lens its identity. You'll provide essential details like:
- Name: The unique name for your Lens.
- Description: A summary of what your Lens does.
- Version: Keep track of updates with a version number.
- Owner: Who’s responsible for this Lens?
- Tags: Add tags to make your Lens easy to find and categorize.
2. Lens-Specific Section
Here, you define all the technical configurations.
a. Compute Resources:
Specify the computational resources (CPU, memory, etc.) your Lens will need to operate smoothly.
b. runAsApiKey and runAsUser:
These fields ensure that your Lens Resource is applied under the correct user’s API key and user ID, making sure everything is secure and properly authorized.
c. Secrets:
This section is optional for public repositories but required for private repositories. Secrets help you securely manage credentials and other sensitive data when accessing private code repositories.
| Parameter | Description |
|---|---|
| name | Name of the referred secret, matching an existing Instance Secret in DataOS. |
| key | Identifier for a specific key within the secret. |
| keys | A list of key identifiers within the secret. |
| allKeys | Set this to true if all keys within the secret should be used. |
| consumptionType | Defines how the secret is consumed, such as being injected as environment variables. |
d. Source:
Define the source configuration that your Lens will be mapped to. Here, the source will be accessed through the Minerva cluster.
| Parameter | Description |
|---|---|
| type | The data source type that your Lens will map to, like themis or trino. |
| name | The identifier for the data source your Lens will connect to. |
e. Repo:
Specify the details of the code repository where your Lens model lives.
| Parameter | Description |
|---|---|
| url | The URL of the repository that contains your Lens model. |
| lensBaseDir | The path to the directory in the repository where your model files are stored. |
| secretId | Identifier for a secret, usually formatted as ${secret_name}_${acl} with hyphens replaced by underscores. |
| syncFlags | Flags to control synchronization, like specifying a branch with --ref=${branch_name}. |
f. API:
This section is where you configure the API instances of your Lens. The API handles incoming requests and executes the business logic.
| Parameter | Description |
|---|---|
| logLevel | Sets the log level for API. The default is INFO. Possible values include INFO, WARN, DEBUG, and ERROR. |
| replicas | The number of API instances to deploy. The default is 1, but you can scale up as needed. |
| autoScaling | Configure autoscaling for your API instances. Set enabled to true to enable it, and define the minReplicas, maxReplicas, and target utilization percentages. |
| metricEndpoint | Defines where metrics will be collected. Specify the port and path for the metrics endpoint. |
| resources | Set the CPU and memory resource requests and limits. Defaults are CPU 100m, memory 100Mi, with limits at CPU 400m, memory 400Mi. |
| envs | Environment variables for the API instance. Example: LENS2_SCHEDULED_REFRESH_TIMEZONES: "UTC,America/Vancouver,America/Toronto". |
g. Worker:
Configure the workers that will carry out the heavy lifting for your Lens.
| Parameter | Description |
|---|---|
| logLevel | Log level for the Worker. The default is INFO, but you can set it to WARN, DEBUG, or ERROR as needed. |
| replicas | Number of Workers to deploy. The default is 1, but feel free to adjust according to your needs. |
| resources | CPU and memory requests and limits. Defaults: CPU 100m, memory 100Mi, with limits at CPU 400m, memory 400Mi. |
| envs | Environment variables for the Worker. |
h. Router:
The Router manages interactions between the API instances and the workers.
| Parameter | Description |
|---|---|
| logLevel | Log level for the Router. The default is INFO, with other options like WARN, DEBUG, or ERROR. |
| replicas | Number of Routers to deploy. The default is 1, but you can scale this up. |
| resources | Resource requests and limits for the Router. Defaults are CPU 100m, memory 100Mi, with limits at CPU 400m, memory 400Mi. |
| envs | Environment variables for the Router. |
Complete Example
Here's what a fully configured Lens manifest file might look like, complete with all the necessary sections and parameters. You can use this as a template to get your Lens Resource up and running.
Lens Manifest File- lens.yaml
# RESOURCE META SECTION
name: retail360testnp        # Lens Resource name (mandatory)
version: v1alpha             # Lens manifest version (mandatory)
layer: user                  # DataOS Layer (optional)
type: lens                   # Type of Resource (mandatory)
tags:                        # Tags (optional)
    - lens
description: retail360 lens2 deployment on DataOS

# LENS-SPECIFIC SECTION
lens:
  compute: runnable-default  # Compute Resource for Lens (mandatory)
  secrets:                   # Instance-secret configuration (mandatory for private code repository, not required for public repository)
    - name: githubnp         # Referred Instance Secret name (mandatory)
      allKeys: true
  source:                    # Data Source configuration
    type: minerva            # Source type
    name: system             # Source name
    catalog: lakehouse         #in case of minerva or themis
  repo:                      # Lens2 model code repository config (mandatory)
    url: ${repo_url}         # URL of repository for the Lens model (mandatory)
    lensBaseDir: lens_testing/model # Relative path of the Lens model directory in repository (mandatory)
    syncFlags:               # Additional flags used during synchronization, such as specific branch.
    - --ref=master # Repository Branch
  api:                       # API Instances configuration (optional)
    replicas: 1              # Number of API instance replicas (optional)
    logLevel: info           # Logging granularity (optional)
    envs:
      LENS2_SCHEDULED_REFRESH_TIMEZONES: "UTC,America/Vancouver,America/Toronto"
      LENS2_SOURCE_WORKSPACE_NAME: public
    resources:               # CPU and emory configurations for API Instances (optional)
      requests:
        cpu: 100m
        memory: 256Mi
      limits:
        cpu: 2000m
        memory: 2048Mi
  worker:                    # Worker configuration (optional)
    replicas: 2              # Number of Worker replicas (optional)
    logLevel: info           # Logging level (optional)
    envs:
      LENS2_SCHEDULED_REFRESH_TIMEZONES: "UTC,America/Vancouver,America/Toronto"
      LENS2_SOURCE_WORKSPACE_NAME: public
    resources:               # CPU and memory configurations for Worker (optional)
      requests:
        cpu: 100m
        memory: 256Mi
      limits:
        cpu: 6000m
        memory: 6048Mi
  router:                    # Router configuration (optional)
    logLevel: info  # Level of log detail (optional)
    envs:
      LENS2_SCHEDULED_REFRESH_TIMEZONES: "UTC,America/Vancouver,America/Toronto"
      LENS2_SOURCE_WORKSPACE_NAME: public
    resources:               # CPU and memory resource specifications for the router (optional)
      requests:
        cpu: 100m
        memory: 256Mi
      limits:
        cpu: 6000m
        memory: 6048Mi
Step 4: Apply the Lens Manifest File
Deploy the Lens model to DataOS using the apply command. Make sure to replace ${manifest-file-path} with the path of your Lens manifest file path and ${workspace} with your Workspace name.
➜  dataos-ctl apply -f /lens_repo/lens_testing/lens.yml
INFO[0000] 🛠 apply...
INFO[0000] 🔧 applying(public) retail360testnp:v1alpha:lens...
INFO[0004] 🔧 applying(public) retail360testnp:v1alpha:lens...created
INFO[0004] 🛠 apply...complete
Step 5: Validate Lens Resource Creation
To confirm successful deployment, use the get command:
This will show the details of the Lens Resource within the specified Workspace.
Lens on Metis
You can check the details of the deployed Lens on Metis.
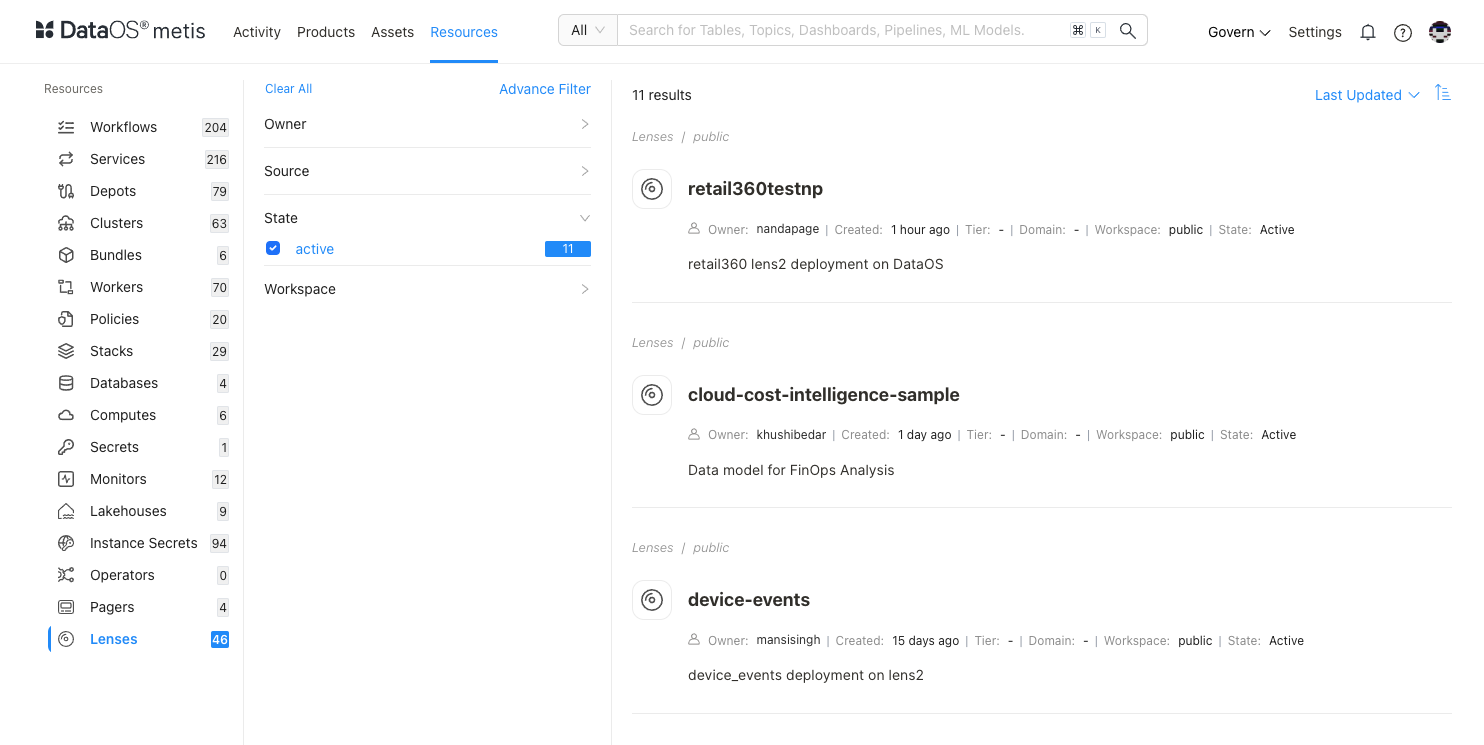
-
On Metis UI, go to Resources > Lenses to access it.
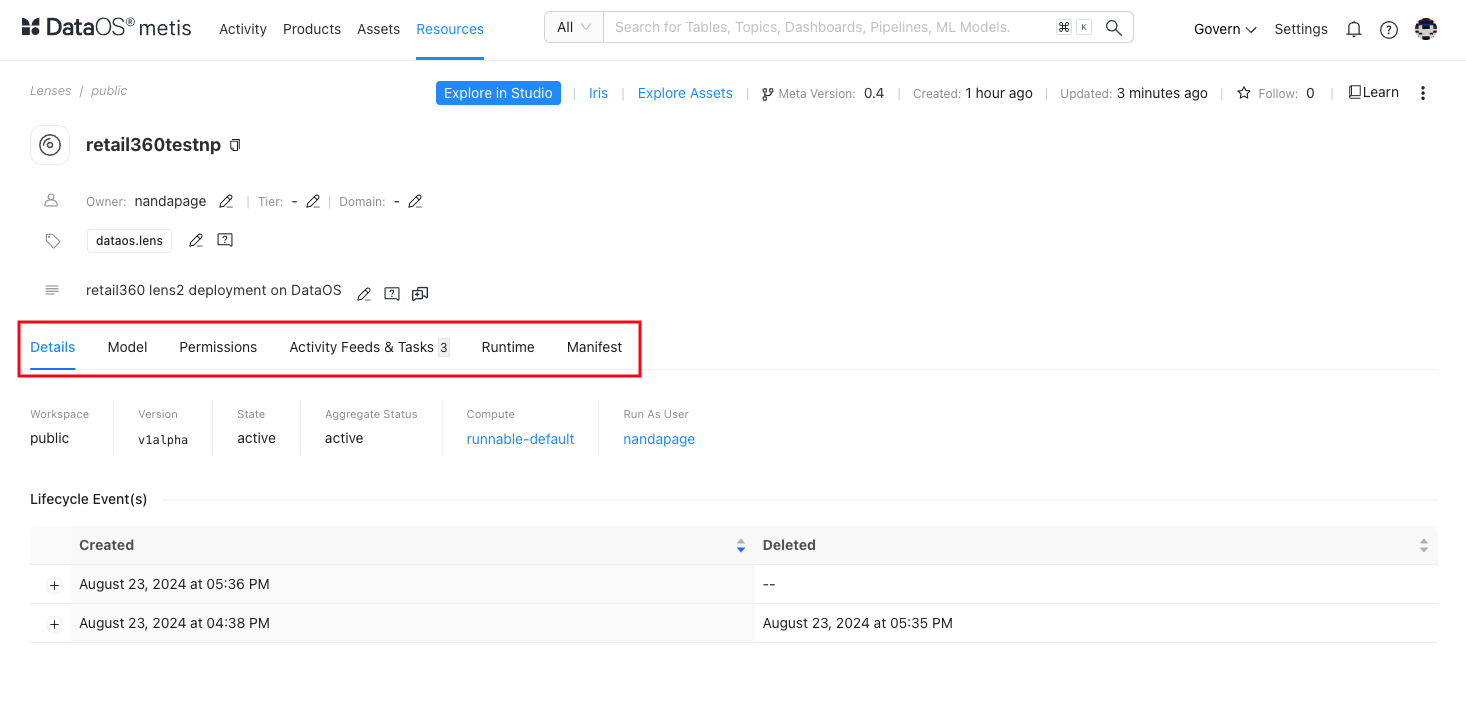
-
Find your Lens and open it. On Metis UI, click on the tabs to view the model, permissions, and other details.
-
You can further explore it using Lens Studio.
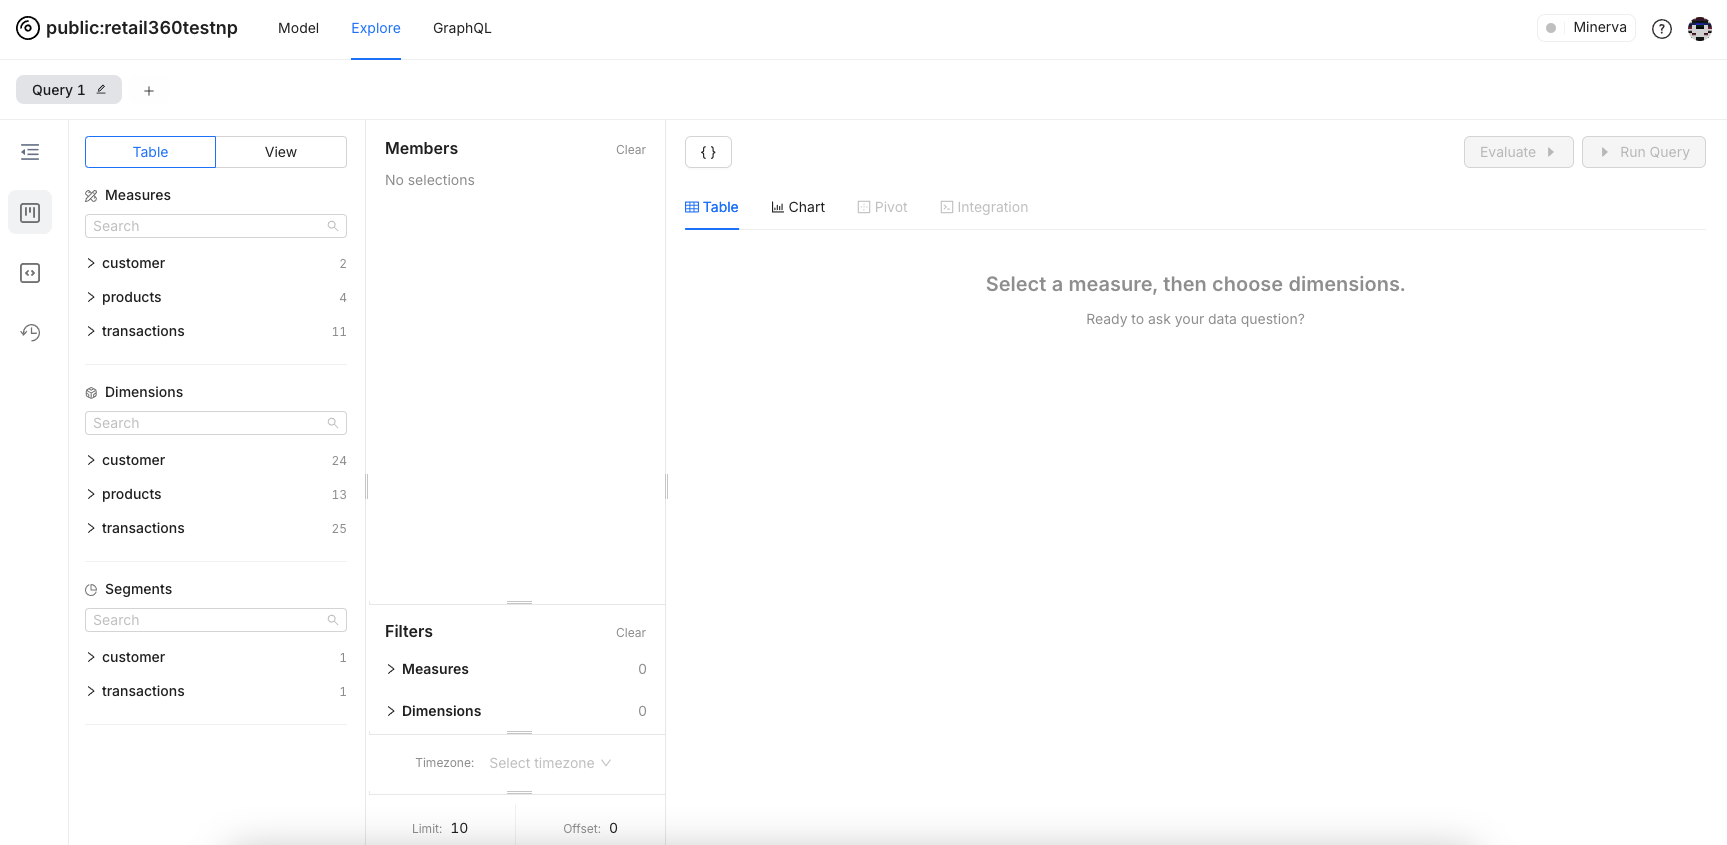
-
You can select dimensions and measures from the tables within your data model and run queries to get the answers to your business questions.

-
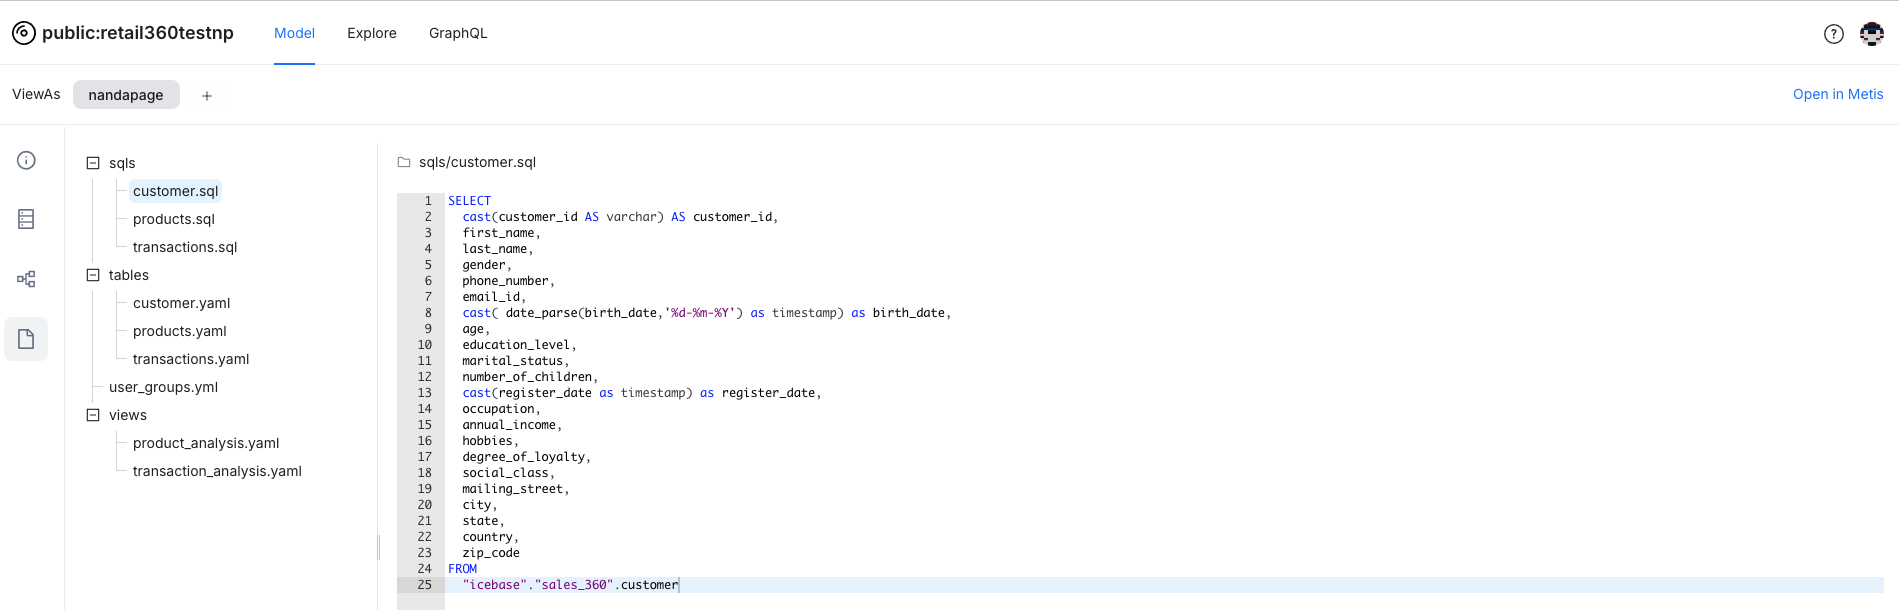
You can view your data model and understand various elements in detail by clicking on Model.
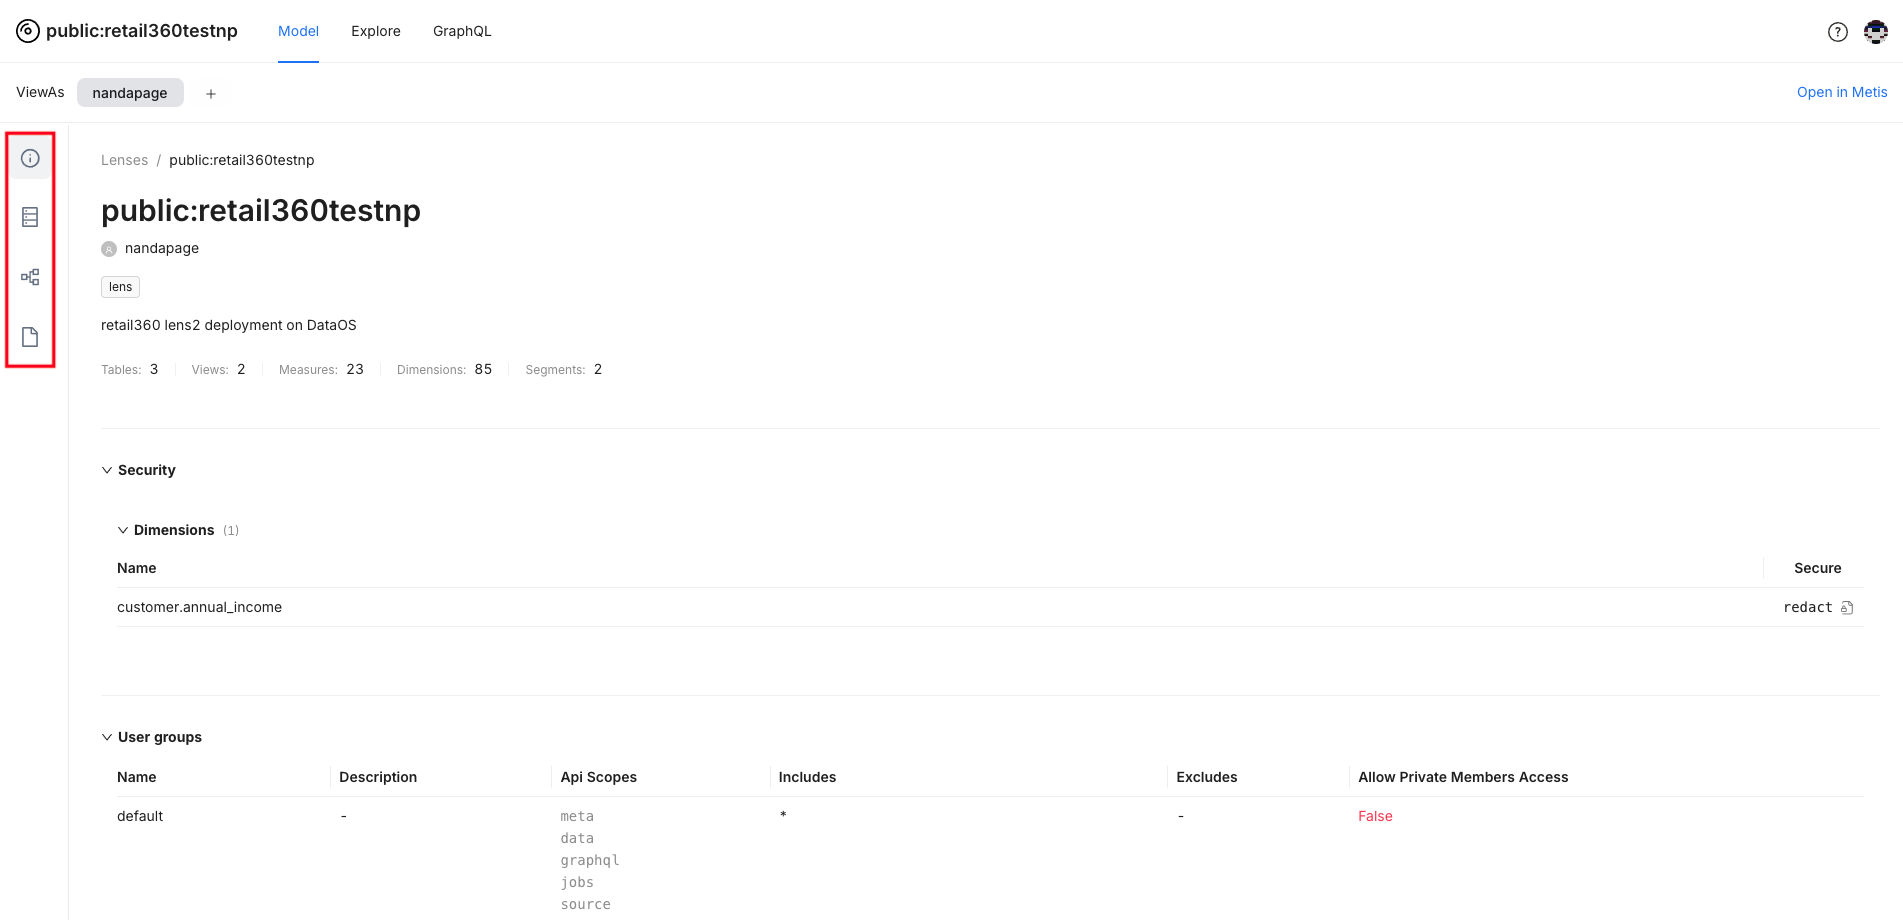
Clicking on the icons given in the left panel, you can view:
Entities and their attributes
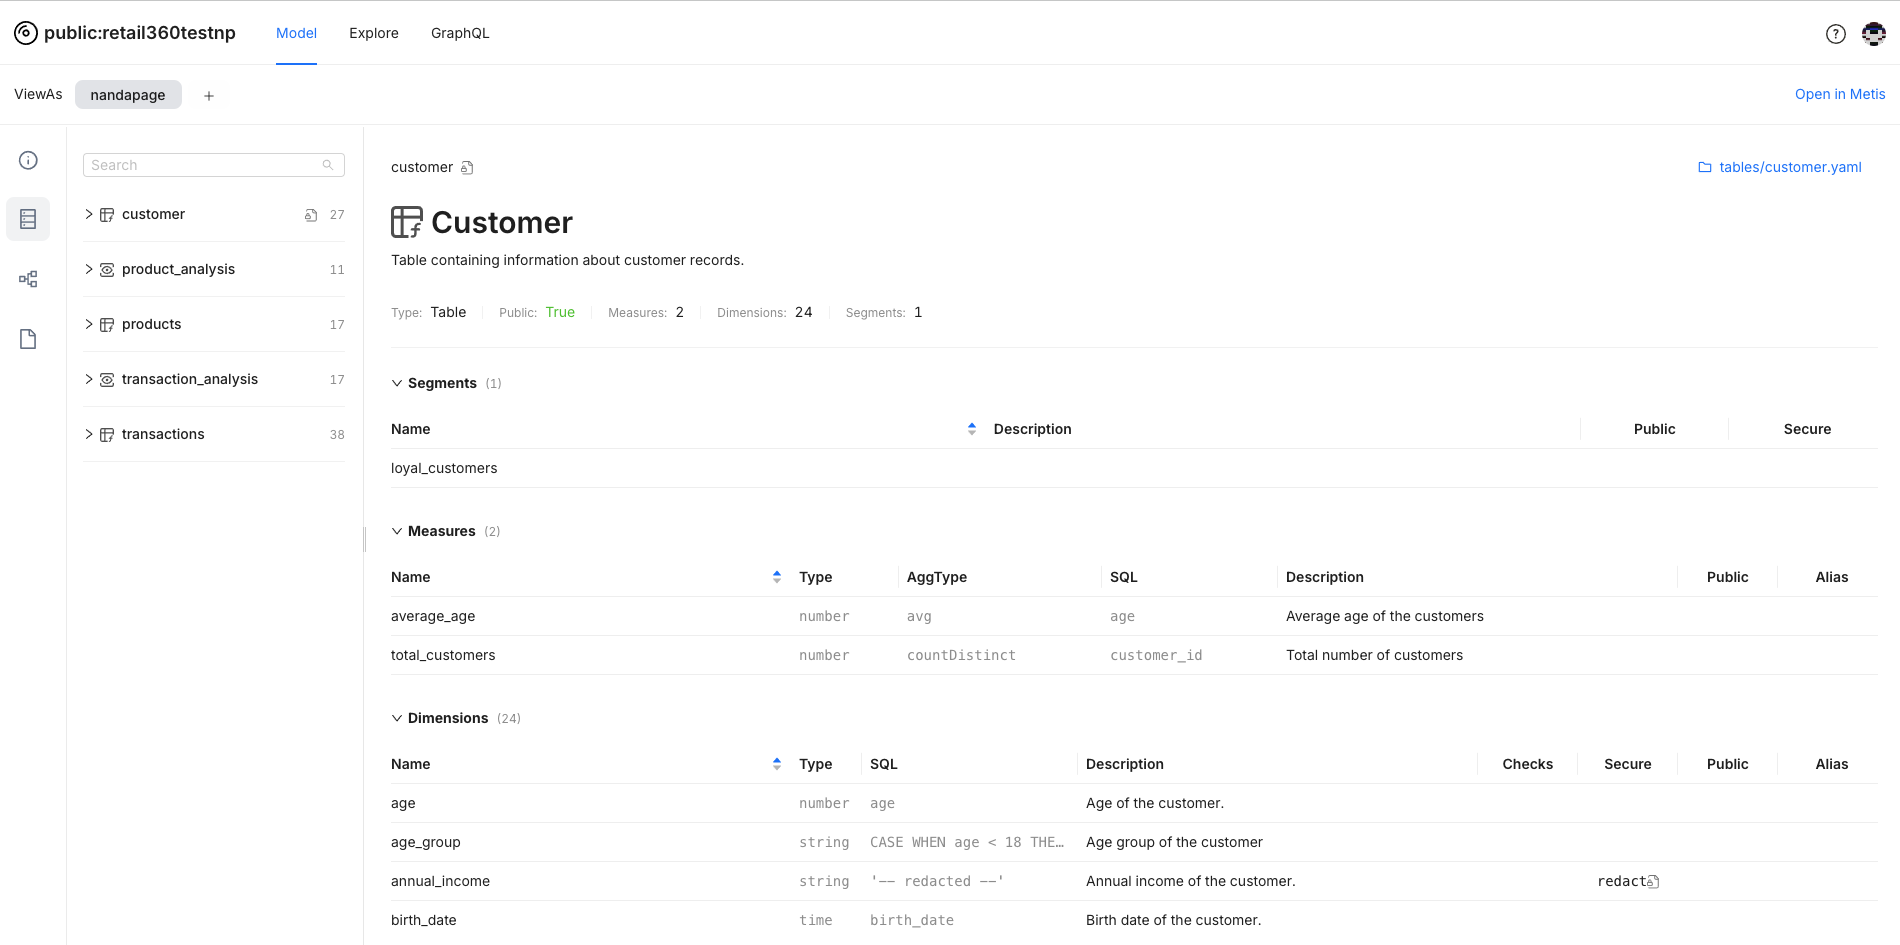
Model
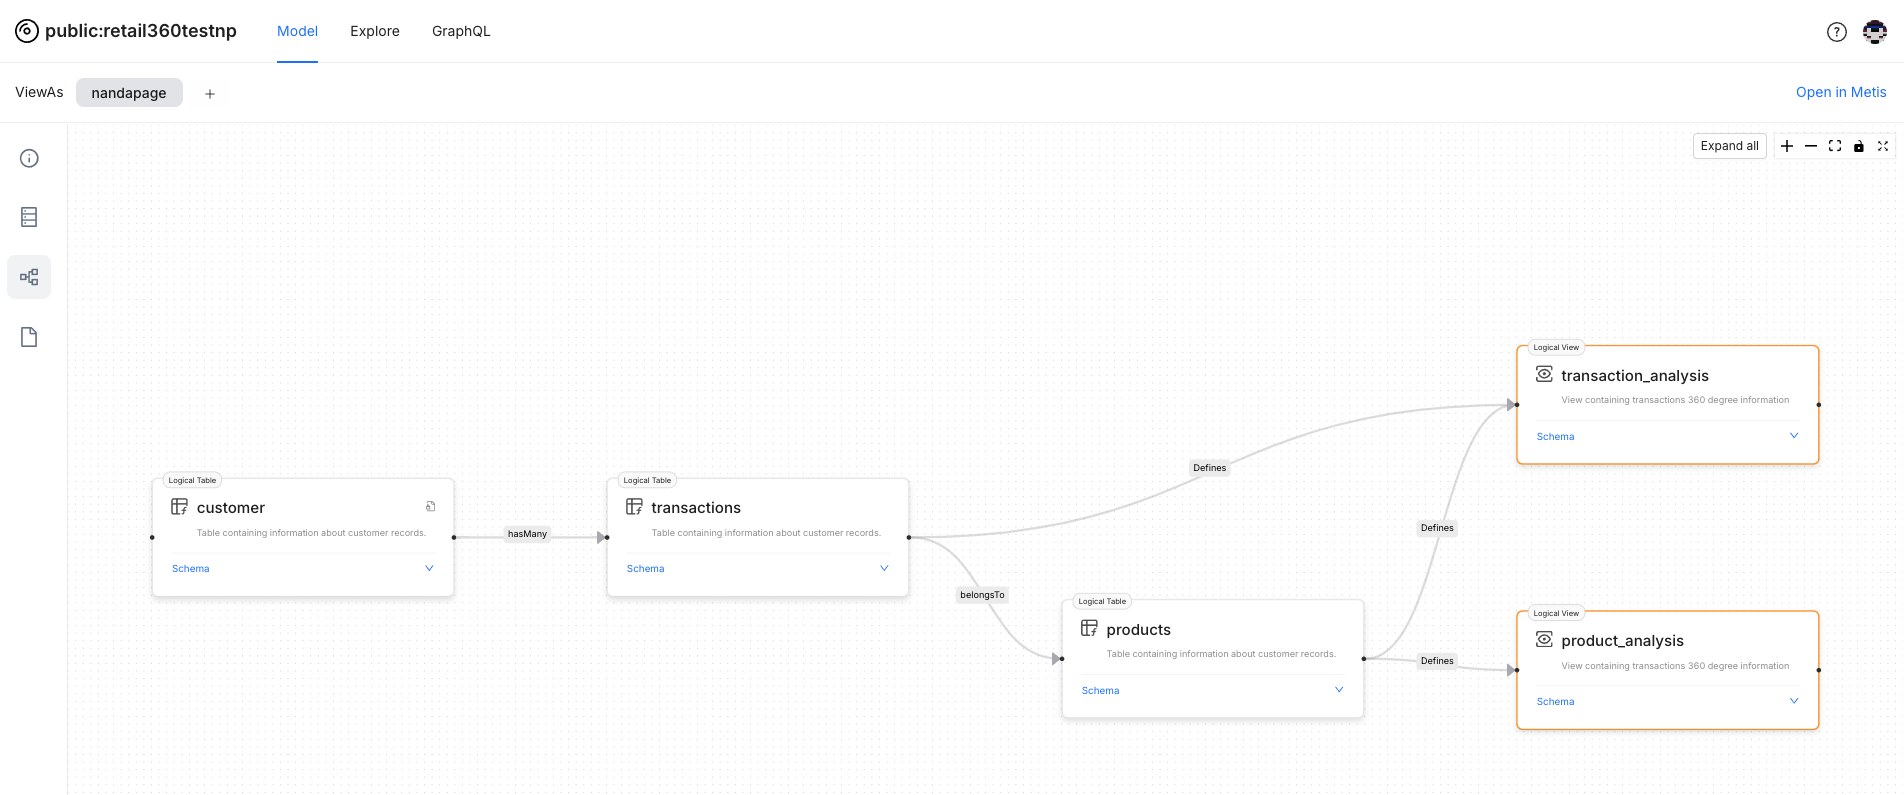
SQL Code for the tables