How to deploy Data Product through a CI/CD pipeline?
This documentation outlines the process for deploying a Data Product through a CI/CD pipeline. A CI/CD pipeline (Continuous Integration/Continuous Deployment) automates building, testing, and deploying code using Bitbucket, significantly reducing the time required for Data Product deployment.
The following steps are provided to guide through the successful setup of a CI/CD Data Product pipeline.
- Creating a repository in Bitbucket.
- Cloning the repository.
- Making specific modifications to the folder/directory.
- Adding repository variables in Bitbucket.
- Deploying the pipeline.
- Verifying the deployment.
Pre-requisites
To begin building the pipeline, ensure the following pre-requisites are met:
-
When building a Data Product, a blueprint should be readily available to guide the process. This blueprint, developed during the design phase. For example, if creating a Data Product like
sales-360, identify the necessary Resources, such as Depot, Services, Workflows, or Lens. -
Obtain the following DataOS environment variables:
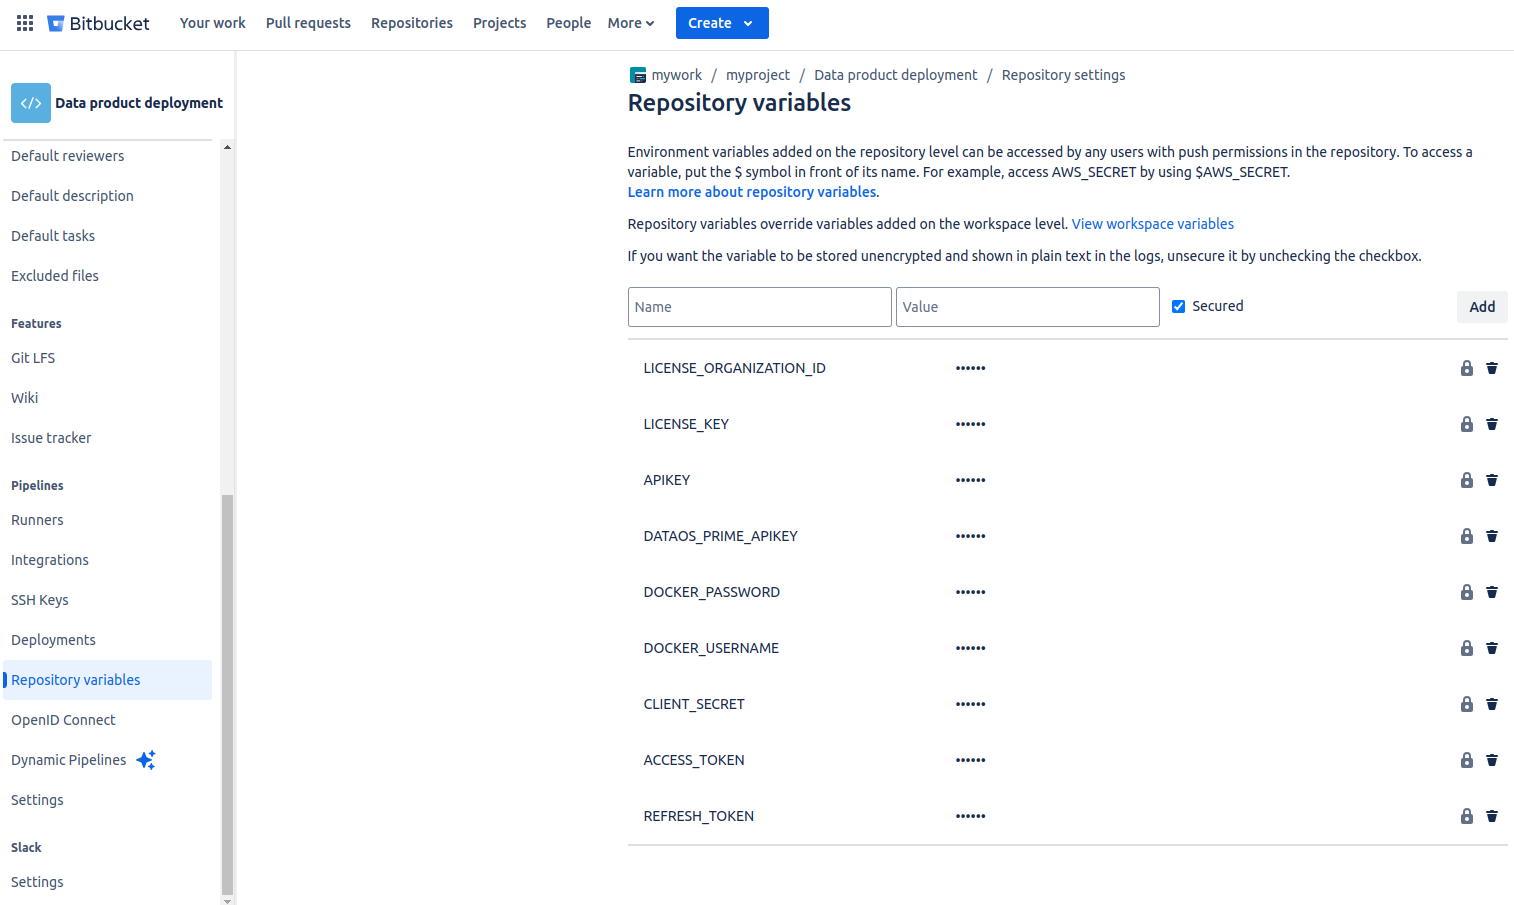
a. License organization ID, license key, Docker username & password, and DataOS prime API key: These details can be provided by the DataOS operator or admin.
b. API key: Generate the DataOS API key in the DataOS profile section.
c. Client secret, access token, and refresh token: These can be obtained from the
.dataosfolder within the home/root directory.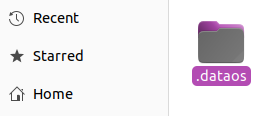
.dataos
Steps to build a CI/CD pipeline
To begin building the CI/CD pipeline for the Data Product, follow these steps.
1. Create a Bit bucket repository
a. Log in to your Bitbucket account.
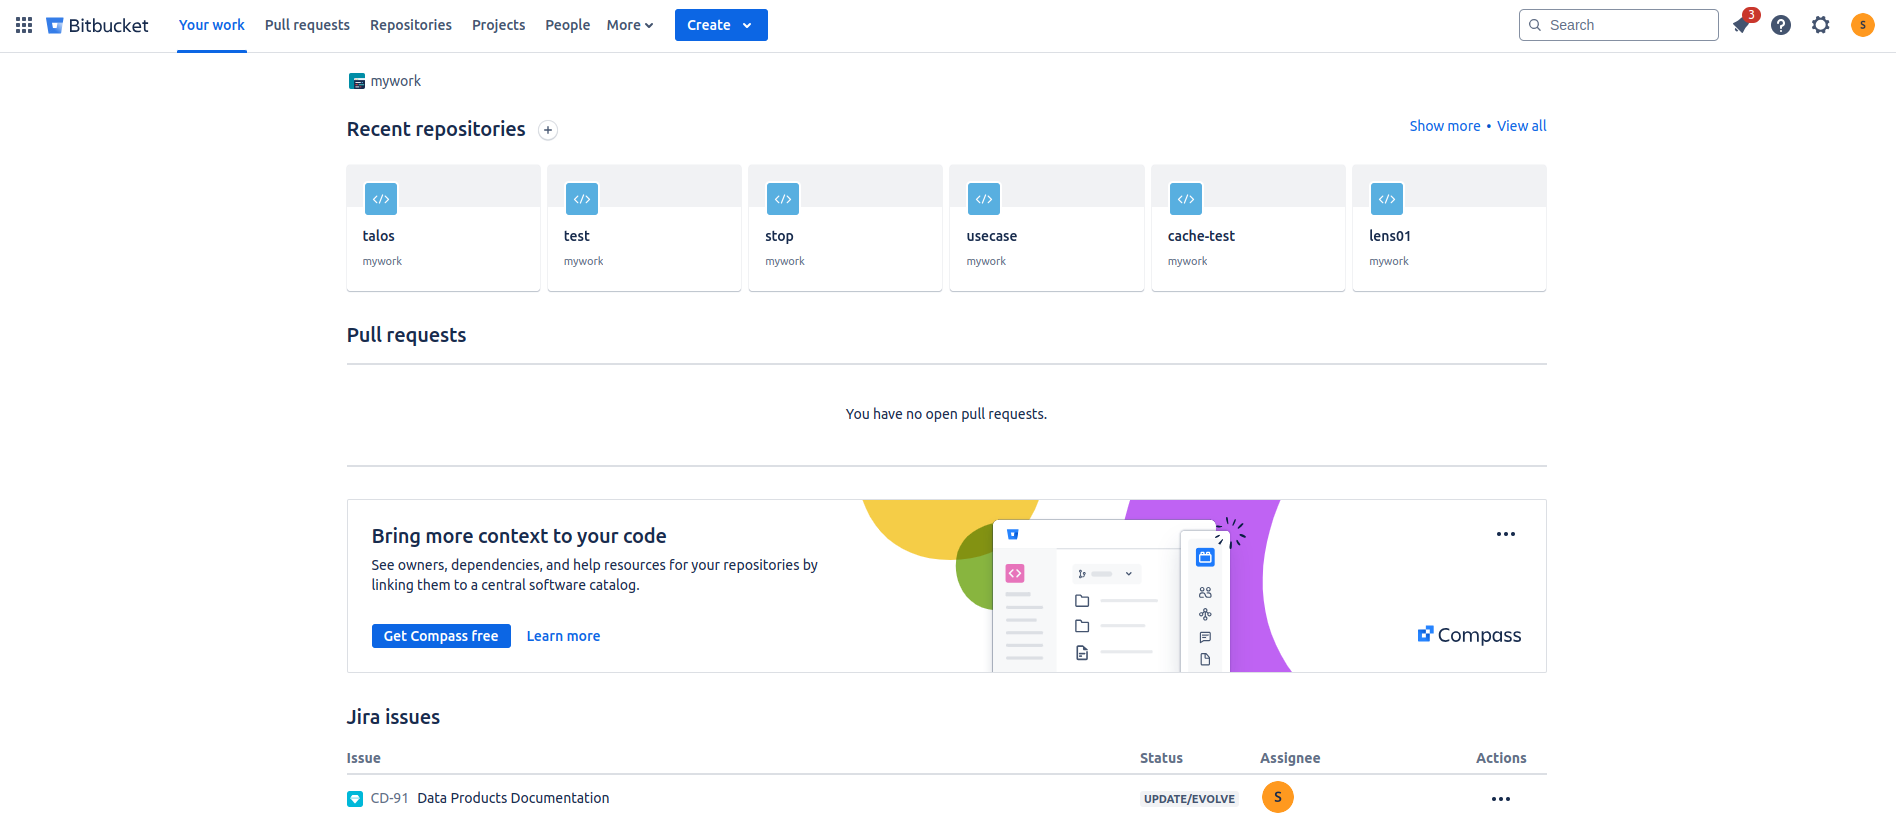
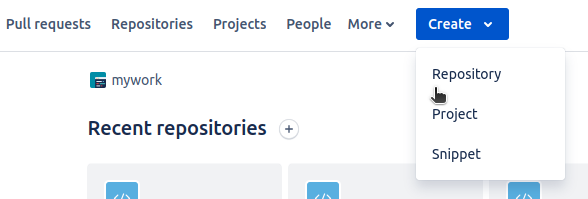
b. Select the “Create” drop-down menu and choose “Repository.”
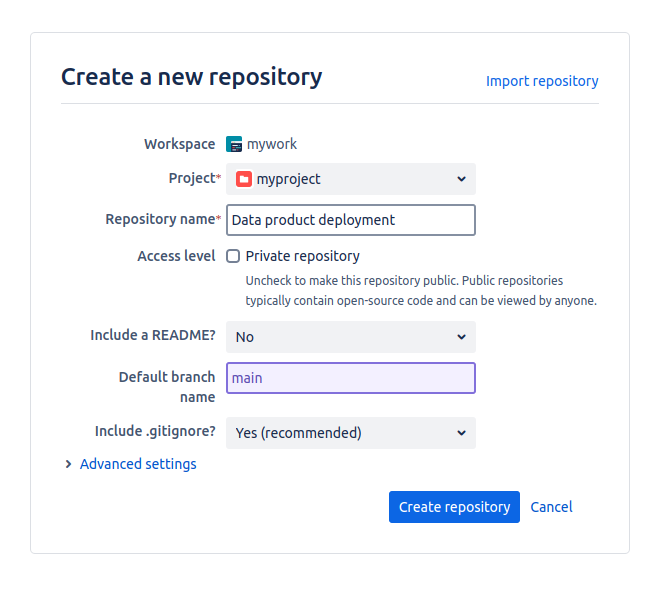
c. Enter the project, repository name, and default branch name. If you want the repository to be public, uncheck the private repository option. Then, click on “Create repository.”
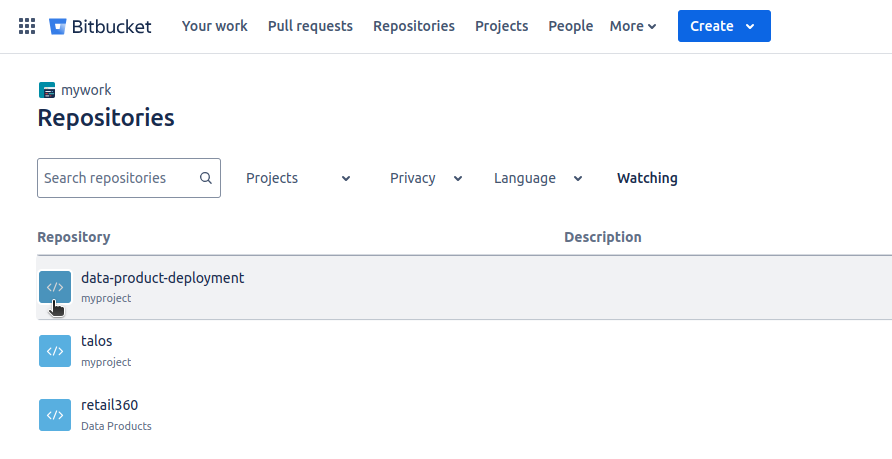
d. The repository creation can be verified by navigating to the Repositories tab.
2. Clone the repository
a. Open the repository and click the "Clone" button.

b. Copy the provided URL, paste it into your terminal, and press Enter.

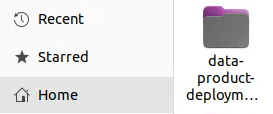
c. The repository can now be found in your home/root directory.
3. Start building the Data Product
Follow the below steps to start building the Data Product by creating the manifest files of the all the Resources and Data Product. For example, to create a Data Product, an Instance Secret manifest file is first created to store the connection details of the data source (e.g., BigQuery). A Depot manifest file for the data connection is then created, followed by the creation of a Depot Scanner manifest file. For data transformation, Flare job manifest files are created. A Bundle manifest file is created to include that refers to the Instance Secret, Depot, Depot Scanner, and Flare job manifest files, along with their dependencies. Finally, a Data Product manifest file is created to apply the Data Product, and a Data Product Scanner is created to deploy the Data Product to the Data Product Hub.
a. Open the cloned repository using the preferred code editor (e.g., VS Code).
b. Inside the repository, create a folder named data_product to store all related Resources.
c. Inside the data_product folder, create a subfolder called depot. Following the Depot documentation, create a Depot manifest file.
d. For the BigQuery Depot, add a JSON file inside the depot folder. Provide the correct path to this JSON file in the depot manifest file. While it is not mandatory to store the JSON file in the same folder, it is recommended as best practice.
e. Inside the data_product folder, create a subfolder named scanner. Place the Scanner manifest file for both the Depot and the Data Product inside this folder.
data-product-deployment
└── data_product
├── depot
│ ├── depot.yaml
│ └── key.json
└── scanner
├── depot_scanner.yaml
└── dp_scanner.yaml
f. Create another folder named transformation inside the data_product folder. Inside this folder, add the Flare job manifest files for data transformation.
data-product-deployment
└── data_product
    ├── depot
    │   ├── depot.yaml
    │   └── key.json
    ├── scanner
    │   ├── depot_scanner.yaml
    │   └── dp_scanner.yaml
    └── transformation
        ├── flare1.yaml
        └── flare2.yaml
g. Create a folder named bundle inside the data_product folder. Inside the bundle folder, create a Bundle manifest file that will apply the Depot, Depot Scanner, and Flare jobs at once.
data-product-deployment
└── data_product
    ├── depot
    │   ├── depot.yaml
    │   └── key.json
    ├── scanner
    │   ├── depot_scanner.yaml
    │   └── dp_scanner.yaml
    ├── transformation
    │   ├── flare1.yaml
    │   └── flare2.yaml
    └── bundle
        └── bundle.yaml
h. Inside the data_product folder, create a Data Product deployment manifest file.
data-product-deployment
├── data_product
    ├── depot
    │   ├── depot.yaml
    │   └── key.json
    ├── scanner
    │   ├── depot_scanner.yaml
    │   └── dp_scanner.yaml
    ├── transformation
    │   ├── flare1.yaml
    │   └── flare2.yaml
    ├── bundle
    │   └── bundle.yaml
    └── deployment.yaml
i. Double-check all files and paths to ensure everything is provided correctly and that the manifest files are properly set up.
j. Add configuration files of more Resources as per the requirements, such as Policy, Talos, Lens, etc.
4. Configure the pipeline
a. In the home directory, locate the .dataos folder containing the current DataOS context configuration files. Copy the folder and paste it into the cloned repository.
b. Create a manifest file named bitbucket-pipelines.yaml and include the following code. This file will contain the DataOS ctl commands to apply the manifest files along with their dependencies. Additionally, update the default branch name in the file. In this case, the default branch is main, but it can be any name, such as master, depending on the branch defined when creating the Bitbucket repository.
image: atlassian/default-image:2
pipelines:
    branches:
    main:  # your default branch name
        - step:
            name: "Setup DataOS Data Product Self Service CLI Runtime"
            script:
            # Login Docker and pull dataos docker image
            - echo "$DOCKER_PASSWORD" | docker login --username "$DOCKER_USERNAME" --password-stdin
            - docker pull rubiklabs/dataos-ctl:2.26.17-dev
            - docker run rubiklabs/dataos-ctl:2.26.17-dev

            services:
            - docker
            caches:
            - docker

        - step:
            name: "Deploy Data Product"
            script:
            # Define common environment variables for Docker run
            - DOCKER_ENV_VARS="-e DATAOS_CONFIG_DIRECTORY=/dataos -e USER_ID=${{iamgroot}} DATAOS_PRIME_APIKEY=$DATAOS_PRIME_APIKEY -e LICENSE_KEY=$LICENSE_KEY -e LICENSE_ORGANIZATION_ID=$LICENSE_ORGANIZATION_ID -e DATAOS_FQDN=${{splendid-shrew.dataos.app}} -e APIKEY=$API_KEY

            # Apply the Bundle Resource
            - docker run --rm -i -v $BITBUCKET_CLONE_DIR/.dataos:/dataos -v $BITBUCKET_CLONE_DIR:/jobsfolder $DOCKER_ENV_VARS rubiklabs/dataos-ctl:2.26.17-dev apply -f /jobsfolder/data-product-deployment/ci_cd/slb/bundle/bundle.yaml

            # Apply the Data Product manifest file
            - docker run --rm -i -v $BITBUCKET_CLONE_DIR/.dataos:/dataos -v $BITBUCKET_CLONE_DIR:/jobsfolder $DOCKER_ENV_VARS rubiklabs/dataos-ctl:2.26.17-dev product apply -f /jobsfolder/data-product-deployment/ci_cd/data_product_spec.yml

            # Apply the Data Product Scanner
            - docker run --rm -i -v $BITBUCKET_CLONE_DIR/.dataos:/dataos -v $BITBUCKET_CLONE_DIR:/jobsfolder $DOCKER_ENV_VARS rubiklabs/dataos-ctl:2.26.17-dev apply -f /jobsfolder/data-product-deployment/ci_cd/slb/scanner/data-product/scanner.yml


            # - sleep 20

            services:
            - docker
            caches:
            - docker
Below table describes each attributes of the bitbucket-pipelines.yaml in brief.
| Attribute | Description |
|---|---|
| image | Specifies the Docker image to use for the pipeline, in this case, atlassian/default-image:2. |
| pipelines | The root element defining the pipeline configuration for specific branches. |
| pipelines.branches | Defines the branches section for pipeline configuration. |
| pipelines.branches.main | Specifies the pipeline configuration for the default branch (main). |
| pipelines.branches.main.step | The steps to be executed in the pipeline for the main branch. |
| pipelines.branches.main.step.name | The name of the step (e.g., "Setup DataOS Data Product Self Service CLI Runtime"). |
| pipelines.branches.main.step.script | A list of commands to be executed sequentially in this step (e.g., logging into Docker, pulling an image, running a Docker container). |
| pipelines.branches.main.step.script[0] | The first script command to run: logs into Docker with provided credentials. |
| pipelines.branches.main.step.script[1] | The second script command to pull the Docker image rubiklabs/dataos-ctl:2.26.17-dev. |
| pipelines.branches.main.step.script[2] | The third script command to run the Docker container with the pulled image. |
| pipelines.branches.main.step.services | The list of services required for this step, in this case, docker. |
| pipelines.branches.main.step.services[0] | The service being used in the step, which is Docker in this case. |
| pipelines.branches.main.step.caches | The caching options to be used in the pipeline, specifically for Docker cache to optimize build times. |
| pipelines.branches.main.step.caches[0] | The cache type being used, which is docker in this case. |
| DOCKER_ENV_VARS | A string containing environment variables used for the Docker run command (e.g., setting configuration directories, API keys). |
| docker run | Runs the Docker container with the specified environment variables and volume mounts. |
| docker run --rm | Runs the Docker container in a way that removes it after execution, preventing leftover containers from consuming resources. |
| docker run -v | Mounts the specified volumes, such as the $BITBUCKET_CLONE_DIR/.dataos and $BITBUCKET_CLONE_DIR directories, to the container. |
| apply -f | The command used to apply resources from a specified file (e.g., bundle.yaml, data_product_spec.yml, or scanner.yml). |
| services | Specifies the services required for this step (e.g., Docker). |
| caches | Specifies caching options (e.g., Docker cache) to be used to optimize subsequent pipeline runs. |
| sleep | An optional command to pause the execution for a specified period (currently commented out). |
c. Update the username and current DataOS context in the placeholders within the script section of the bitbucket-pipelines.yaml file.
d. To apply the Bundle manifest file, copy the relative path of the Bundle manifest file and paste it into the script, as shown below. The path should be pasted after the /jobsfolder in this case.
# Apply the Bundle Resource
- docker run --rm -i -v $BITBUCKET_CLONE_DIR/.dataos:/dataos -v $BITBUCKET_CLONE_DIR:/jobsfolder $DOCKER_ENV_VARS rubiklabs/dataos-ctl:2.26.17-dev delete -f /jobsfolder/data-product-deployment/ci_cd/slb/bundle/bundle.yaml
e. Repeat the previous step to apply the Data Product deployment and Scanner manifest files. For these specific manifest files, the commands need to be updated accordingly. In this case, to apply the Data Product manifest file, the command should be provided along with the path, as shown: product apply -f /jobsfolder/data-product-deployment/ci_cd/data_product_spec.yml. Similarly, to delete any existing resource, use the delete command along with the corresponding path.
# Apply the Data Product manifest file
- docker run --rm -i -v $BITBUCKET_CLONE_DIR/.dataos:/dataos -v $BITBUCKET_CLONE_DIR:/jobsfolder $DOCKER_ENV_VARS rubiklabs/dataos-ctl:2.26.17-dev product apply -f /jobsfolder/data-product-deployment/ci_cd/data_product_spec.yml
f. In the same manner, any number of Resources, Stacks, and Products can be applied or deleted as needed.
5. Add repository variables
Add repository variables to the Bitbucket repository settings by following the below steps.
a. In the Bitbucket repository, navigate to the repository settings.
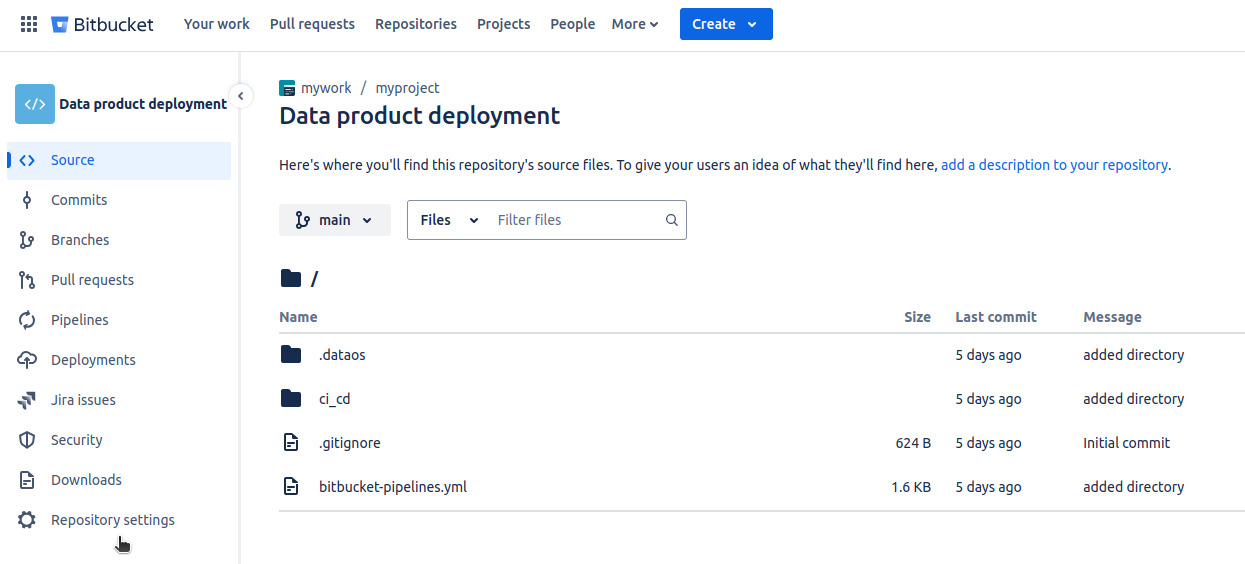
b. In the repository variables section, add key-value pairs mentioned in the pre-requisites section as shown below.
6. Deploy the pipeline
a. Open the terminal of the repository, and add the changes by applying the following command.
b. Commit the changes.
c. Push the changes by providing the Bitbucket app password which can be created from the personal Bitbucket settings.
d. By pushing the changes in Bitbucket, the pipeline will automatically start deploying which can be tracked on the commits section of the Bitbucket repository.

e. A successful deployment will look like the following.

7. Error fixes
-
If an error occurs during the push due to a large file size, navigate to the repository settings. Under Repository details, open the Advanced dropdown, uncheck the “Block pushes with files over 100MB” option, and save the changes. Then push again.

Terminal 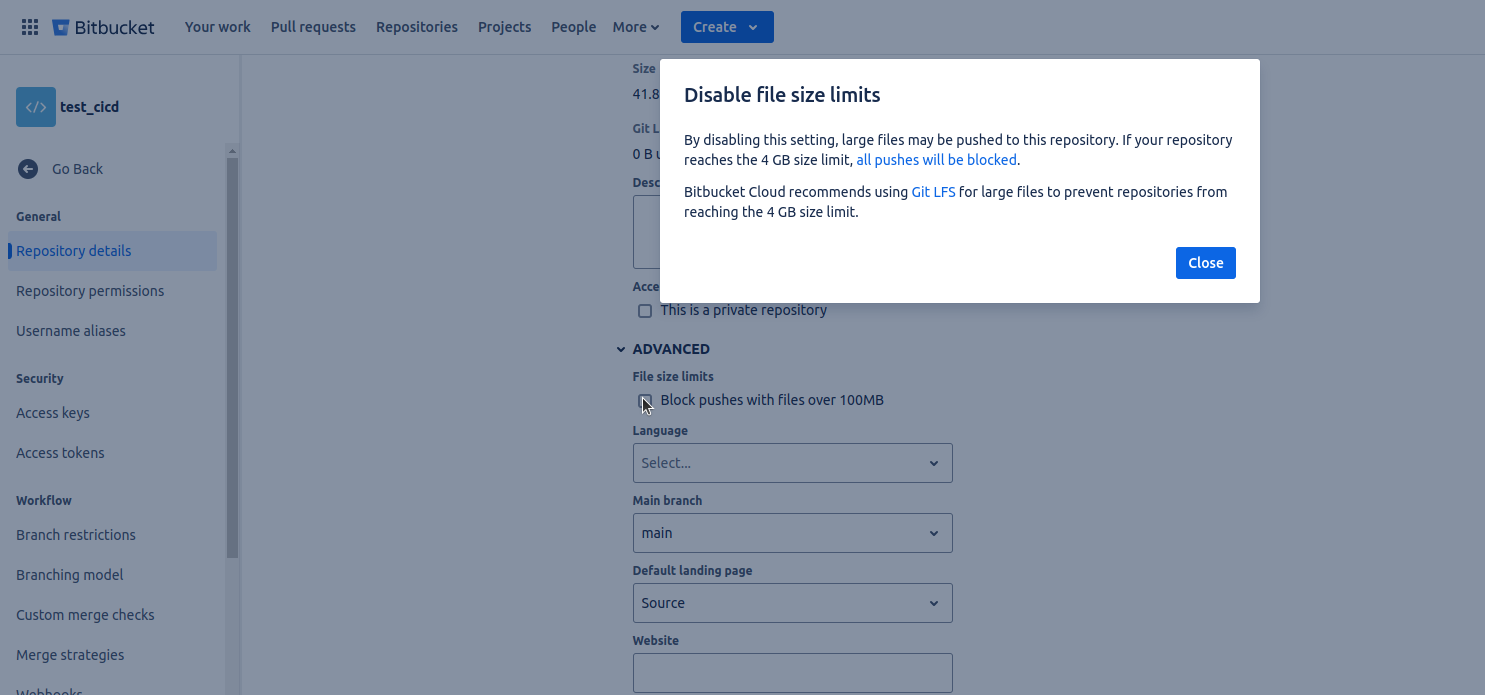
Bitbucket settings -
If the pipeline fails for any reason, you can make the necessary updates, push the changes, and rerun the failed part of the pipeline based on the error received.

Bitbucket deployment
Good to go!