Building your first Data Product!
This section outlines the steps to create a Data Product using single-source Snowflake within DataOS. This documentation focuses on leveraging Snowflake’s compute engine to run queries. The Data Product will provide insights into the total revenue generated, total quantity sold, and average price of each product from the sales data.
Pre-requisites for creating a Data Product
Ensure the following requirements are met before starting to develop the Data Product.
DataOS requirements
Ensure you meet the following requirements specific to DataOS:
-
A user must have the
roles:id:data-devtag or whatever tag an organization decides to have that allows the user to create and access all the DataOS Resources and the Data Product itself. To get this tag, get in touch with the DataOS Admin. One can check the available tags by executing the following command on the DataOS CLI terminal. Learn more about tags by referring to this link.Expected output:
dataos-ctl user get INFO[0000] 😃 user get... INFO[0001] 😃 user get...complete NAME │ ID │ TYPE │ EMAIL │ TAGS ───────────────┼─────────────┼────────┼──────────────────────┼───────────────────────────────── iam groot │ iamgroot │ person │ iamgroot@tmdc.io │ roles:id:data-dev, │ │ │ │ roles:id:user, │ │ │ │ users:id:iamgroot -
Alternatively, instead of assigning the tag, a user can be assigned the particular use cases built for the specific purpose for each Resource and the Data Product itself. To get the use cases, get in touch with the DataOS Admin. Learn more about use cases by referring to this link.
-
DataOS CLI Version should be
dataos-cli 2.26.39or greater. -
It is recommended that the Data Product artifacts (configuration files) be stored in a Bitbucket repository for better collaboration, as shown below, while building the Data Product. To initialize the Bitbucket repository, follow steps 1 and 2 mentioned in this document.
data-product-deployment
└──── data_product
        ├── depot
        │   └──depot.yaml
        ├── scanner
        │   ├── depot_scanner.yaml
        │   └── dp_scanner.yaml
        ├── lens
        │   ├── model
        │   │   ├── sqls
        │   │   │   └── sales.sql  # SQL script for table dimensions
        │   │   ├── tables
        │   │   │   └── table1.yml  # Logical table definition (dimensions, measures)
        │   │   ├── views
        │   │   │   └── view1.yml  # Logical views referencing tables
        │   │   └── user_groups.yml  # User group policies for governance
        │   └── lens_deployment.yaml
        ├── bundle
        │   └── bundle.yaml
        └── dp_deployment.yaml
Snowflake requirements
Ensure you meet the following requirements specific to Snowflake:
- Sufficient computing and storage permissions are needed to run queries. Learn more about access control in Snowflake by referring to this link.
Designing the Data Product
Designing the Data Product starts with defining the organization's objective. In this case, the goal is to increase revenue, which will be measured using total revenue generated over a specific period and total quantity sold as key indicators.
Defining a business use case
In this case, the objective is to enhance the total revenue of a retail center by leveraging a Data Product that provides insights into total revenue generated and the number of products sold. The use case involves utilizing this Data Product to track and analyze these key metrics.
Generating the data in Snowflake
The data to solve the use case should have the unique ID of each product, product name, product category, product price (MRP), product quantity, and the date on which the product is sold. For this case, we’ll generate the data that will contain the required dimensions and measures to create the Data Product in Snowflake. To generate the sales data in Snowflake, follow the steps below.
-
Log in to your Snowflake account.
-
Navigate to
Admin→Warehouse→+ Warehouse.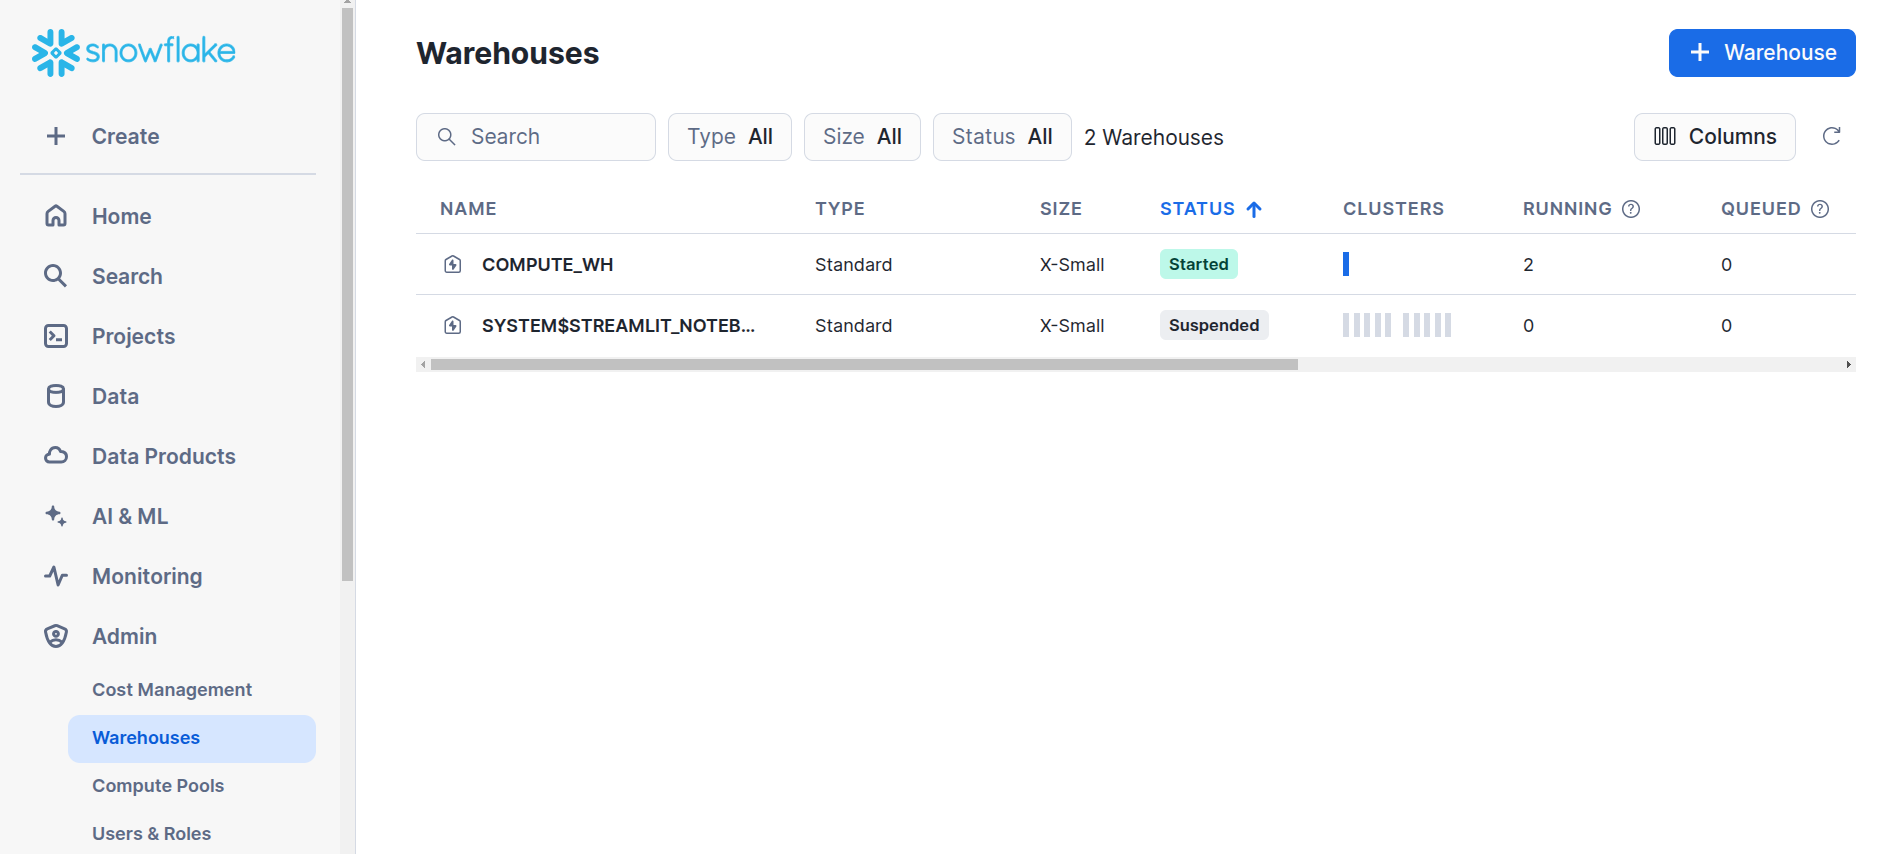
Snowflake -
Create the new warehouse named
mywarehouseor any preferred name.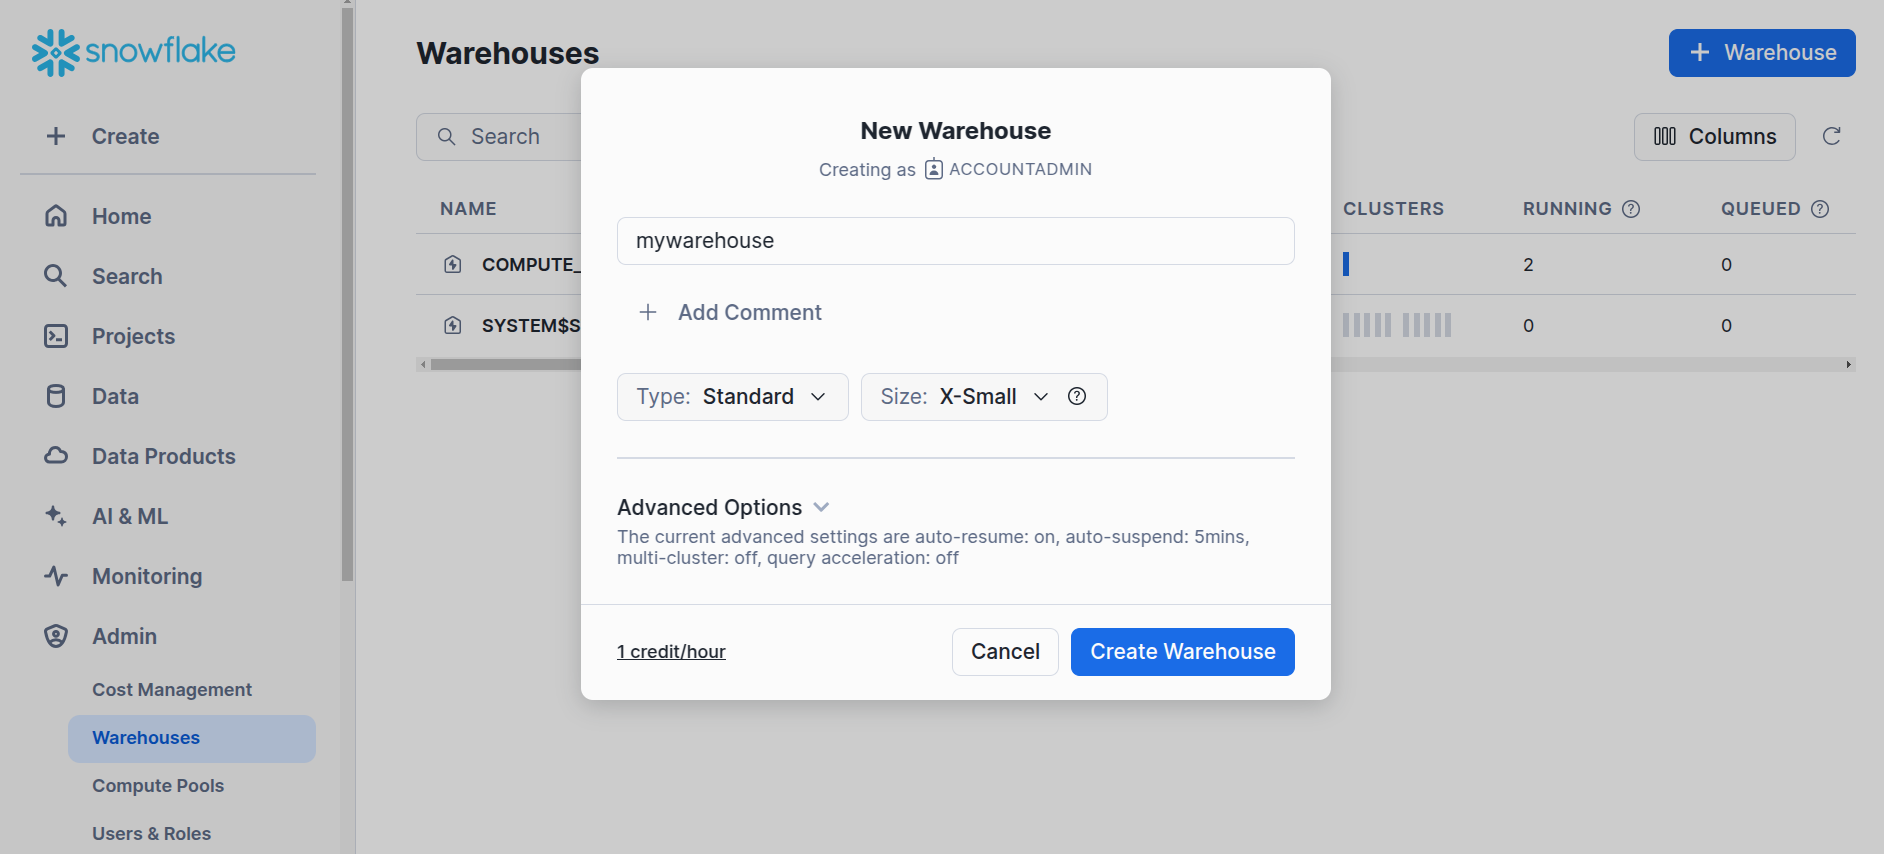
Snowflake -
Edit the warehouse to change the auto-suspend time.
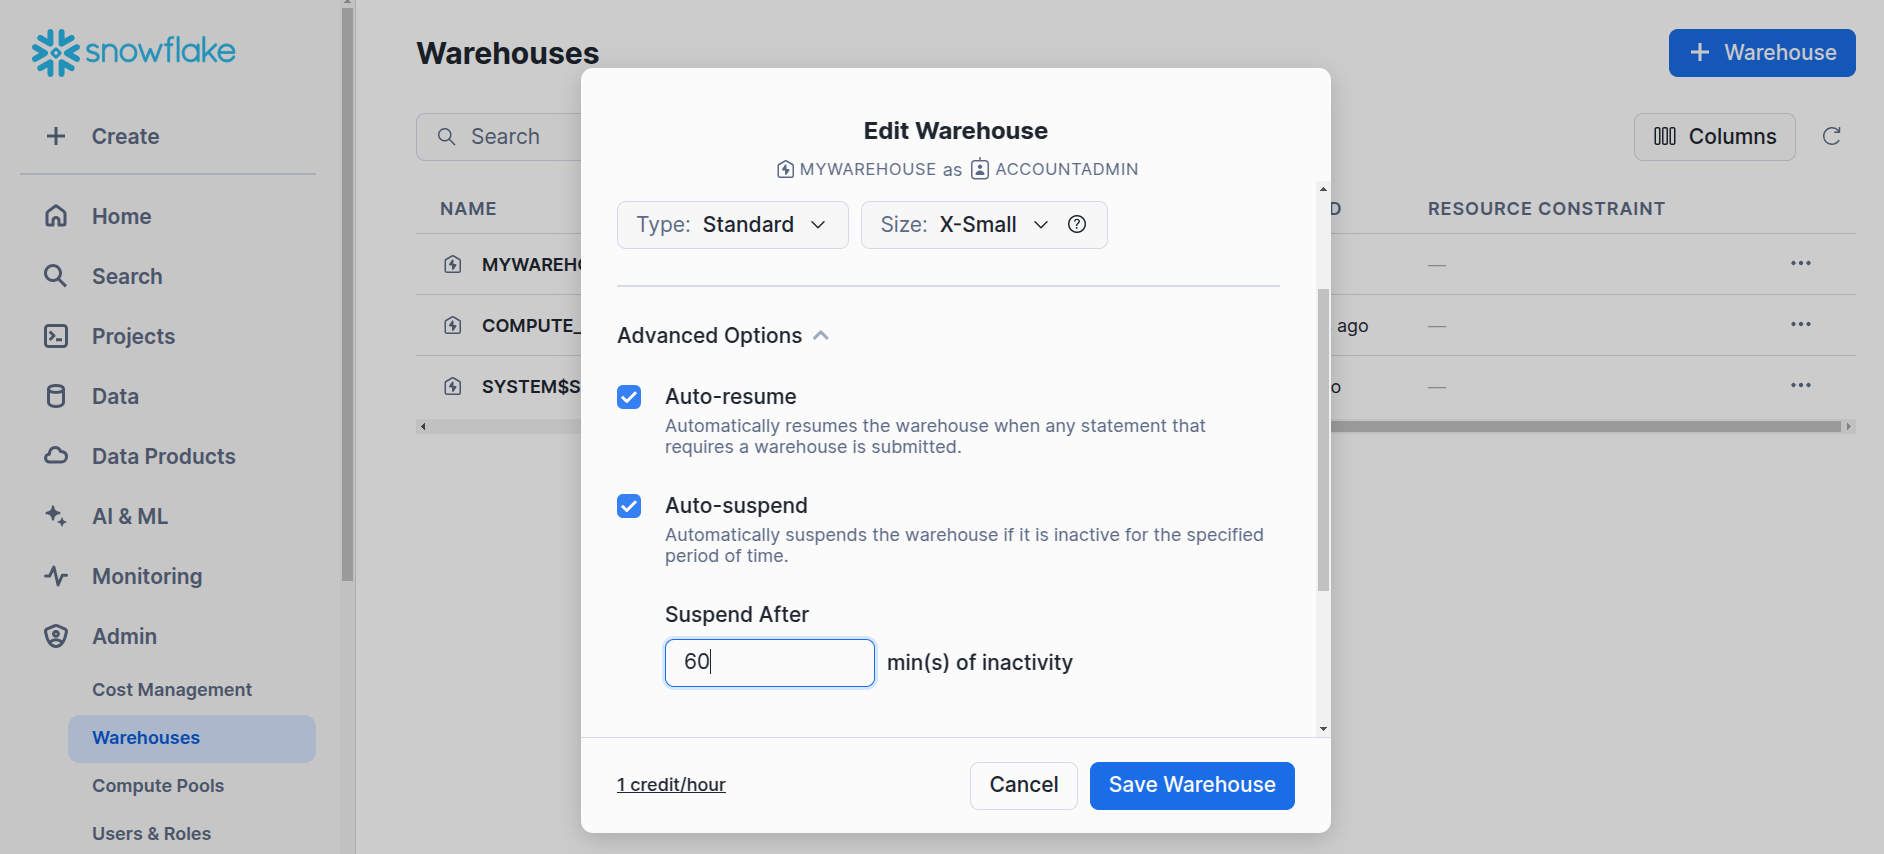
Snowflake -
Now, navigate to
data→databases→+ Database, and create a new database namedmydatabase, which will automatically generate theINFORMATION_SCHEMAandPUBLICschemas.
Snowflake -
Navigate to the
Projectsand create a new worksheet namedmyworksheet, then select theMYDATABASE.PUBLICand execute the below query to create a table namedsales. EnsureMYWAREHOUSEis selected and is active.CREATE TABLE sales ( sale_id BIGINT COMMENT 'Unique sale ID', product_name STRING COMMENT 'Name of the product', category STRING COMMENT 'Product category', price DECIMAL(10,2) COMMENT 'Product price', quantity INT COMMENT 'Quantity sold', sale_date DATE COMMENT 'Date of sale' );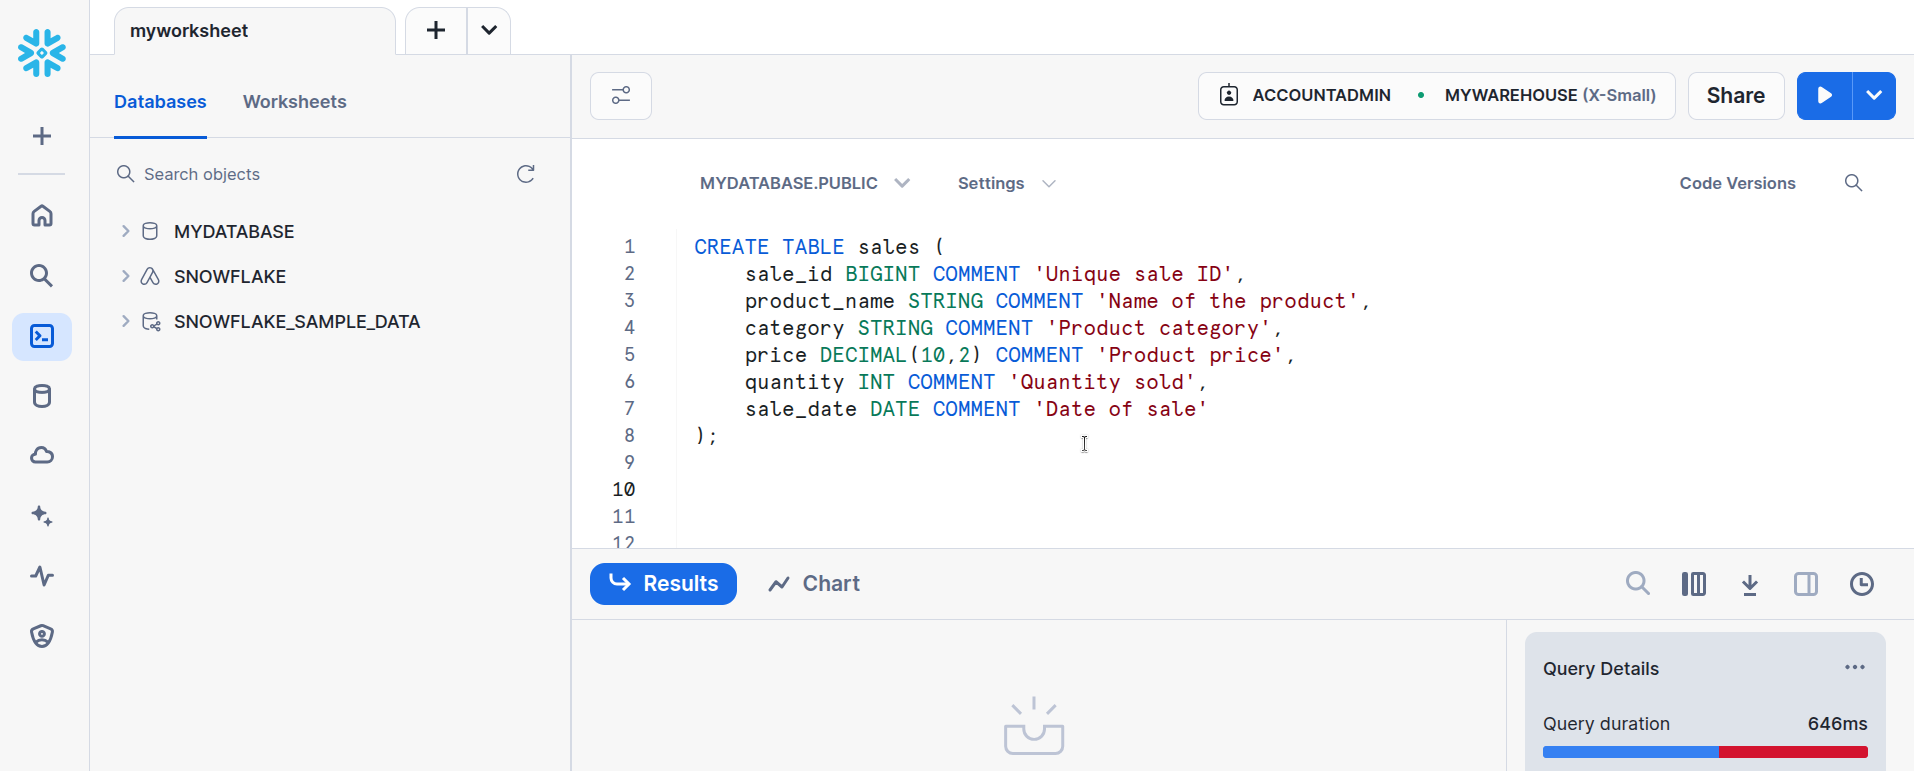
Snowflake -
Execute the below query to load the data into the table.
INSERT INTO sales VALUES
(1, 'T-shirt', 'Clothing', 499.99, 10, '2024-03-10'),
(2, 'Jeans', 'Clothing', 1299.50, 5, '2024-03-11'),
(3, 'Laptop', 'Electronics', 54999.00, 2, '2024-03-12'),
(4, 'Headphones', 'Electronics', 1999.00, 15, '2024-03-13'),
(5, 'Shoes', 'Footwear', 2499.99, 8, '2024-03-14');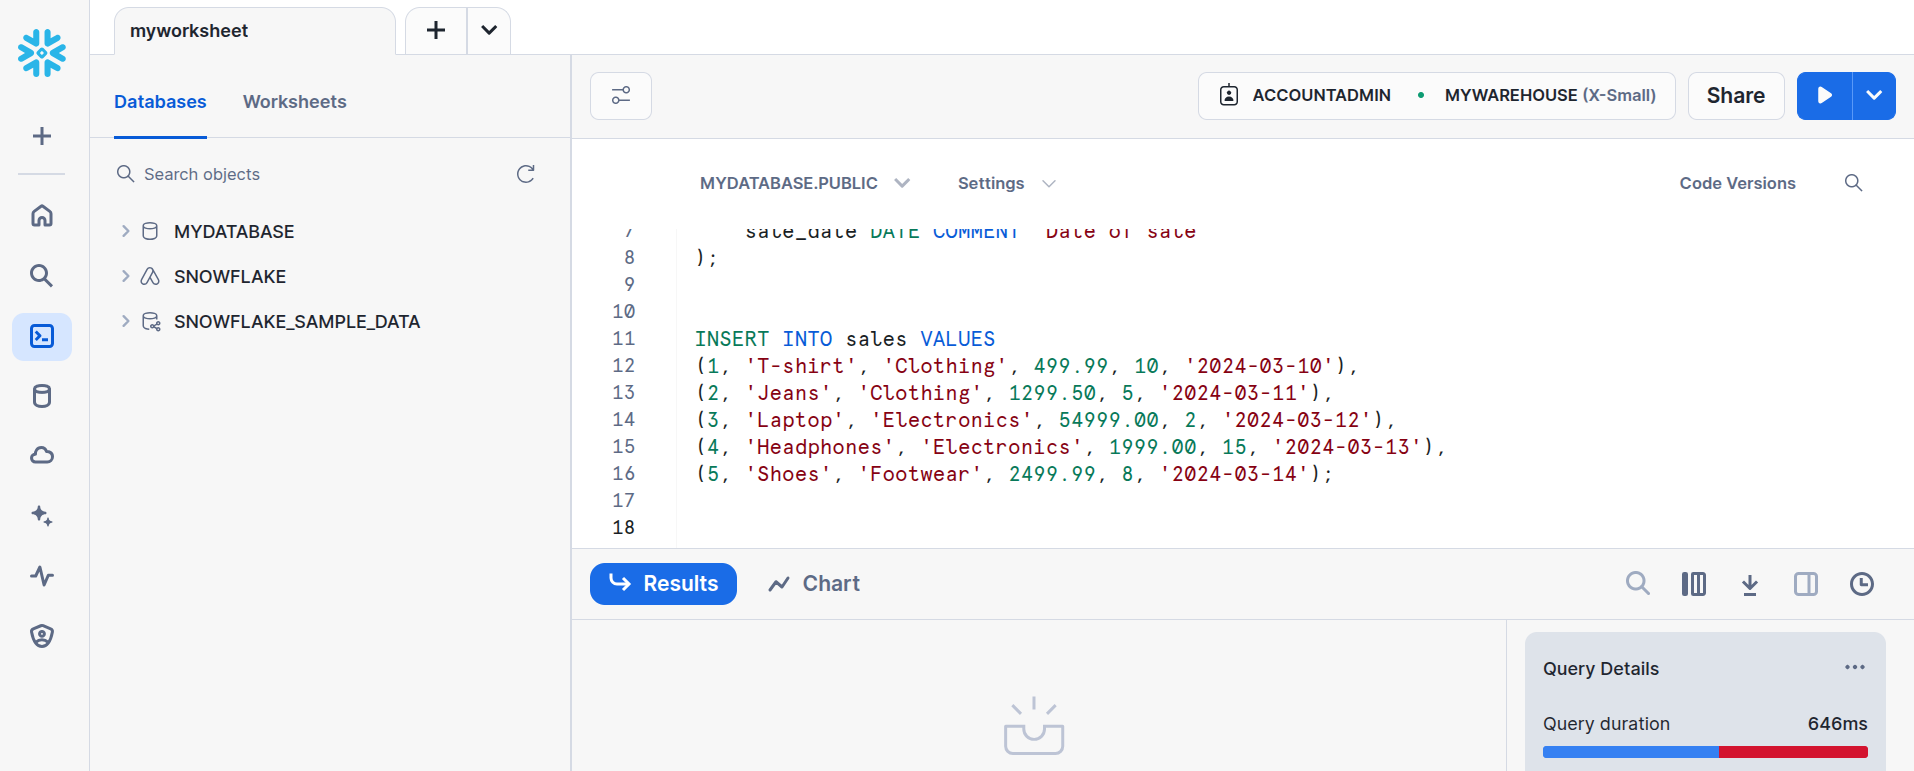
Snowflake
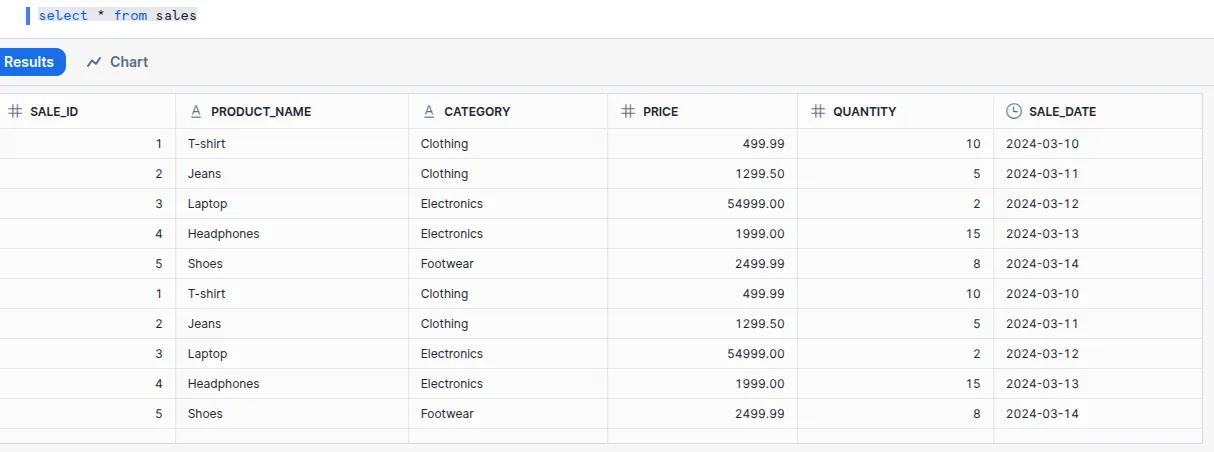
Done! After generating the data, the table will look like below after executing the select * from sales query:
Defining data model (semantic model)
Once you have generated the data, the next step is to design the Semantic Model, which is crucial for turning raw data into actionable insights. A semantic model organizes data into easily understandable structures, such as dimensions and measures, and defines the relationships between them.
Dimensions:
-
sale_id -
product_name -
category
Measures:
-
total_revenue: Calculated asSUM(price * quantity)to determine total revenue per product category. -
total_product_quantity: Represents the total count of sold products. -
sale_date: Converted fromdatetotimestampformat, as Lens (the semantic model) does not support thedatedata type.
This phase serves as a strategic decision-making step, laying the foundation for semantic model construction, which will be executed in the subsequent Data Product building phase.
Defining Data Product specifications
This phase involves establishing key attributes for the Data Product, including its identifier, version, use case, domain, collaborators, and essential resources. These specifications are defined within the deployment file named dp_deployment.yaml, structured as follows:
# Product meta section
name: sales-insights # mandatory
version: v1beta # mandatory
entity: product # mandatory
type: data # mandatory
tags:   # optional
  - DPDomain.Sales
  - DPDomain.Marketing
  - DPUsecase.Sales Analysis

description: Focuses on insights into sales data. # optional
refs: # optional
- title: 'Workspace Info'
  href: https://dataos.info/interfaces/cli/command_reference/#workspace
# Product specific section
v1beta: # mandatory
  data: # mandatory
    meta: # optional
      title: Sales Insights
      sourceCodeUrl: https://bitbucket.org/mywork15/sflens/src/main/

    collaborators: # optional
      - name: shraddhaade
        description: developer
      - name: piyushjoshi
        description: consumer

    resource: # mandatory
      refType: dataos
      ref: bundle:v1beta:salesinsights-bundle

    inputs: # mandatory
      - refType: dataos
        ref: dataset:sfdepot:public:sales

    ports: # optional
      lens:
          ref: lens:v1alpha:sales-insights-lens:public
          refType: dataos
-
In this configuration, the Data Product is designated as 'sales-insights', positioned within the Sales and Marketing domain, addressing the Sales Analysis use case. A description is provided to inform business users and Data Product consumers, which will be accessible via the Data Product Hub post-deployment.
-
The collaborators’ section lists individuals involved in developing the Data Product. Required resources are referenced through a Bundle Resource, ensuring the seamless application of all necessary dependencies. In this instance, the Lens model (semantic model) is applied using the Bundle Resource. Additionally, the input dataset reference is defined, which will be generated during the build phase. Optionally, ports can be configured to establish connections with the Lens model.
This step serves as a blueprint for the deployment process, ensuring all required components are systematically structured before the actual build phase.
Building the Data Product
The build phase focuses on constructing the Data Product, beginning with securely storing Snowflake credentials in the DataOS Environment, establishing a connection between DataOS and Snowflake, and creating the semantic model. The following guide provides a step-by-step approach to streamline each phase of the process.
Store the Snowflake credentials in DataOS
To securely store Snowflake credentials, two instance secrets must be created for read-write access:
-
Read-only instance secret.
-
Read-write instance secret.
The following steps outline the process of creating Instance Secrets efficiently.
-
Create two manifest files: Instance Secret with read access and Instance Secret with read-write access. The following manifest files are provided as templates. Simply update them with your credentials and use them to create the instance secrets.
-
Apply the read-only Instance Secret manifest file by executing the command below.
Expected output:
-
Apply the read-write Instance Secret manifest file by executing the command below.
Expected output:
-
Validate the Instance Secret creation by executing the command below, which will list the instance-level resources created by the user.
Expected output:
dataos-ctl resource get
INFO[0000] 🔍 get...
INFO[0001] 🔍 get...complete

      NAME      | VERSION |      TYPE       | WORKSPACE | STATUS | RUNTIME |    OWNER
----------------|---------|-----------------|-----------|--------|---------|--------------
  sfdepot-r     | v1      | instance-secret |           | active |         | iamgroot
  sfdepot-rw    | v1      | instance-secret |           | active |         | iamgroot
Connect DataOS to Snowflake
To establish a connection between DataOS and Snowflake, a Depot Resource must be created. Follow the steps below to configure the Depot Resource efficiently.
-
To establish a connection, a Depot manifest file must be created. This file references both read-only and read-write Instance Secrets, ensuring secure credential management within DataOS.
name: sfdepot version: v2alpha type: depot layer: user depot: type: snowflake description: This depot is for Data Product purpose. snowflake: warehouse: mywarehouse url: FLJXHCC-GN43023.snowflakecomputing.com database: mydatabase account: FLJXHCC-GN43023 external: true secrets: - name: sfdepot-r keys: - sfdepot-r - name: sfdepot-rw keys: - sfdepot-rw -
Apply the manifest file by executing the command below.
-
Validate the Depot creation by executing the command below, which will list the instance-level resources created by the user.
Expected output:
dataos-ctl resource get
INFO[0000] 🔍 get...
INFO[0001] 🔍 get...complete

      NAME      | VERSION |      TYPE       | WORKSPACE | STATUS | RUNTIME |    OWNER
----------------|---------|-----------------|-----------|--------|---------|--------------
  sfdepot       | v2alpha | depot           |           | active |         | iamgroot
  sfdepot-r     | v1      | instance-secret |           | active |         | iamgroot
  sfdepot-rw    | v1      | instance-secret |           | active |         | iamgroot
Extract the metadata
To access the metadata of the sales data on Metis UI within DataOS, the user must create a Scanner Workflow that scans the metadata from the source (Depot) and stores it within DataOS.
-
Create the Scanner Workflow to fetch the metadata of the Snowflake table without moving the actual data.
version: v1 name: scanner-newdepot type: workflow tags: - Scanner title: Scan snowflake-depot description: | The purpose of this workflow is to scan snowflake and see if scanner works fine with a snowflake of depot. workflow: dag: - name: scan-snowflake-db title: Scan snowflake db description: | The purpose of this job is to scan gateway db and see if scanner works fine with a snowflake type of depot. tags: - Scanner spec: stack: scanner:2.0 compute: runnable-default stackSpec: depot: sfdepot -
Apply the Scanner Workflow by executing the command below.
-
Validate the Scanner Workflow by executing the command below. It will take some time for the workflow’s runtime to succeed. In the below command
-rrefers to the running state of the Workflow, which gets updated in real time.Expected output:
dataos-ctl get -t workflow -w public -r INFO[0000] 🔍 get... INFO[0001] 🔍 get...complete NAME | VERSION | TYPE | WORKSPACE | STATUS | RUNTIME | OWNER -------------------|---------|----------|-----------|--------|-----------|-------------- scanner-newdepot | v1 | workflow | public | active | succeeded | iamgroot -
After successfully creating the Depot and running the Scanner Workflow, the user will be able to access the metadata on the Metis UI.

Metis UI
Create a data model
In DataOS, Lens Resource is used to create the semantic model. Follow the steps below to create a semantic model as decided in the design phase.
-
Prepare the Lens model folder inside the cloned repository
Organize the Lens model folder with the following structure to define tables, views, and user groups inside the
lensfolder: -
Load data from the data source
In the
sqlsfolder, createsales.sqlfiles for each logical table. This file is responsible for loading or selecting the relevant data from the source, as shown below. -
Define the table in the model
Create a
tablesfolder to store logical table definitions, with a ‘table1.yaml' file outlining its dimensions and measures. To define a table forsalesdata :tables: - name: sales sql: {{ load_sql('sales') }} description: "Sales transactions with product details and revenue calculations." dimensions: - name: sale_id type: number description: "Unique ID for each sale." sql: SALE_ID primary_key: true public: true - name: product_name type: string description: "Name of the product sold." sql: PRODUCT_NAME - name: category type: string description: "Product category." sql: CATEGORY measures: - name: total_revenue type: sum sql: TOTAL_SALES description: "Total revenue generated from sales." - name: total_quantity type: sum sql: QUANTITY description: "Total quantity of items sold." - name: avg_price type: avg sql: PRICE description: "Average selling price per product." -
Create views
Create a
viewsfolder to store all logical views within the ‘view1.yaml’ file. The views reference dimensions and measures from multiple tables to provide a consolidated view of key metrics. For example, to create a simple metric called category_sales, we have taken the category dimension and total sales, and quantity measuresviews: - name: category_sales description: "Aggregated sales data grouped by product category." tables: - join_path: sales includes: - category - sum(total_sales) AS category_revenue - sum(quantity) AS category_quantityTo know more about the views click here.
-
Create user groups
This YAML manifest file is used to manage access levels for the semantic model. It defines user groups that organize users based on their access privileges. In this file, you can create multiple groups and assign different users to each group, allowing you to control access to the model. By default, there is a 'default' user group in the YAML file that includes all users.
To know more about the User groups, click here
-
Push the changes.
-
Create the Instance Secrets to store the Bitbucket credentials.
To securely store Bitbucket credentials, an Instance Secret must be created.
The following steps outline the process of creating an Instance Secret efficiently.
-
Create a manifest file: Instance Secret with read-write access.
-
Apply the read-only Instance Secret manifest file by executing the command below.
Expected output:
-
Apply the read-write Instance Secret manifest file by executing the command below.
Expected output:
-
Validate the Instance Secret creation by executing the command below, which will list the instance-level Resources created by the user.
Expected output:
dataos-ctl resource get
INFO[0000] 🔍 get...
INFO[0001] 🔍 get...complete

      NAME      | VERSION |      TYPE       | WORKSPACE | STATUS | RUNTIME |    OWNER
----------------|---------|-----------------|-----------|--------|---------|--------------
bitbucket-cred01| v1      | instance-secret |           | active |         | iamgroot
bitbucket-cred01| v1      | instance-secret |           | active |         | iamgroot
-
-
Deployment manifest file
After setting up the Lens model folder, the next step is to configure the Lens deployment manifest file. Below is the YAML file template for configuring a Lens.
version: v1alpha
name: sales-insights-lens
layer: user
type: lens
tags:
  - lens
description: This semantic model provides comprehensive insights for product affinity analysis.
lens:
  compute: runnable-default
  secrets:
    - name: bitbucket-cred01
      allKeys: true
  source:
    type: depot
    name: sfdepot
  repo:
    url: https://bitbucket.org/mywork15/sflens
    lensBaseDir: sflens/model
    syncFlags:
      - --ref=main

  api:   # optional
    replicas: 1 # optional
    logLevel: info  # optional
    resources: # optional
      requests:
        cpu: 100m
        memory: 256Mi
      limits:
        cpu: 500m
        memory: 500Mi
  worker: # optional
    replicas: 1 # optional
    logLevel: debug  # optional
    resources: # optional
      requests:
        cpu: 100m
        memory: 256Mi
      limits:
        cpu: 500m
        memory: 500Mi
  router: # optional
    logLevel: info  # optional
    resources: # optional
      requests:
        cpu: 100m
        memory: 256Mi
      limits:
        cpu: 500m
        memory: 500Mi
Each section of the YAML template defines key aspects of the Lens deployment. Refer to this link to learn more about Lens.
Create the Bundle to deploy the Resources
The Bundle Resource enables the deployment of all required resources in a single step. In this case, the Lens model will be deployed using the Bundle, referencing it within the Bundle manifest file. Follow the steps below to configure the Bundle Resource efficiently.
-
Create a manifest file, copy the code below, and refer to the Lens deployment manifest created in the previous step.
-
Apply the Bundle manifest file by executing the code below.
Expected output:
Deploy the Data Product
Follow the below to steps below to deploy the Data Product.
Apply the Data Product
To deploy the Data Product, apply its manifest file, which was created in the design phase, by executing the command below in DataOS CLI.
Add the Data Product to the Data Product Hub
To add the Data Product to the Data Product Hub, you have to run the Data Product Scanner Workflow. Follow the steps below to configure and apply the Scanner Workflow.
-
Create a manifest file containing the below code.
version: v1 name: scan-data-product-test type: workflow tags: - scanner - data-product description: The job scans Data Product from poros workflow: dag: - name: scan-data-product-job description: The job scans data-product from poros and register data to metis spec: tags: - scanner2 stack: scanner:2.0 compute: runnable-default stackSpec: type: data-product sourceConfig: config: type: DataProduct markDeletedDataProducts: true -
Apply the manifest file by executing the command below.
Expected output:
-
Validate the Workflow by executing the following command.
Expected output:
Once the Scanner Workflow has succeeded, the Data Product becomes available on the Data Product Hub.
Accessing the Data Product on the Data Product Hub
To access the Data Product on Data Product Hub, follow the steps below.
-
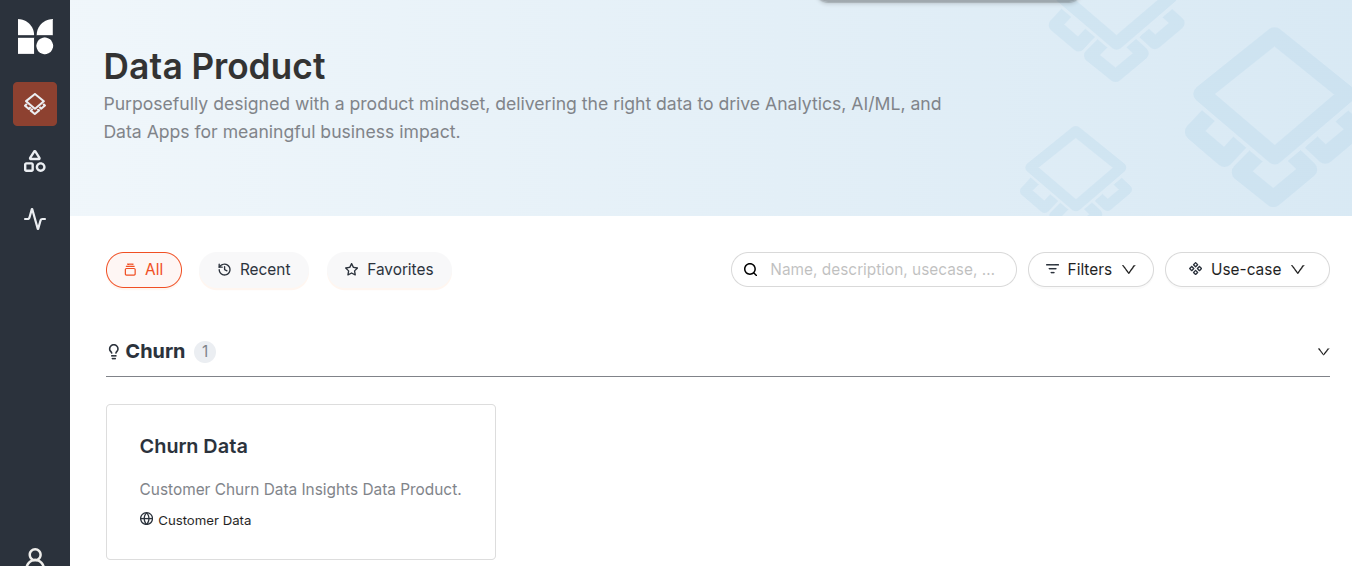
Open Data Product Hub.
Data Product Hub -
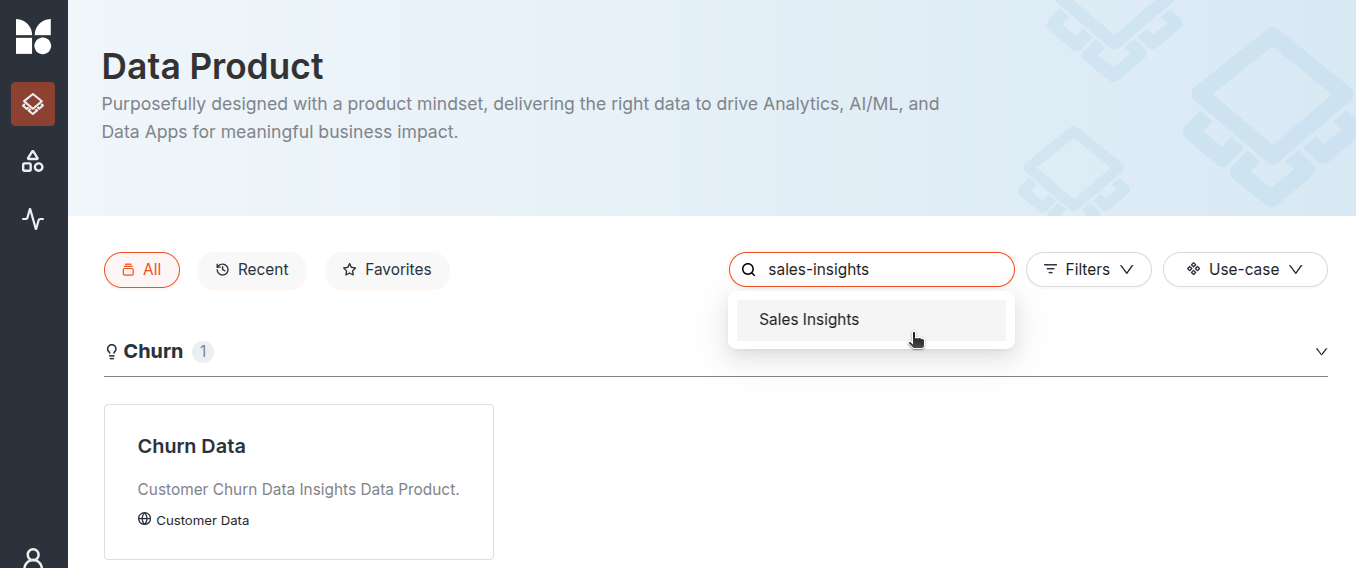
Search the Data Product by name.
Data Product Hub -
Click on the Data Product to view detailed information about it. Upon selection, additional details will be displayed, along with an option to further explore the data.
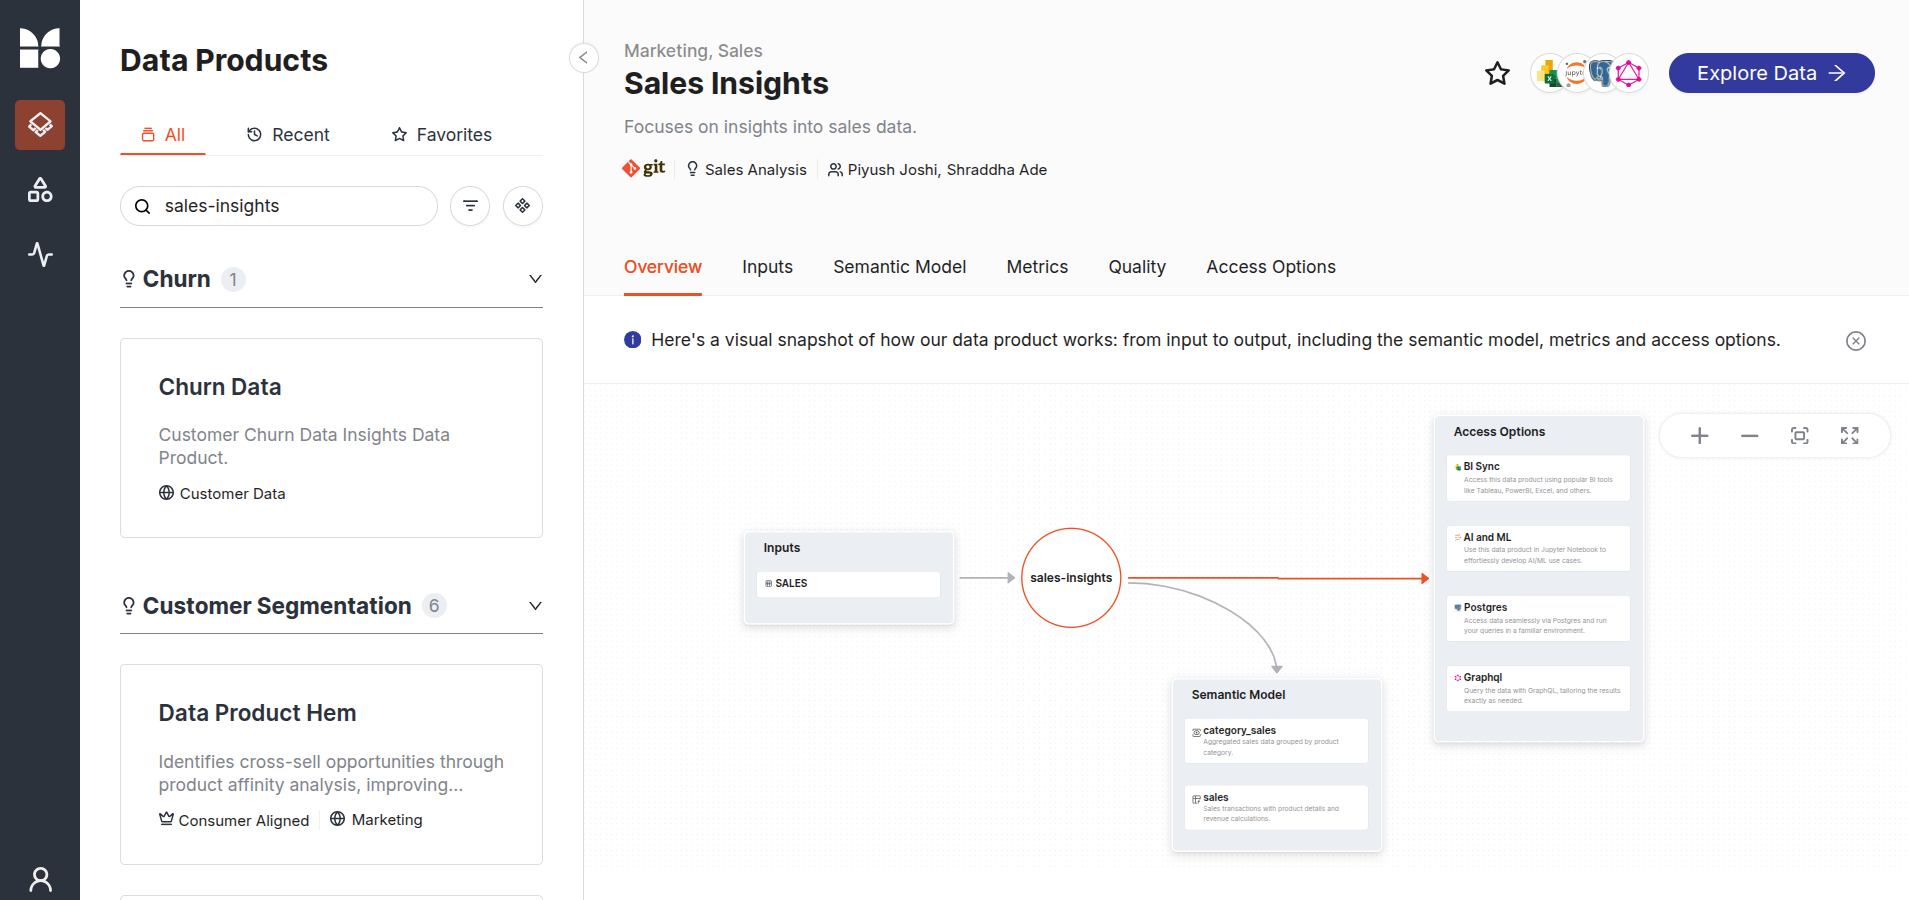
Data Product Hub -
You can fetch the key measures such as total_revenue, total_quantity, and avg_price on the “Explore Data” tab once the Snowflake cluster is up.
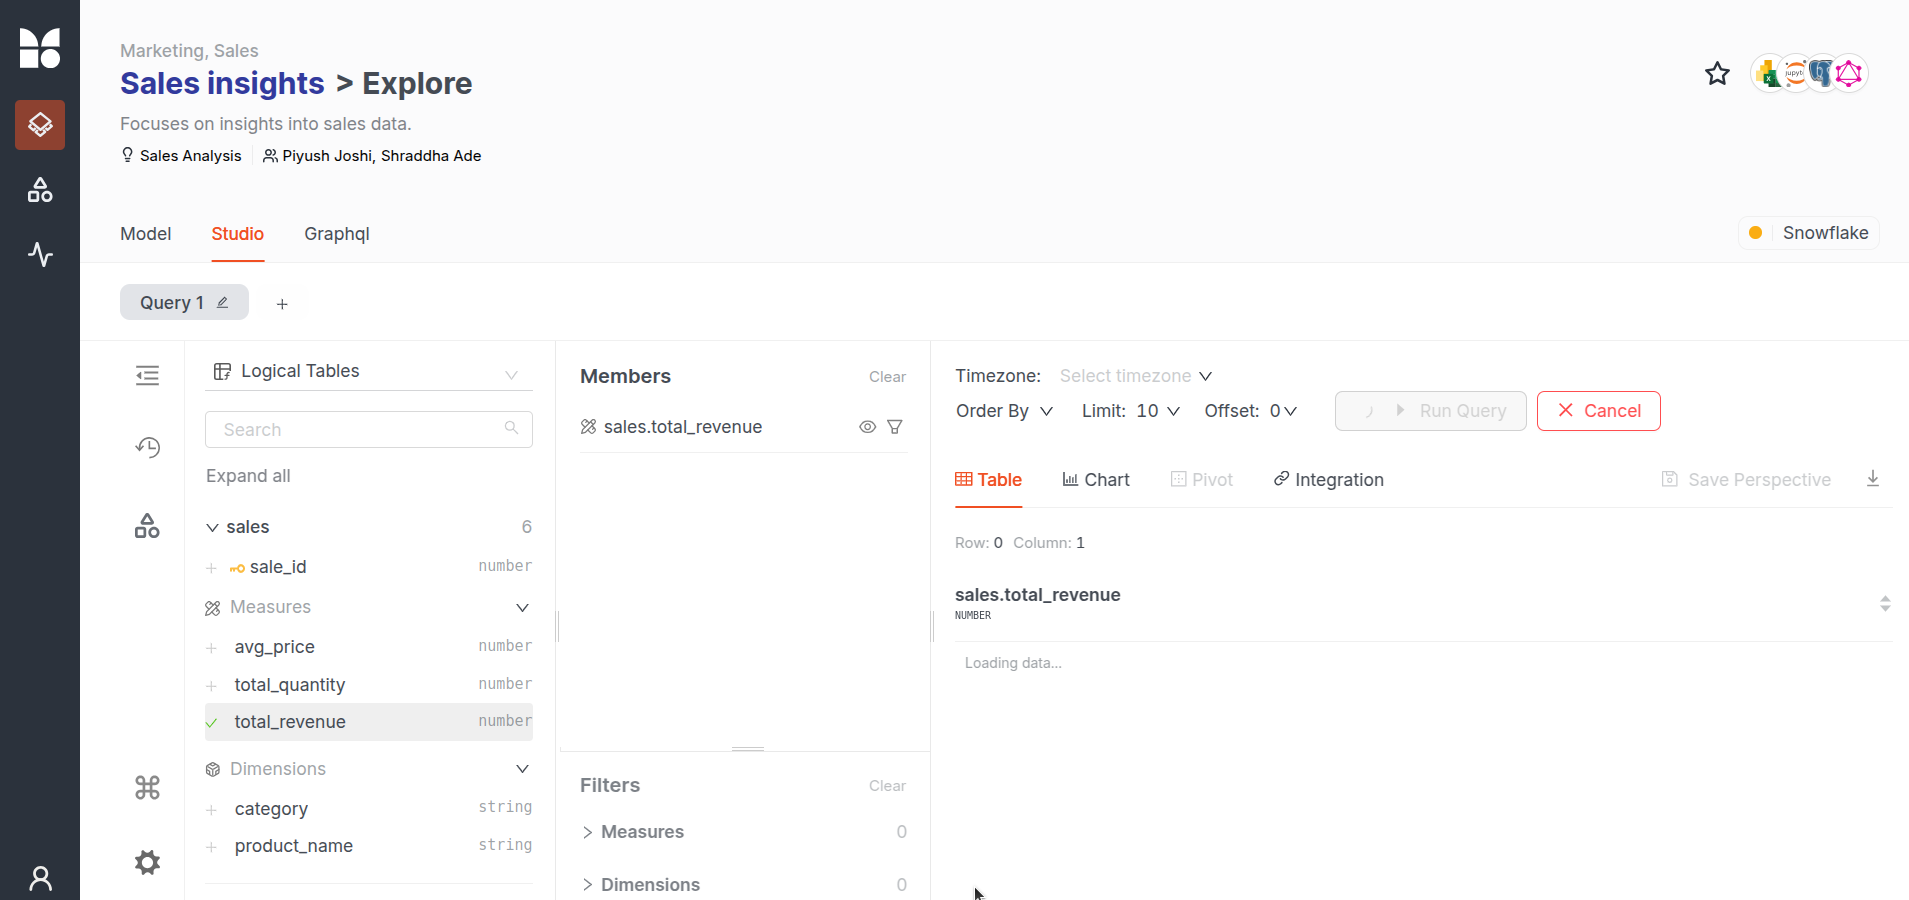
Data Product Hub
Consuming the Data Product
The most effective way to present the Sales Analysis is by creating a dashboard. This section provides step-by-step instructions to connect the Sales Insights Data Product to Tableau Cloud, allowing users to build an interactive dashboard for data visualization.
Step 1: Navigate to the Data Product Hub
Access the Home Page of DataOS. From the home page, navigate to the Data Product Hub to explore the various Data Products available.

Step 2: Browse and select a Data Product
Search for the “Sales insights” Data Product on the search bar and select.
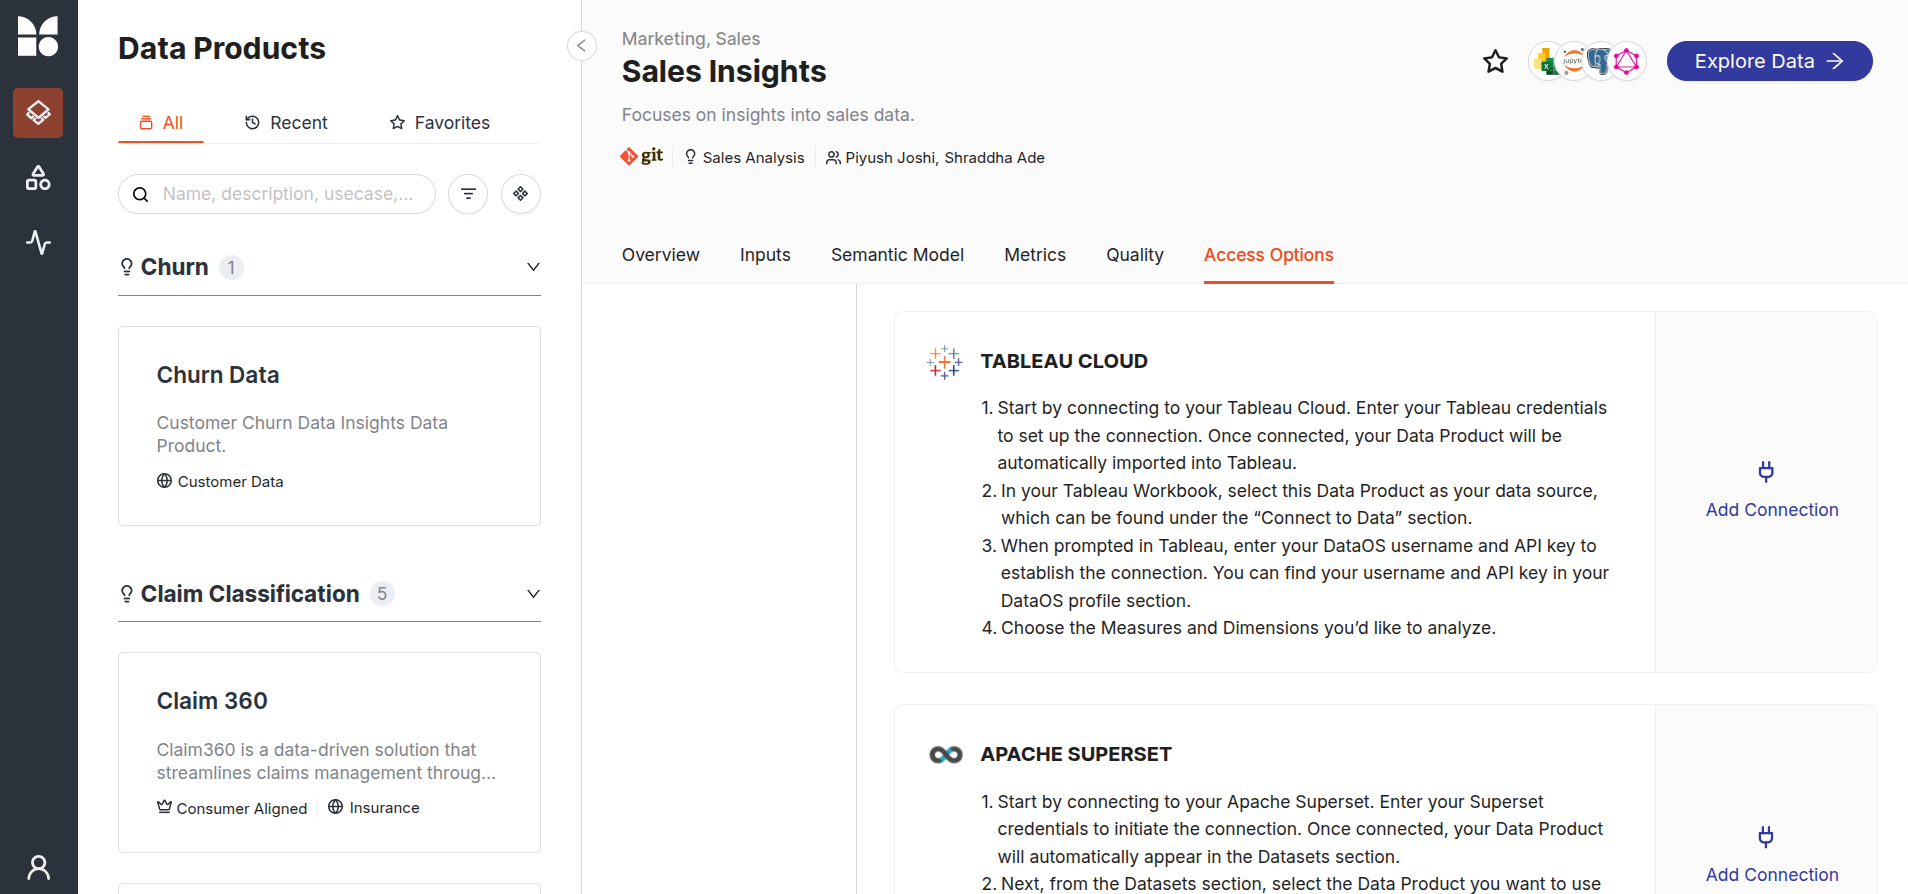
Step 3: Navigate to the Access Options
After selecting a Data Product, navigate to the BI Sync option in the Access Options tab. Scroll through the BI Sync and locate the Tableau Cloud option. Now, click on the Add Connection button.
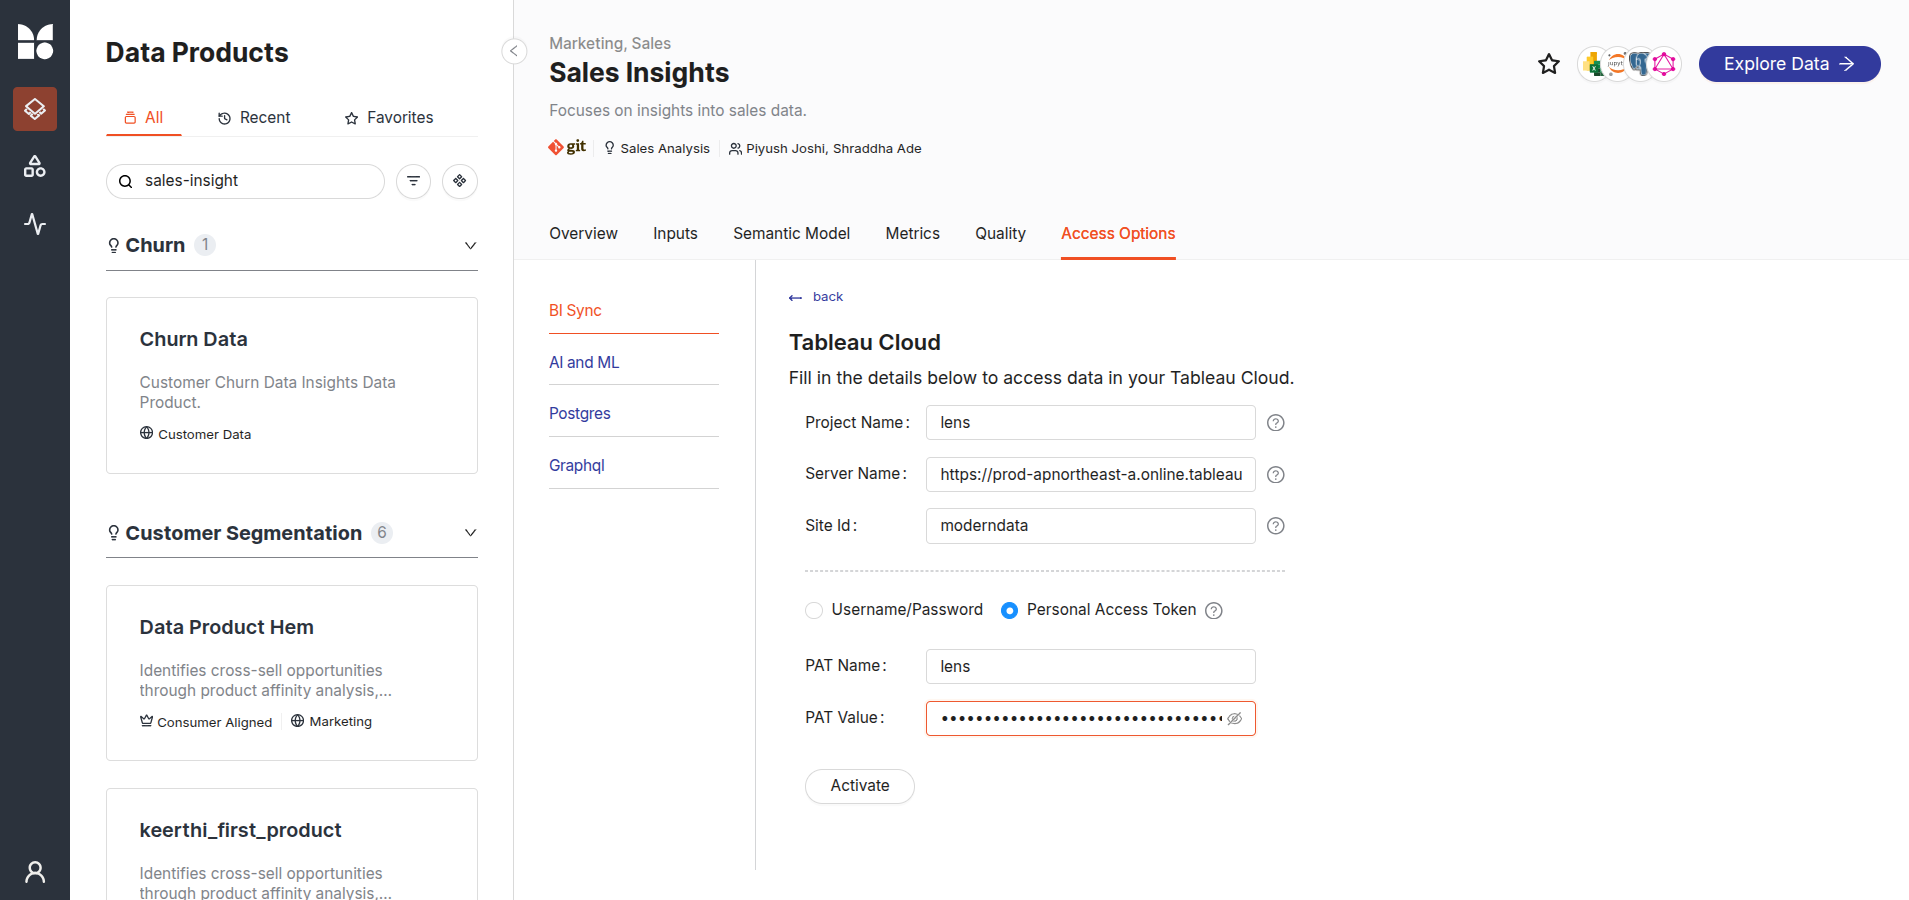
Step 4: Enter connection details and click the Activate button
A connection window will open, prompting the entry of the necessary connection details. There are the following two ways to pass the connection details:
In this example, the connection to Tableau Cloud is established using a Personal Access Token.
Step 5: Connection details for connecting using Tableau PAT
Use Personal Access Tokens (PAT) for authentication in this case. To create a PAT in Tableau follow the instructions given on this link.
After successfully creating the PAT, enter the connection details:
- Project Name: The designated name for the project within Tableau. (E.g. Sales Analysis)
- Server Name: The URL or address of the Tableau Server hosting the cloud instance.
- Site ID: The identifier for the specific site on Tableau Cloud.
- PAT Name: Tableau PAT Name. (e.g.,
iamgroot,test_token) - PAT Value: Personal Access Token.
After filling in all the details, click on the Activate button. A confirmation message will appear upon successful connection.
Step 6:Exploring the Data Product on Tableau Cloud
Once the sync is successful, the data source is published to the Tableau cloud/server for the user to create the dashboard. Follow the steps below to start exploring the Data Product on Tableau Cloud.
-
Log in to Tableau Cloud
Users should log in to Tableau Cloud using the same credentials as Tableau. This will redirect to the Tableau Cloud home page.
Tableau Cloud -
Explore Tabs
Click on the Explore option on the home page.
Tableau Cloud -
Access the Project interface
This will open an interface displaying all projects, including the newly created project titled Product Analysis.

Tableau Cloud
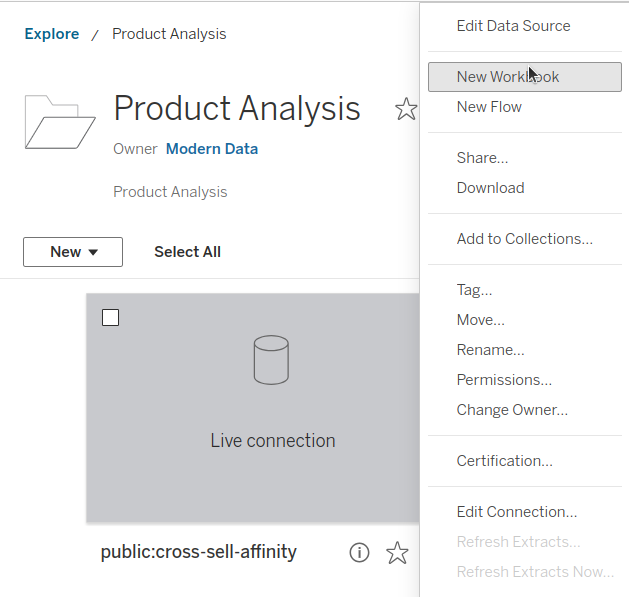
Step 4: Select the Project
Click on the project to view the available data sources for dashboard creation. This project will contain a semantic model and all its views (entities and metrics).
Step 5: Create a new workbook
Click on the menu option in the upper right corner of the data source and select the New Workbook option.
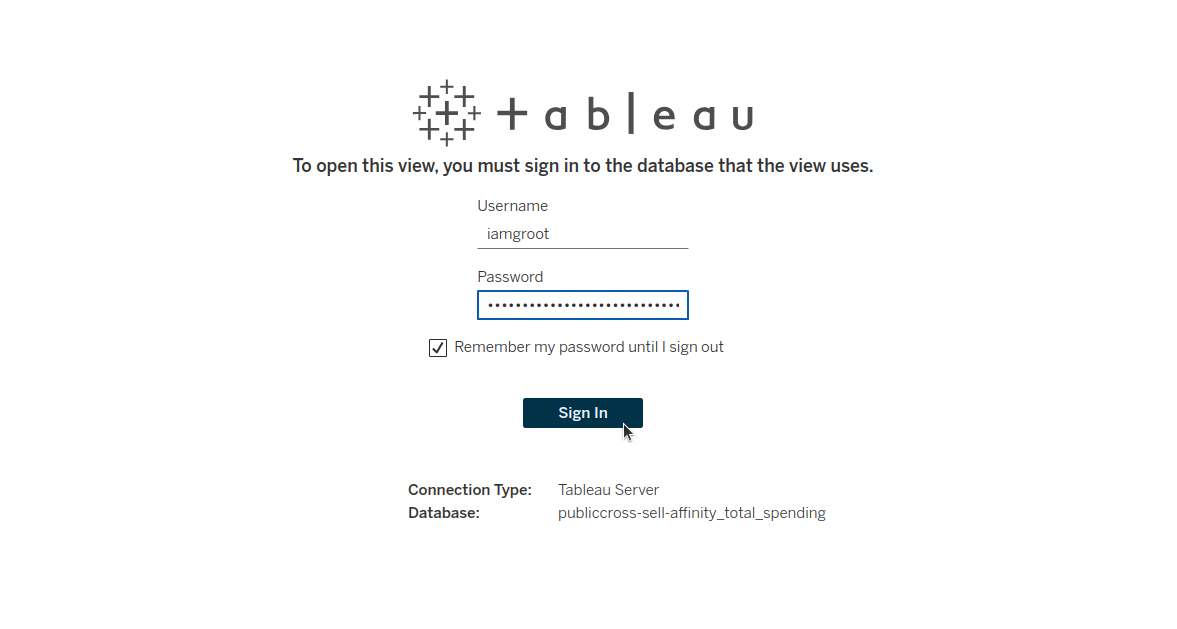
Step 6: Provide credentials
To create a new workbook where dashboard creation can commence, users will be prompted to provide their DataOS username and API key as the password to access the data source. The API can be retrieved by navigating to the profile page in the bottom left corner of the Data Product Hub.
Step 7: Start creating the dashboard
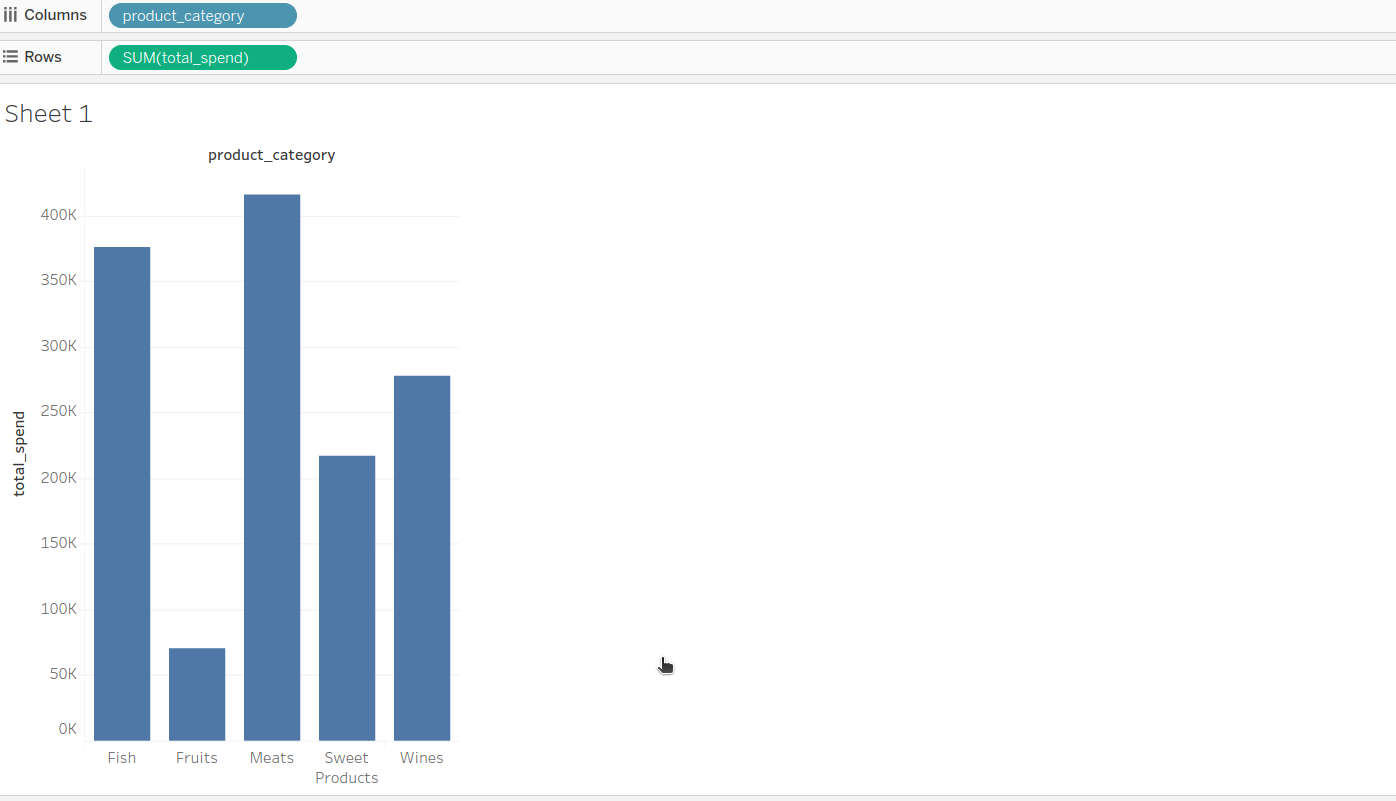
Now, users can create a dashboard and extract relevant insights.
Happy dashboarding!
Step 8: Publishing workbook/dashboard
The publisher can embed their credentials (DataOS username and API Token) or ask users to provide credentials whenever they want to access the published Workbook/Sheet/Dashboard. If the publisher has chosen to ‘Embed password for data source’, users can access the published workbook and dashboard without providing credentials.