Quick Guide for Scanner
The Scanner stack in DataOS is designed for developers to extract metadata from external source systems (such as RDBMS, Data Warehouses, Messaging services, Dashboards, etc.) and the components/services within the DataOS environment to extract information about Data products and DataOS Resources.
Info
Scanning metadata allows for a comprehensive understanding of the source data's structure, which helps in designing and optimizing ETL processes that meet desired use cases and ensure data quality. This guide explains the different ways to scan metadata and provides detailed instructions to perform the metadata scan.
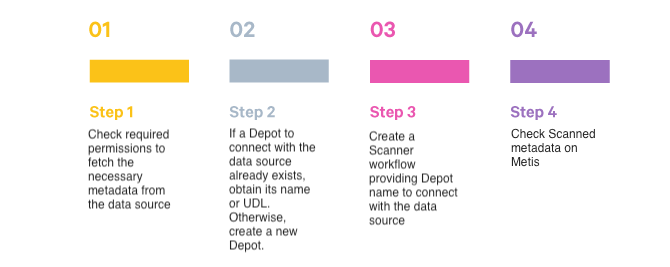
Quick Steps for Scanner Workflow
Follow the below steps:
Depots are used to connect to metadata sources to extract entities' metadata. Users must provide the Depot name or address to establish a connection and scan all datasets from the data source referenced by the Depot.
Source Data in Snowflake
For illustration purposes, the Snowflake data source will be connected.

Step 1: Check Required Permissions
-
To scan metadata from the Snowflake source system, the Snowflake user must have USAGE privileges on required schemas.
-
To run the Scanner workflow, a user must have Metis admin access or a grant for the “Run as Scanner User” use case.
-
Ensure the Depot for Snowflake is created and have Read access. If it does not exist, then create a Depot.
Step 2: Create a Depot to Connect with Snowflake
User need to connect with a data source by creating a Depot and then will use the Depot to scan the metadata for the entities.
- First create an Instance Secret for securing Snowflake credentials, using following manifest file:
    # Snowflake Read Instance-secret Manifest

    name: ${{snowflake-depot-name}}-r # Unique identifier for Resource, replace ${snowflake-depot-name} with depot name
    version: v1 # Manifest version
    type: instance-secret # Type of the Resource
    description: ${{description}} # Purpose of the Instance-secret
    layer: user # DataOS layer
    instance-secret:
      type: key-value-properties # Secret type
      acl: r # Access control: 'r' for read-only
      data:
        username: ${{username}} # replace with snowflake username
        password: ${{password}} # replace with snowflake password
This Instance Secret referenced by name within the Depot manifest file. Get more information on creating an Instance Secret Resource by following the Instance Secret document.
- Create a manifest file to store the configuration details for the Snowflake Depot.
      #Instance Secret reference Depot manifest file

      name: ${{snowflake-depot}}
      version: v2alpha
      type: depot
      tags:
        - ${{tag1}}
        - ${{tag2}}
      layer: user
      depot:
        type: snowflake
        description: ${{snowflake-depot-description}}
        snowflake:
          warehouse: ${{warehouse-name}}
          url: ${{snowflake-url}}
          database: ${{database-name}}
        external: true
        secrets:
          - name: ${{snowflake-instance-secret-name}}-r
            allkeys: true

          - name: ${{snowflake-instance-secret-name}}-rw
            allkeys: true
- Apply the Depot manifest file through the DataOS CLI by pasting the path in the placeholder, using the command given below:
Step 3: Write Scanner Workflow with Filter Patterns
Now build a Scanner workflow to scan the data source. The workflow includes the depot name and filter patterns. Filter patterns enables to control whether or not to include databases/schemas/tables as part of metadata ingestion.
-
Provide the workflow properties, such as version, name, description, tags, etc., in the YAML file.
-
Provide the Depot name or address(Universal Data Link) to connect to the data source.
-
Specify
schemaFilterPatternandtableFilterPatternto filter schemas/tables which are of interest. -
Use
includes:andexcludes:to specify schema/table names or a regex rule to include/exclude tables while scanning the schema.
    version: v1
    name: snowflake-scanner-test
    type: workflow
    tags:
      - snowflake-scanner-test
    description: The workflow scans the schema of tables and registers their metadata
    workflow:
      dag:
        - name: scanner2-snowflake
          description: The job scans schema from sanity snowflake Depot tables and registers their metadata on metis2
          spec:
            stack: scanner:2.0
            compute: runnable-default
            stackSpec:
              depot: snowflaketestsource
              sourceConfig:
                config:
                  schemaFilterPattern:
                    includes:
                      - TPCH_SF1$
                  tableFilterPattern:
                    includes:
                      - region
                      - supplier
                      - Customer
                      - ORDERS
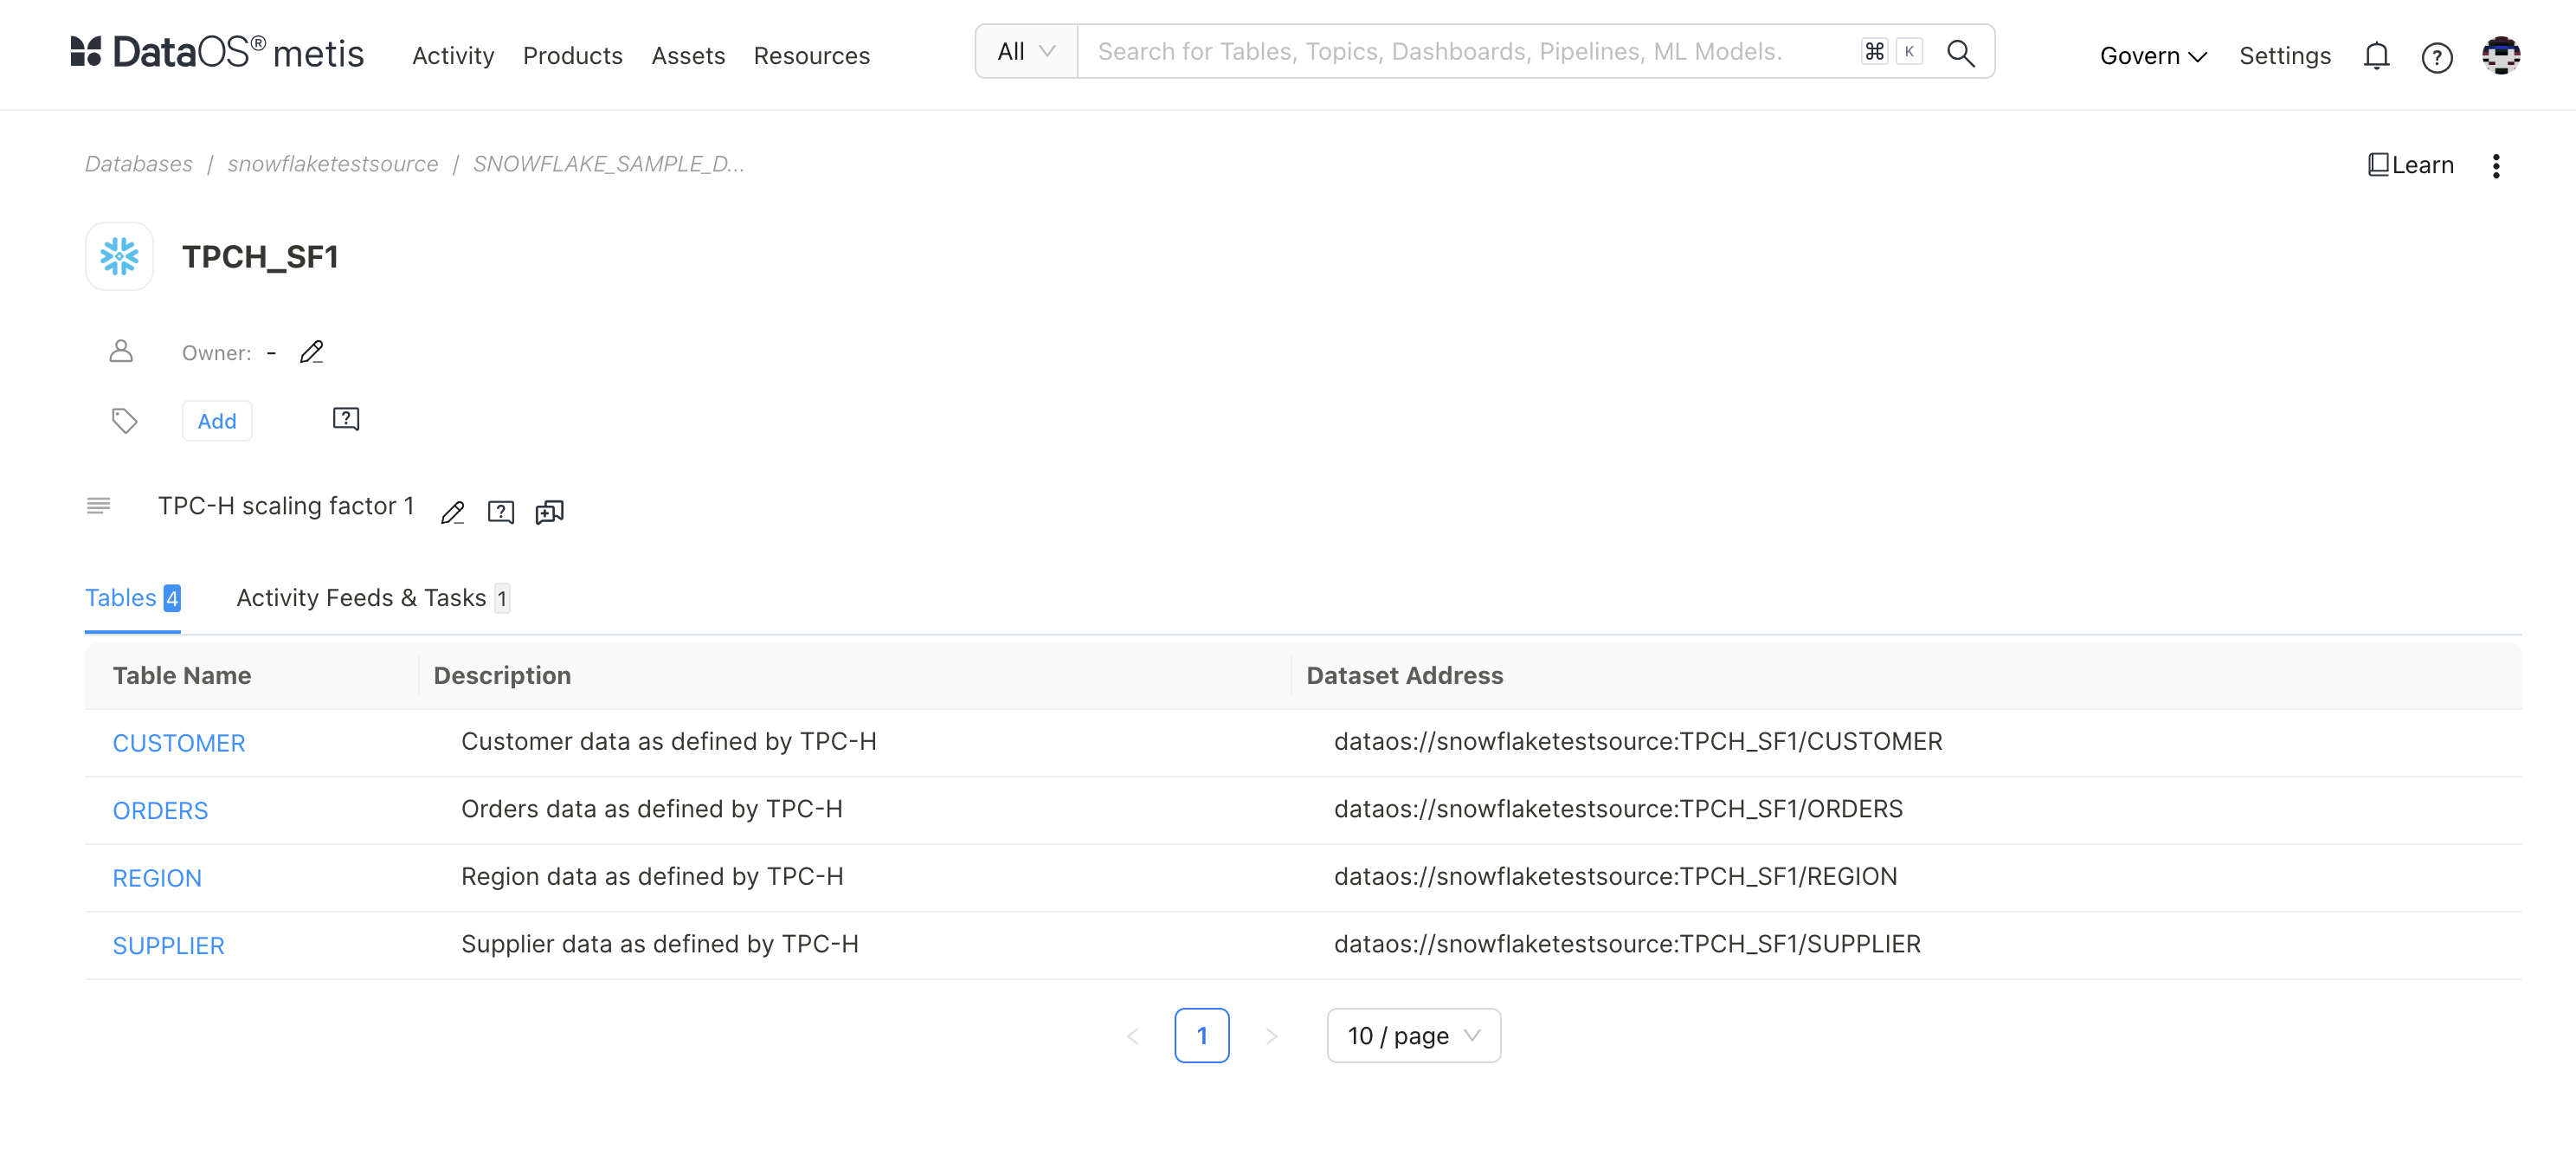
Step 4: Check Metadata Source Created on Metis
- On Metis UI, go to Settings > Databases to access it.
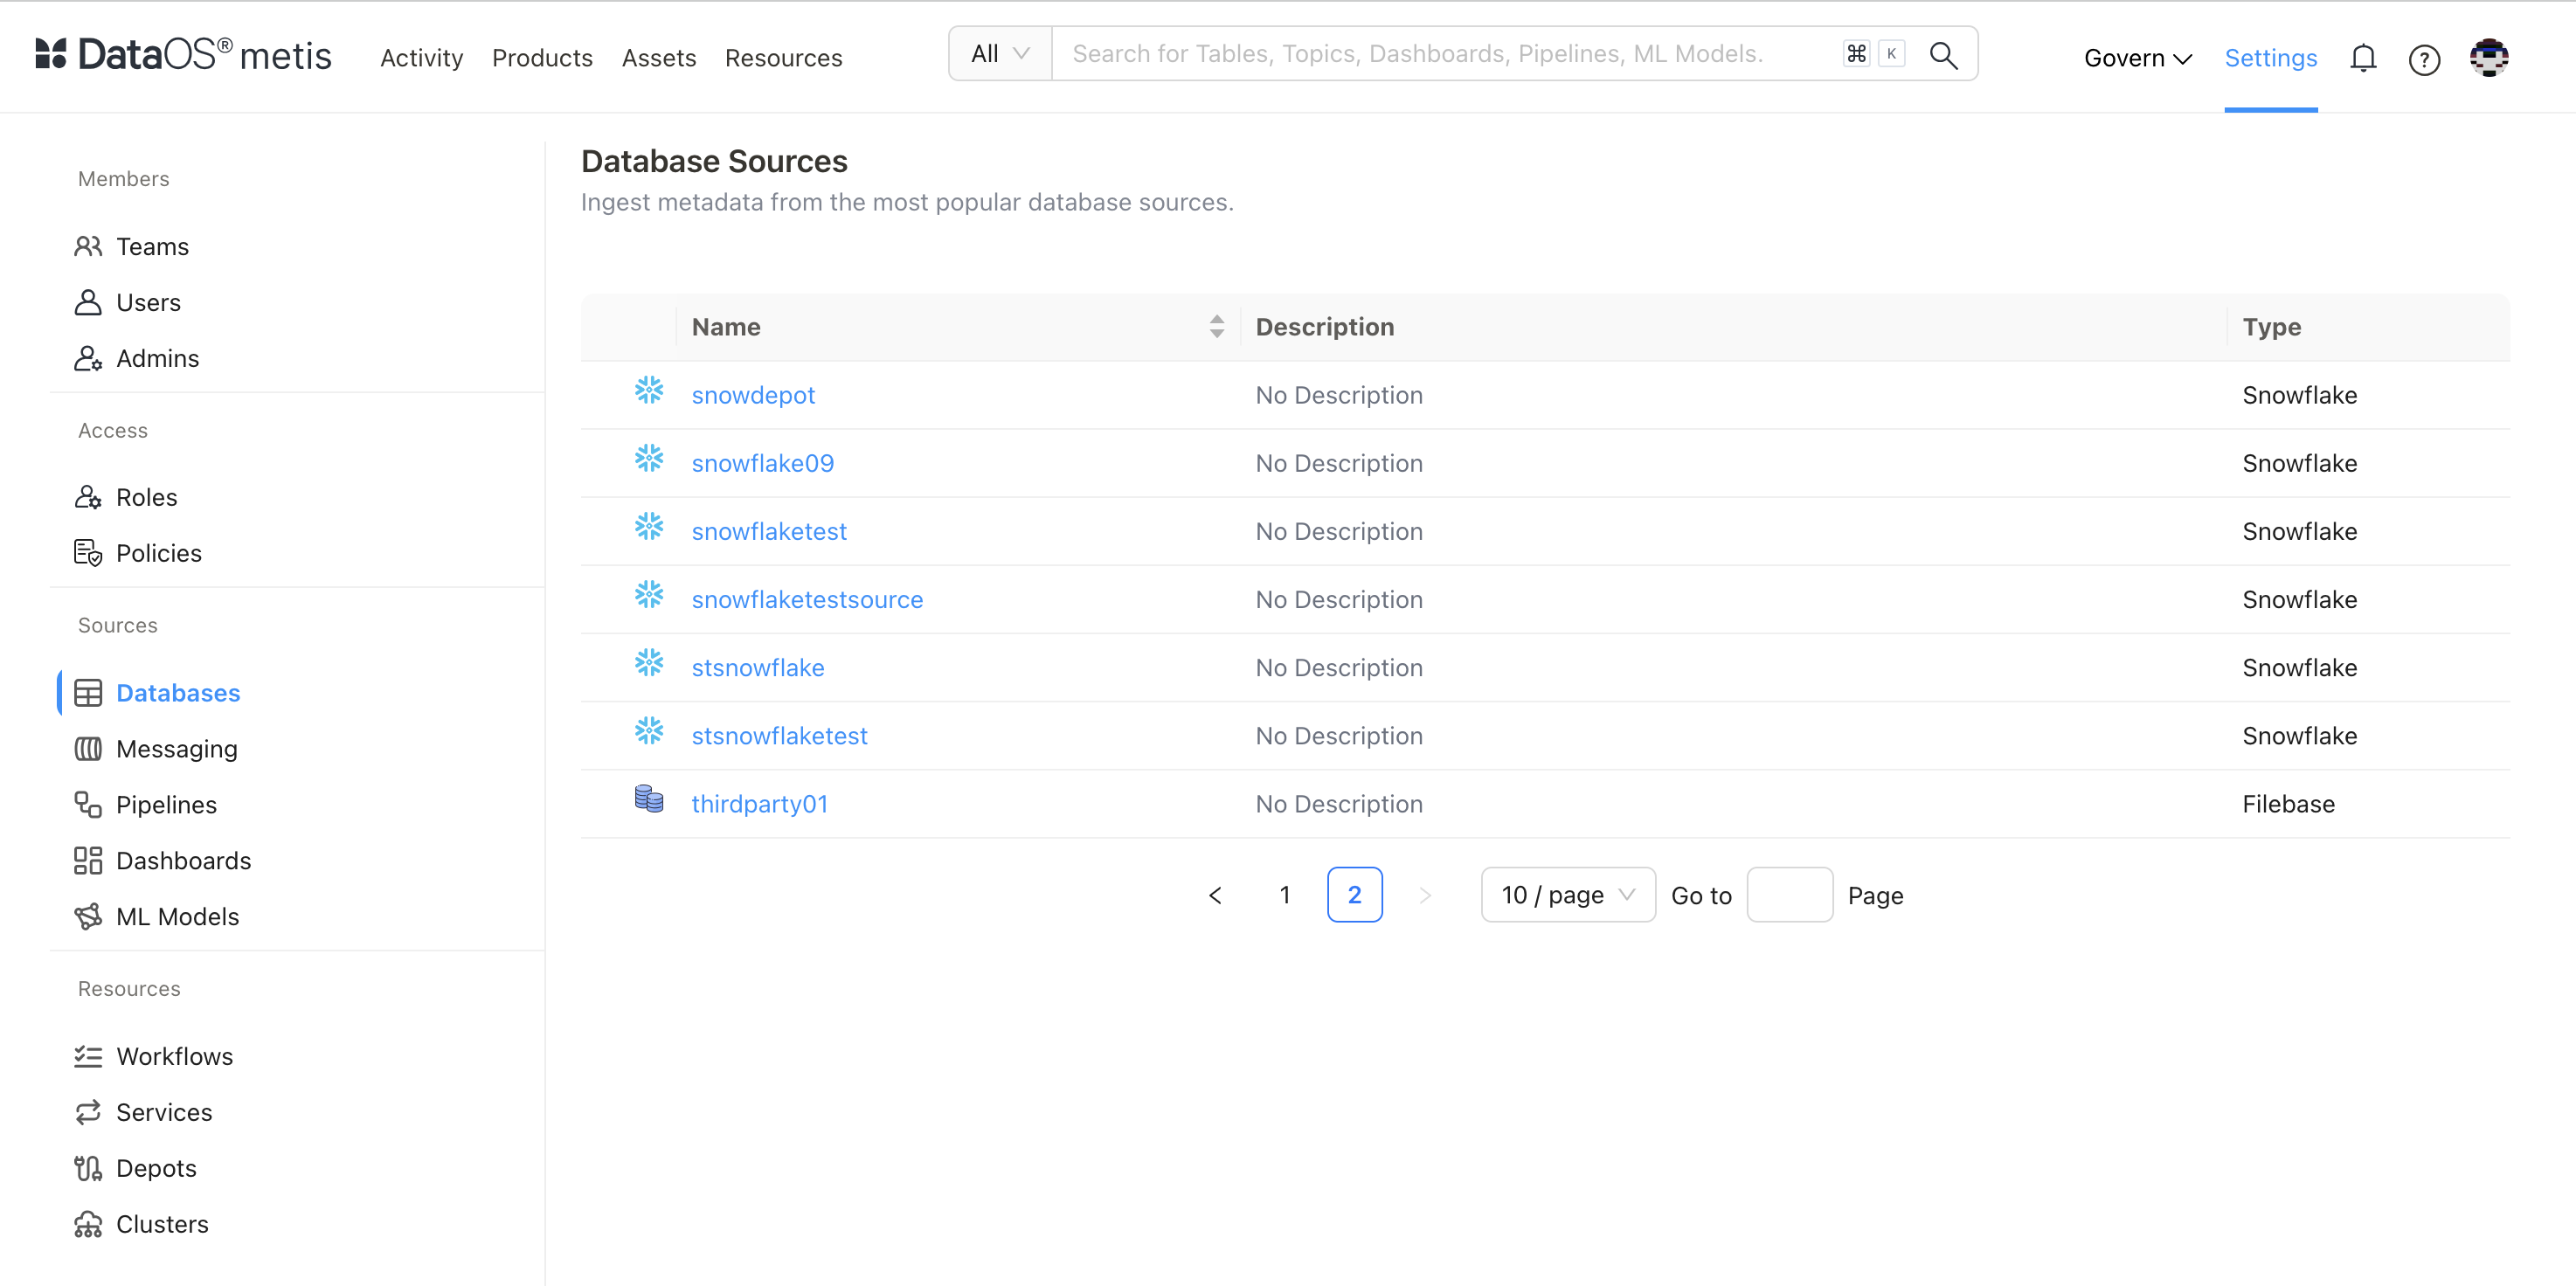
Scanned Database
- Click on the database.
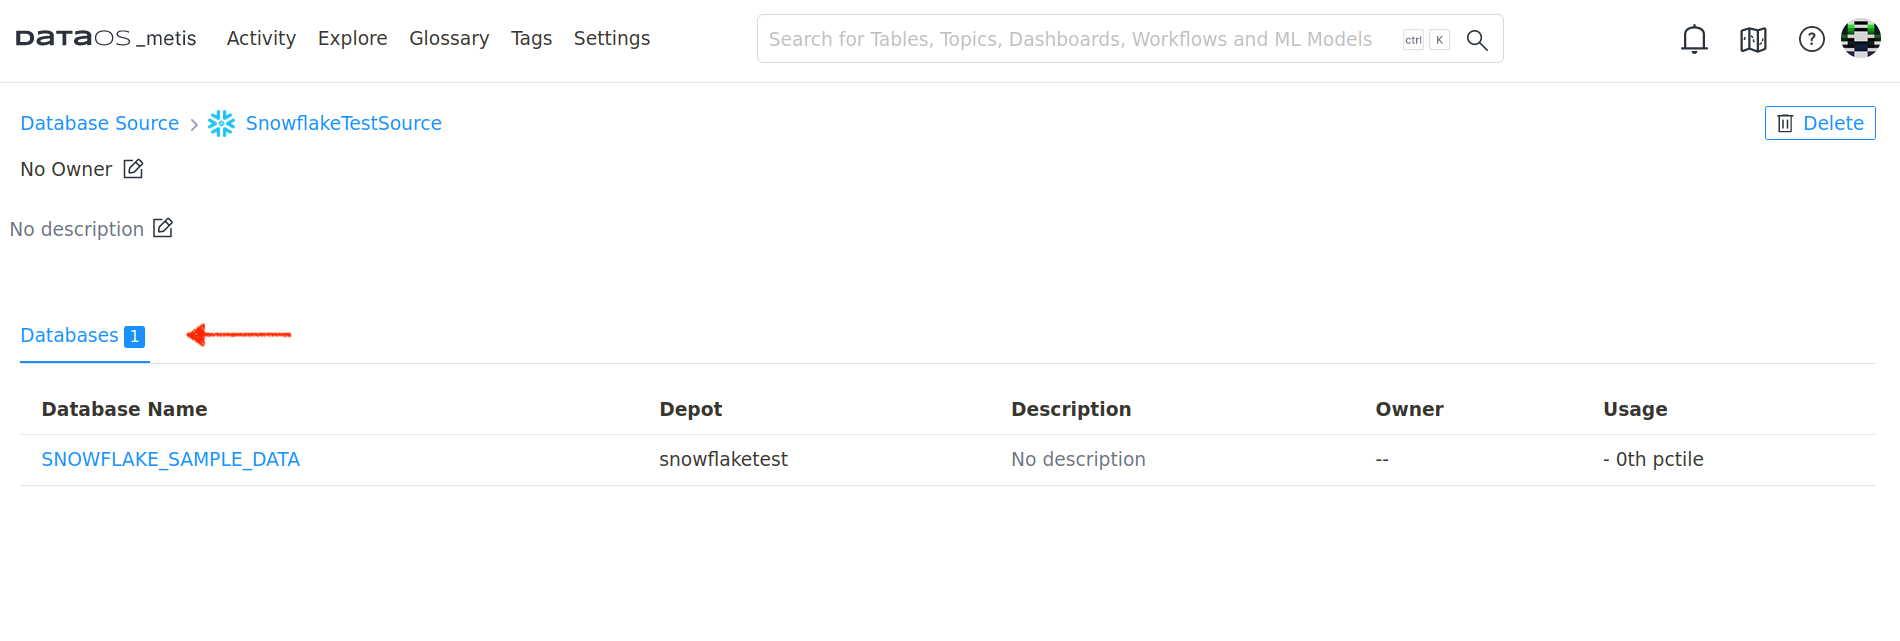
- Scanned Tables on Metis using includes Filter Pattern:
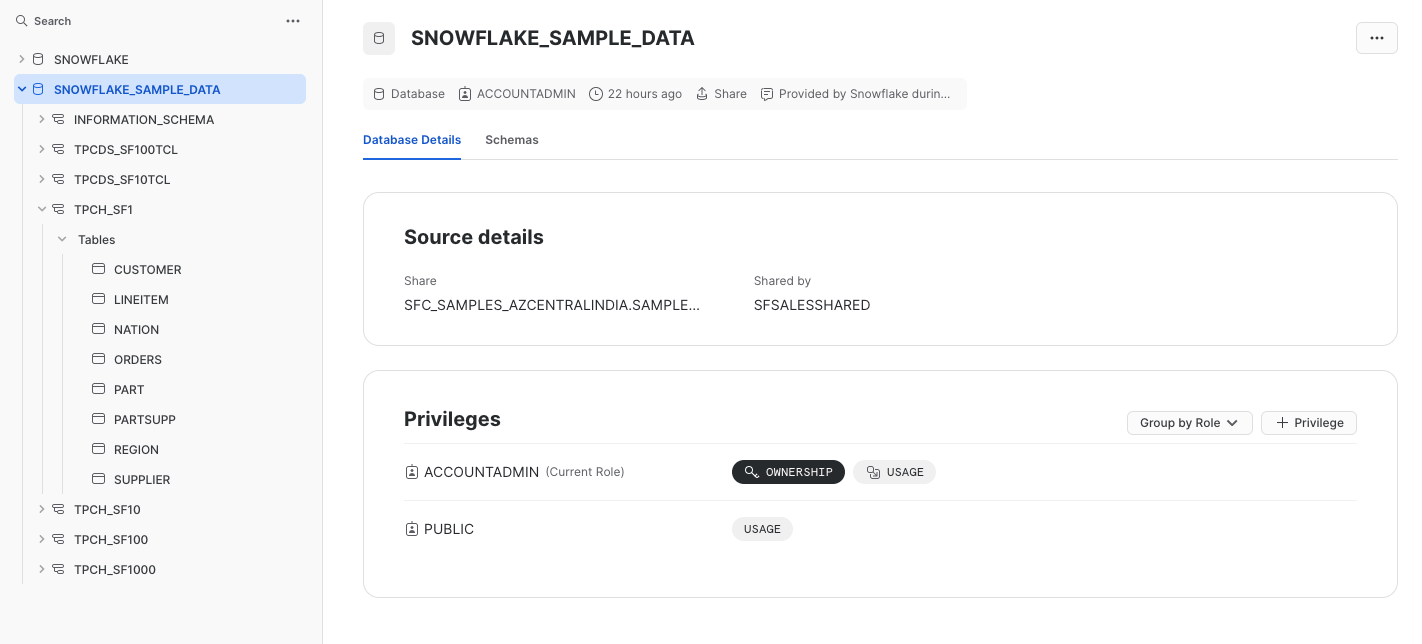
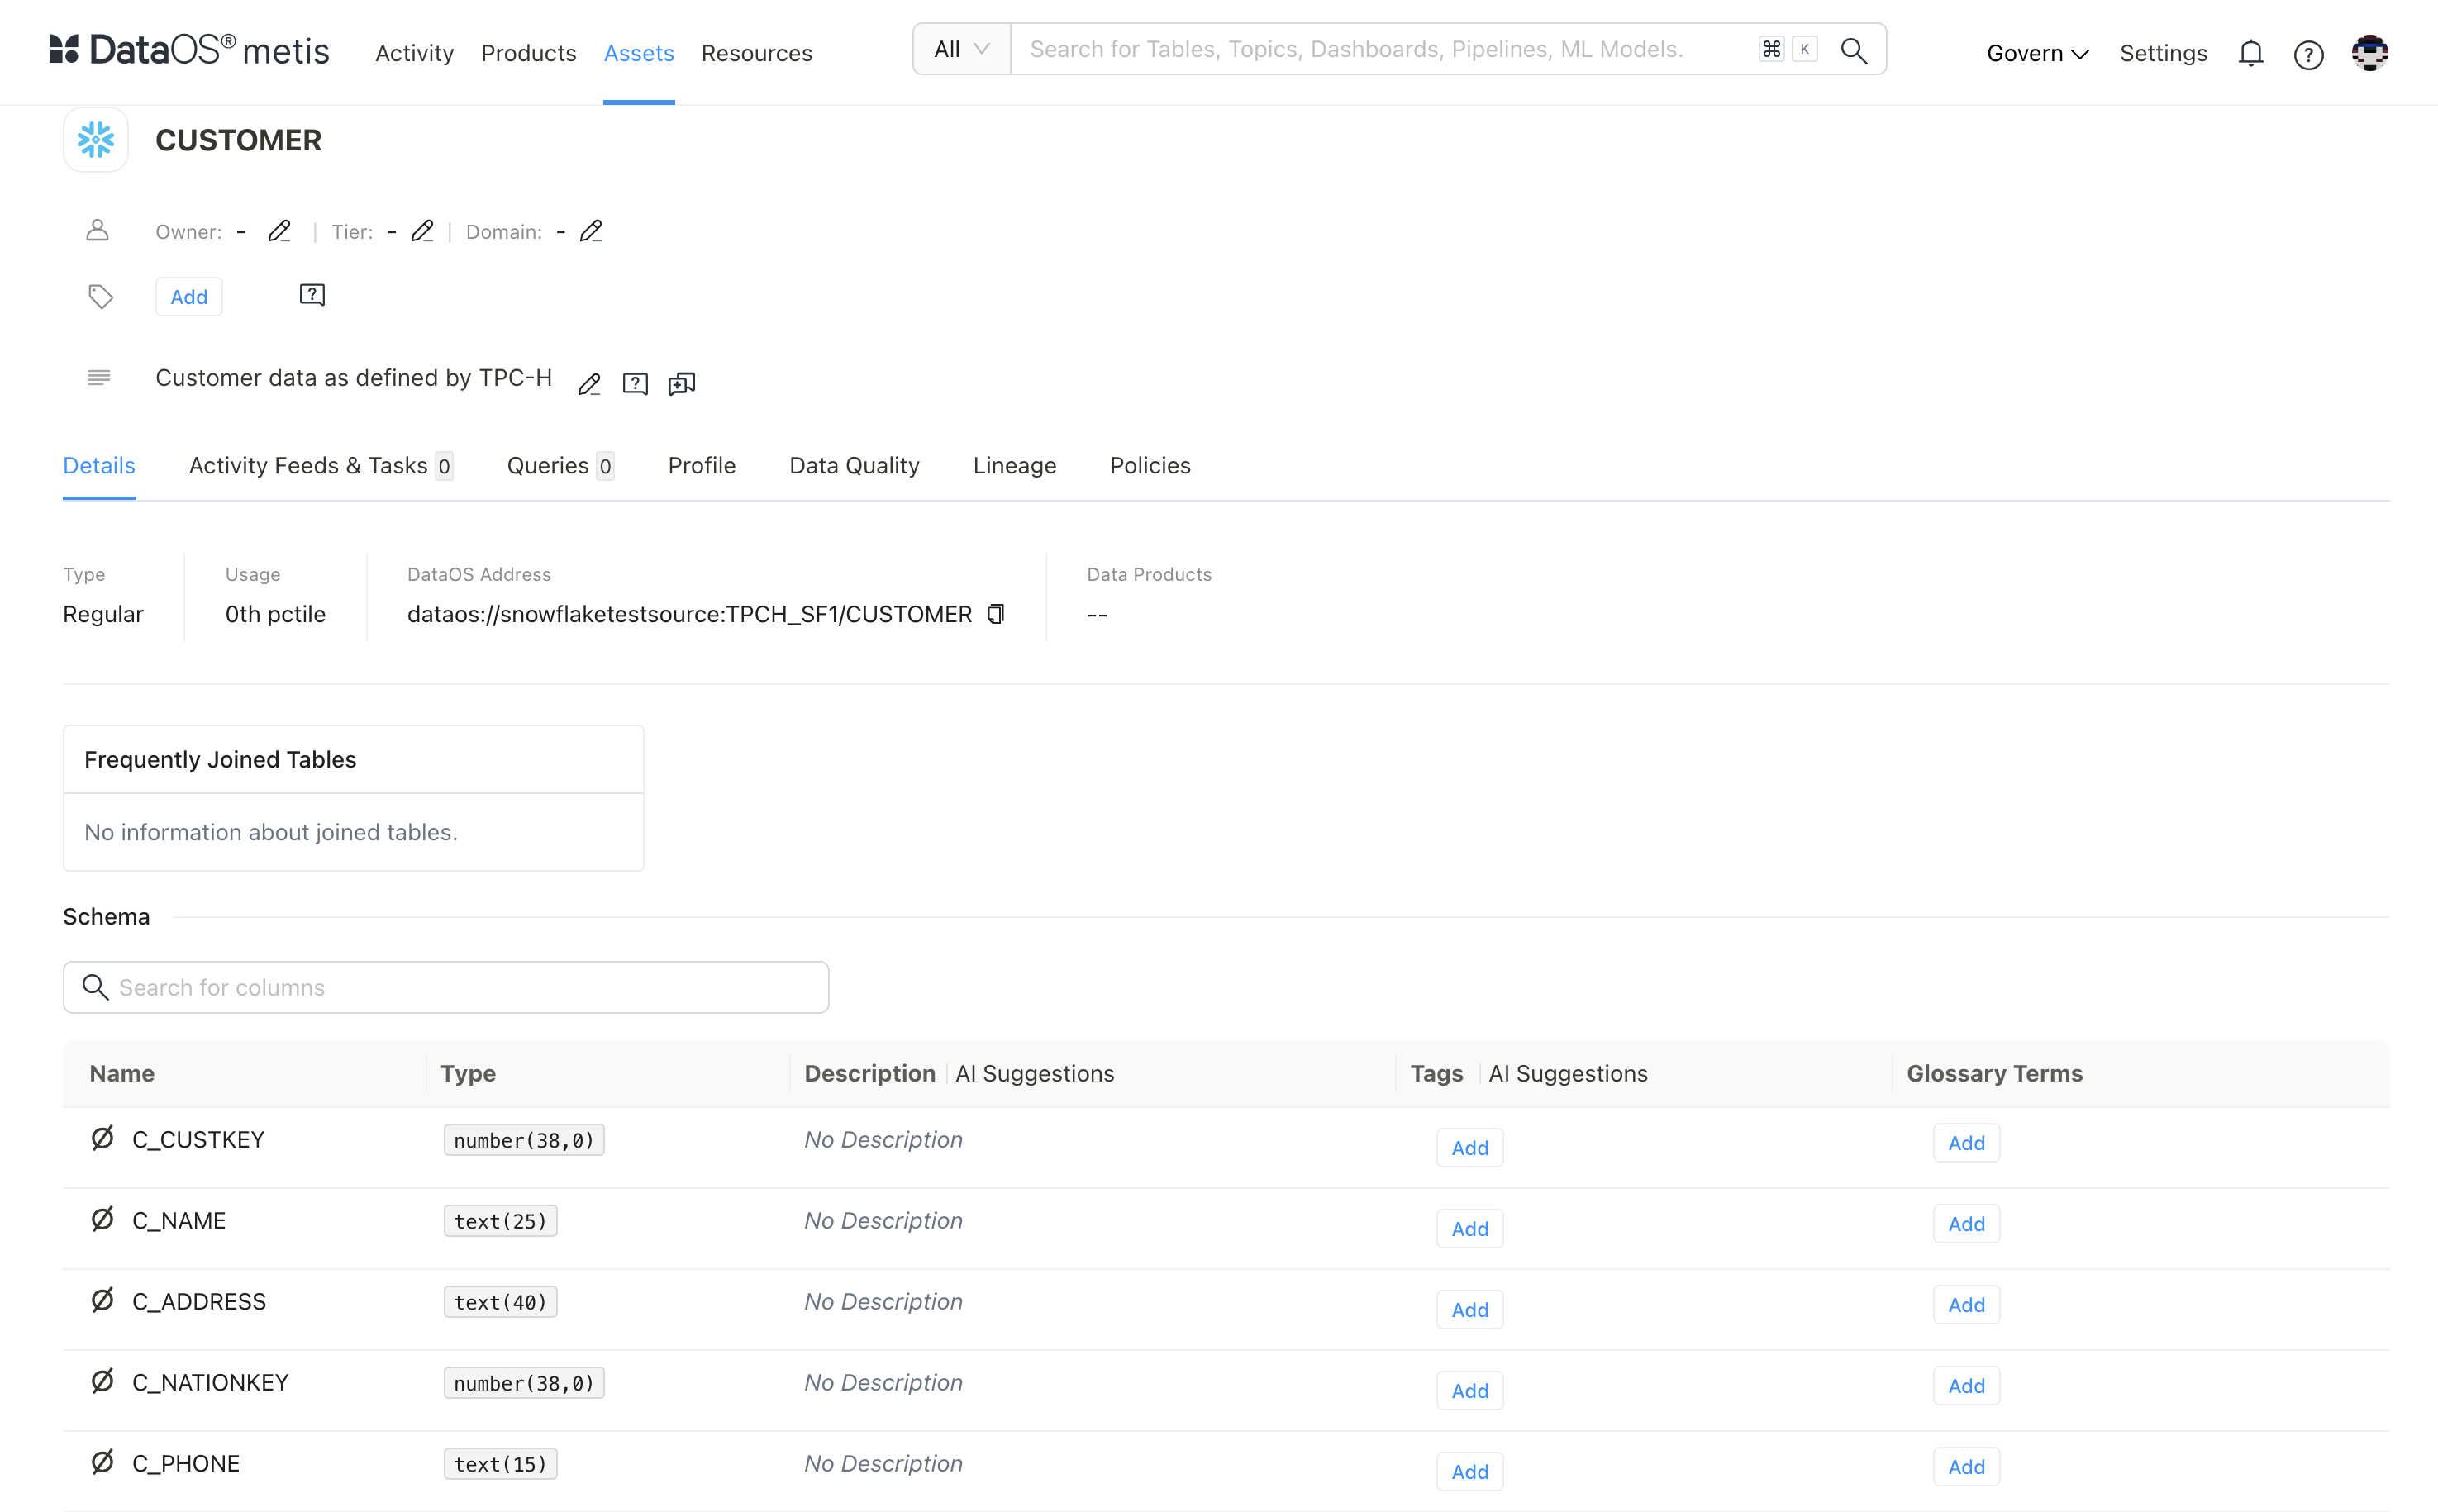
- Schema of the Scanned Customer Table (validate with the source)
To know more about how to specify filters in different scenarios, refer to Filter Pattern Examples.
Additional links
The templates of different sources of Scanner Workflows are as follows:
-
Data Sources: The Scanner Stack in DataOS provides a extensible framework for extracting metadata from multiple data sources. By creating custom Scanner Workflows, it become efficient to connect to diverse data sources, extract relevant metadata, and store it in the Metis DB for discoverability, governance, and observability. For more info, visit Data Sources.
-
System Sources: System Scanner Workflows are pre-defined Workflows that run periodically to scan related metadata and save it to Metis DB. These Workflows are scheduled to run at set intervals and are used to reflect the updated metadata state. For more info, visit System Sources.
-
Indexer Services: Indexer service is a continuous running service within the DataOS environment keeps track of newly created or updated entities such as Data products, Data Assets (datasets/topics/dashboards, etc.) and DataOS Resources (Workflows, Services, Workers, Monitors, Depots etc.). With this information about the changed entity, it creates a reconciliation Scanner manifest with filters to include only the affected entity. This Scanner Workflow will extract the metadata about the entity and update the target metastore. For more info, visit Indexer Services.