Integration with AI/ML
Overview
In this topic of the module, you'll learn how to consume the Data Product for training machine learning models. This guide provides step-by-step instructions to consume the Data Product with the help of Jupyter Notebook.
Scenario
Once you've confirmed that the 'Product Affinity' Data Product fully addresses your use case, you’ll use machine learning algorithms to build a recommendation system. This system will not only pinpoint cross-sell opportunities but also deliver valuable insights to the marketing team. These insights will help craft personalized promotions, boost customer engagement, and drive additional sales for the business.
What do you need to get started?
To get started, you'll need:
- Basic Understanding of Machine Learning Concepts – Familiarity with common ML algorithms and their applications, particularly in recommendation systems.
- Python Proficiency – Experience with Python programming, especially using data science libraries like Pandas, NumPy, and requests for API interactions.
- DataOS API Key – Access to your DataOS account and API key, as it will be required for secure data access.
Steps to consume Data Product for AI/ML
Follow these steps to start training your machine learning model using the Data Product.
-
Download the Jupyter Notebook template
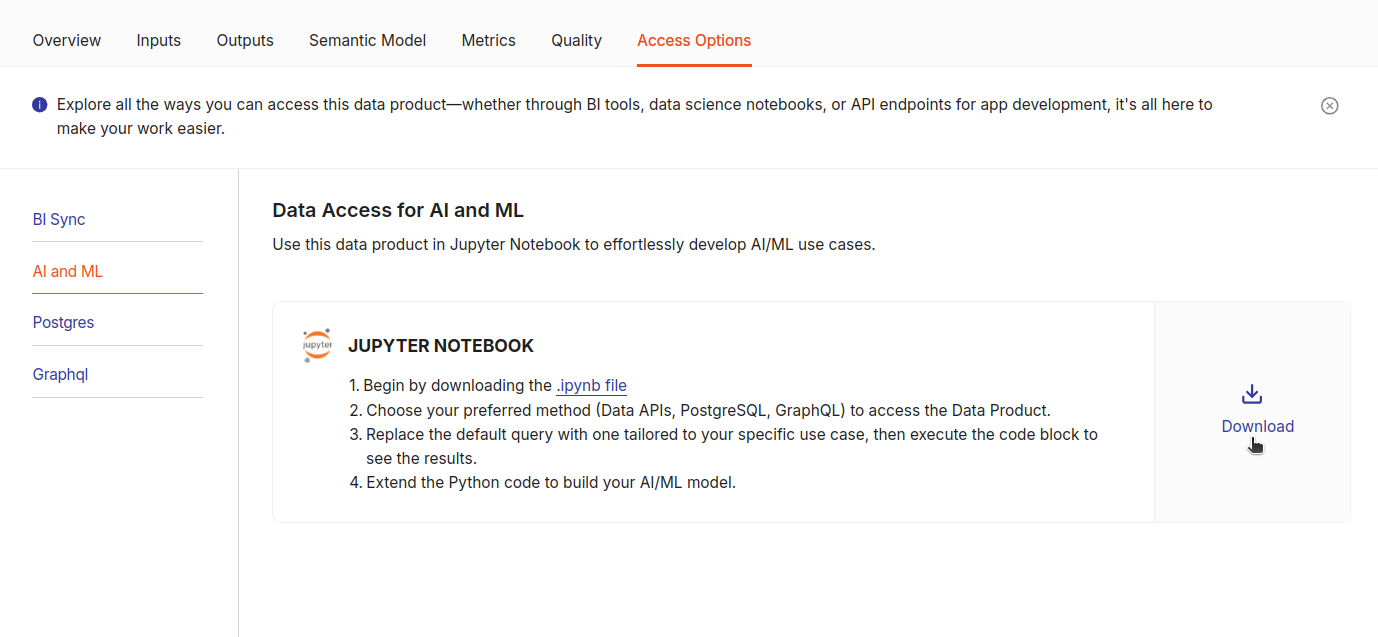
Go to the Access Options tab in your Data Product details, and in the 'AI and ML' section, click 'Download'. This will download a
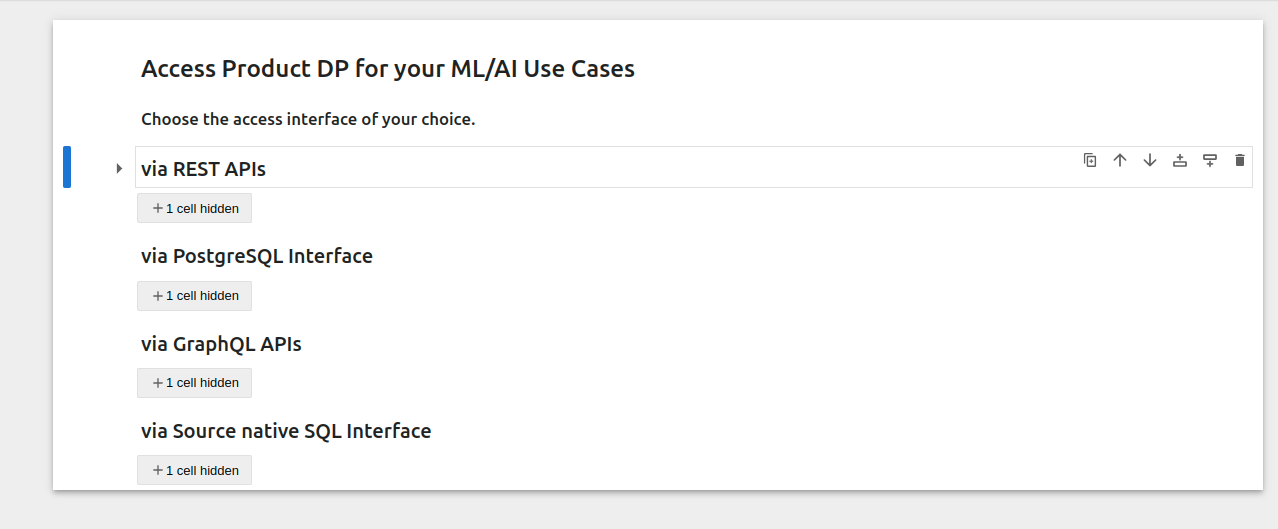
.ipynbfile pre-configured with templates to consume the Data Product via REST APIs, PostgreSQL, GraphQL, and SQL interfaces.
-
Open the Notebook in your editor
You can open the downloaded
.ipynbfile in an editor like VS Code or export it to DataOS’s Notebook environment. This notebook template contains examples and placeholders for integrating with various data access options.
-
Set Up the REST API for Data Retrieval
Here we choose the REST API integration in the notebook template. First, copy your DataOS API key from your profile page and retrieve the endpoint URL from the 'Access Options' tab.
-
Configure the template with your API key and query
In the template, replace placeholders with the API URL, API key, and your actual query. Use the query example provided in the template as a guide, then run the code.
-
Rest APIs template
# Import necessary libraries
import requests
import pandas as pd
import json
# API URL and API key
api_url = "https://lucky-possum.dataos.app/lens2/api/public:corp-market-performance/v2/load"
apikey = 'api key here'
# API payload, enter YOUR_QUERY here.
payload = json.dumps({
    "query": {
        YOUR_QUERY
    }
})
# Query Example: This is how your query should look like.
    # "query": {
    #     "measures": [
    #         "sales.total_quantities_sold",
    #         "sales.proof_revenue"
    #     ],
    #     "dimensions": [
    #         "inventory.warehouse"
    #     ],
    #     "timeDimensions": [
    #         {
    #             "dimension": "sales.invoice_date",
    #             "granularity": "day"
    #         }
    #     ],
    #     "limit": 1000,
    #     "responseFormat": "compact"
    # }
# Headers
headers = {
    'Content-Type': 'application/json',
    'apikey': apikey
}
# Fetch data from API
def fetch_data_from_api(api_url, payload, headers=None):
    response = requests.post(api_url, headers=headers, data=payload)
    if response.status_code == 200:
        data = response.json()
        df = pd.json_normalize(data['data'])  # Create DataFrame
        return df
    else:
        print(f"Error: {response.status_code}")
        return None
# Main execution
if __name__ == "__main__":
    data = fetch_data_from_api(api_url, payload, headers=headers)
    if data is not None:
        print("Data Frame Created:")
        print(data.head())  # Show the first few rows of the DataFrame
        print("Ready for AI/ML model building.")
    else:
        print("Failed to fetch data.")
-
-
Run the Code to Start Building Models
Once you’ve executed the code, the DataFrame generated will be ready for machine learning model building.
Next step
You may want to consume the Data Product via Postgres, then follow the next module: