Local to Local - Using Docker
This article is a step-by-step guide for downloading prerequisites to install Flare Standalone and exploring the sample data while also assisting the user in completing a guided assignment.
Prerequisites
These installation steps are only for Mac and Linux operating systems.
To complete the Flare standalone installation and guided assignment, the user needs to:
Operationalize Docker if you want to Read/Write IO Locally
Docker should be installed and running on the system. If Docker is installed on your system, move to the next step. In case it's not installed, visit the official Docker installation page for the same by clicking the link
Install curl utility on the system
Check whether you have curl installed in your system by executing the following commands:
If its installed move on to the next step, in case it is not installed follow the instruction guide below to install curl
Get Started with Flare Standalone
Download the Flare Standalone Image
Copy the below link in the browser to download flare.tar file containing the Flare standalone image.
https://mockdataosnew.blob.core.windows.net/dropzone001/customer-resources/flare.tar?sv=2021-04-10&st=2022-09-08T12%3A55%3A03Z&se=2024-09-09T12%3A55%3A00Z&sr=b&sp=r&sig=DnejgR8%2B9Rifg7eWb8CYA%2FXxhJhoYWC%2FGgV38WA5xlk%3D
Load the Flare Standalone Image in Docker
- Open the terminal and navigate to the directory where the tar file is downloaded.
- Load the downloaded flare image into docker by entering the following command
Note: For Mac OS, a docker container should be running to perform this command.
Note: For Linux OS, while running this command if you get the message “Permission Denied”, run this command with ‘sudo’.
Output
- Check if the image is present in the listing using the following command.
Expected Output
REPOSITORY         TAG       IMAGE ID       CREATED        SIZE
rubiklabs/flare2   5.9.20    96fe0ebbfc19   2 months ago   1.88GB
rubiklabs/flare2   5.9.2     f939d9d3b61a   4 months ago   1.87GB
Here also if your permission gets denied use ‘sudo’
- Run the following Shell script to create an alias to run Flare standalone.
 flare() {

while [[ "$#" -gt 0 ]]; do
case $1 in
-d|--data) data="$2"; shift ;;
-c|--config) config=$2; shift;;
*) echo "Unknown parameter passed: $1";;
esac
shift
done

echo "Data dir: $data"
echo "Supplied config dir: $config"
echo "Mounting data dir: $data into /datadir"
docker run --rm -it \
-e ENVIRONMENT=standalone \
-e DATAOS_WORKSPACE=public \
-v $config:/etc/standalone \
-v $data:/datadir \
-v $data/dataout:/dataout \
rubiklabs/flare2:5.9.2 start
}
This is what the docker command will look like for M1 Mac Machine:
flare() {
  while [[ "$#" -gt 0 ]]; do
    case $1 in
        -d|--data) data="$2"; shift ;;
        -c|--config) config=$2; shift;;
        *) echo "Unknown parameter passed: $1";;
    esac
    shift
  done

  echo "Data dir: $data"
  echo "Supplied config dir: $config"
  echo "Mounting data dir: $data into /datadir"
docker run --rm -it --platform=linux/amd64 \
-e ENVIRONMENT=standalone \
-e DATAOS_WORKSPACE=public \
-v $config:/etc/standalone \
-v $data:/datadir \
-v $data/dataout:/dataout \
rubiklabs/flare2:5.9.2 start
}
Download and Unzip Sample Data
- Copy the below link in the browser to download
sampledata.zip.
https://mockdataosnew.blob.core.windows.net/dropzone001/customer-resources/sampledata.zip?sv=2021-04-10&st=2022-09-15T07%3A36%3A43Z&se=2024-09-16T07%3A36%3A00Z&sr=b&sp=r&sig=KRUcakck4i7yHWYS6L0IgYA6YJjVMdkB9JWjmCdpKFw%3D
- Extract the downloaded
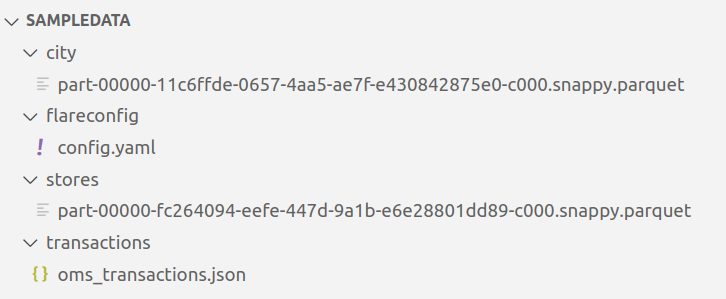
sampledata.zipfile. It contains two folders: - Open the
sampledatafolder. It contains aflareconfigfolder, which has a flare workflow fileconfig.yaml, and sample data contained in thecity,stores, andtransactionsfolder to test the installation of Flare standalone and run Spark SQL queries - MacOSX Users - MacOSX users will only s, ee one folder i.e.
sampledata. The other folder,__MACOSX, will automatically get hidden. - Linux Users - Linux users will see,e two folders i.e.
sampledataand__MACOSX.
Run the Sample Workflow
- Open the terminal and navigate to the folder named sampledata.
- You can use the below command to run the
config.yaml.
# Sample config.yaml
---
version: v1beta1
name: wf-cust-demo-01
type: workflow
tags:
  - Connect
  - Customer
description: Sample job
workflow:
  dag:
    - name: customer
      title: Sample Customer Dimension Data Ingester
      description: The job ingests customer data and joins it with city data
      spec:
        tags:
          - Connect
          - Customer
        stack: flare:3.0
        tier: connect
        flare:
          driver:
            coreLimit: 1200m
            cores: 1
            memory: 1024m
          executor:
            coreLimit: 1200m
            cores: 1
            instances: 1
            memory: 1024m
          job:
            explain: true
            inputs:                 **# data files**
              - name: transactions_connect
                dataset: /datadir/transactions
                format: json

              - name: city_connect
                dataset: /datadir/city
                format: parquet

            logLevel: ERROR
            outputs:
              - name: output01
                depot: /dataout/
            steps:                 **# transformation steps**
              - sequence:          **# series of SQL statements**
                  - name: customers
                    doc: Pick all columns from customers
                      timestamp.
                    sql: SELECT city_connect.*, transactions_connect.* FROM transactions_connect LEFT JOIN city_connect on city_connect.city_id = transactions_connect.shipment.city_id
                    functions:
                      - name: copy
                        fromColumn: order
                        toColumn: order_dup

                  - name: customers_final
                    doc: Pick all columns from customers
                    sql: SELECT * FROM customers limit 1
The sample Flare workflow joins customer and city datasets and creates a new enriched dataset: customer_final.
Note: Following any error, if you cannot run the above command, refer here for an additional flag for your docker command if you are using an M1 Mac machine.
docker run --rm -it --platform=linux/amd64 \
               -v $PWD/flareconfig:/etc/standalone \
               -v $PWD:/datadir \
               -v $PWD/dataout:/dataout \
               -e DATAOS_WORKSPACE=public \
               -e DATAOS_RUN_AS_USER=tmdc \
               rubiklabs/flare2:5.9.2 start
You should see the Scala interactive shell to indicate a successful start of Flare Standalone.
Flare session is available as flare.
    Welcome to
         ______   _
        |  ____| | |
        | |__    | |   __ _   _ __    ___
        |  __|   | |  / _` | | '__|  / _ \
        | |      | | | (_| | | |    |  __/
        |_|      |_|  \__,_| |_|     \___|  version 1.1.0

    Powered by Apache Spark 3.2.1
Using Scala version 2.12.15 (OpenJDK 64-Bit Server VM, Java 1.8.0_262)
Type in expressions to have them evaluated.
Type :help for more information.

scala>
Exploring Spark Commands in Scala Interactive Shell
After successfully setting up the Flare Standalone, you can run various Spark commands in Scala interactive shell.
- Type
helpin the terminal prompt for available commands and their syntax.
scala> help

Standalone functions for using standalone shell

Usage:
  [function]
Available function:
  count(tableName: String)                                                     Prints number of record of supplied table.
  head(tableName: String, numRows: Int, vertical: Boolean, truncate: Boolean)  Display records in given table name, default number of rows 2
  printJsonSchema(tableName: String)                                           Print Spark JSON schema.
  printDDLSchema(tableName: String)                                            Print Spark DDL schema.
  printAvroSchema(tableName: String)                                           Print Avro schema.
  refresh                                                                      Remove all tables and load again.
  reload                                                                       Soft reload all tables specified in yaml.
  remove(tableName: String)                                                    Remove one table.
  reset                                                                        Remove all tables.
  schema(tableName: String)                                                    Prints schema of supplied table.
  sql(query: String)                                                           Runs a sql and loads result in a dataframe.
  table(tableName: String)                                                     Returns a dataframe for table with supplied name.
  tables                                                                       List all tables available for query.
tablescommand will give you the list of all tables in the, In addition, your directory. You should see thecus,tomer_final**listed, created after the given YAML is successfully run.
Output
+---------+--------------------+-----------+
|namespace|tableName           |isTemporary|
+---------+--------------------+-----------+
|         |city_connect        |true       |
|         |customers           |true       |
|         |customers_final     |true       |
|         |transactions_connect|true       |
+---------+--------------------+-----------+
- You can also run a Spark SQL query to verify the data, as follows:
scala> spark.sql("select city_id, customer.phone, order.id, payments.amount from customers where customer.phone is not null and city_id is not null").show(5)
Output
+-------+-----------------+-----------+------+
|city_id|            phone|         id|amount|
+-------+-----------------+-----------+------+
|CITY1  |     529-950-3707|10000000001|  1186|
|CITY2  |+1-(040)-525-5558|10000000002|  1374|
|CITY3  |     863.265.0613|10000000003|   681|
|CITY4  |     532-975-3459|10000000004|   635|
|CITY5  |     132.898.3748|10000000006|   827|
+-------+-----------------+-----------+------+
only showing top 5 rows
Note: To exit the Scala SQL shell, press
Ctrl + C.