Local to Local - Using DataOS CLI
This article is a step-by-step guide to run Flare Standalone using DataOS Command Line Interface to test your workflows and explore the sample data using SparkSQL.
Pre-Requisites
Install DataOS CLI
DataOS CLI should be installed on your system. If it's not installed, please look at this document for the installation steps.
Operationalize Docker if you want to Read/Write IO Locally
Docker should be installed and running on the system. If Docker is installed on your system, move to the next step. In case it's not installed, visit the official Docker installation page for the same by clicking the link
Get the toolbox-user tag
The user must have the dataos:u:toolbox-user tag. To check whether you have a tag, please go ahead and execute the below command and check in the TAGS section. In case you don’t have the tag, contact the system administrator
Note: Ensure you are logged into DataOS before executing the above command. In case you haven’t logged in, run
dataos-ctl loginin the terminal.
Getting started with Flare Standalone
Download and Unzip Sample Data
- Copy the below link in the browser to download
sampledata.zip.
https://mockdataosnew.blob.core.windows.net/dropzone001/customer-resources/sampledata.zip?sv=2021-04-10&st=2022-09-15T07%3A36%3A43Z&se=2024-09-16T07%3A36%3A00Z&sr=b&sp=r&sig=KRUcakck4i7yHWYS6L0IgYA6YJjVMdkB9JWjmCdpKFw%3D
- Extract the downloaded
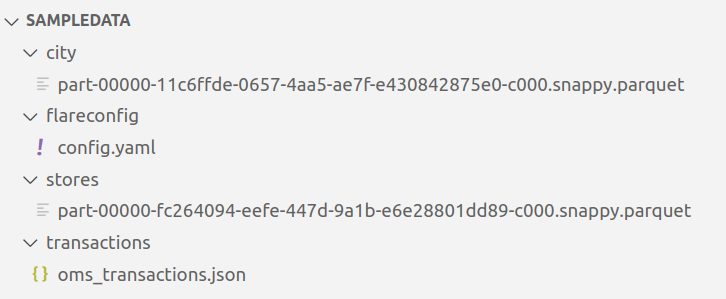
sampledata.zipfile. It contains two folders: - Open the
sampledatafolder. It includes aflareconfigfolder, which has a flare workflow fileconfig.yaml, and sample data contained in thecity,stores, andtransactionsfolder to test the installation of Flare standalone and run Spark SQL queries. - MacOSX Users - MacOSX users will only see one folder, i.e.,
sampledata. The other folder,__MACOSX, will automatically get hidden. - Linux Users - Linux users, will see two folders, i.e.,
sampledataand__MACOSX.
Run Sample Workflow
- Open the terminal and navigate to the just extracted folder named
sampledata. - Open the
config.yamlfile using the code editor. - Edit the dataset paths for
transactionsto/data/examples/transactionsandcityto/data/examples/city, respectively. The path must include/data/examples.
Note: The paths given in the sample
config.yamlare the docker container paths where the dataset contained in the data folder will be mounted
---
version: v1beta1
name: wf-cust-demo-01
type: workflow
tags:
  - Connect
  - Customer
description: Sample job
owner: itsme
workflow:
  dag:
    - name: customer
      title: Sample Customer Dimension Data Ingester
      description: The job ingests customer data from dropzone into the raw zone
      spec:
        tags:
          - Connect
          - Customer
        stack: flare:3.0
        tier: connect
        flare:
          driver:
            coreLimit: 1200m
            cores: 1
            memory: 1024m
          executor:
            coreLimit: 1200m
            cores: 1
            instances: 1
            memory: 1024m
          job:
            explain: true
            inputs:
              - name: transactions_connect
                dataset: /data/examples/transactions **# replace ~~/datadir/transactions~~ with /data/examples/transactions**
                format: json

              - name: city_connect
                dataset: /data/examples/city **# replace ~~/datadir/city~~ with /data/examples/city**
                format: parquet

            logLevel: ERROR
            outputs:
              - name: output01
                depot: /dataout/
            steps:
              - sequence:
                  - name: customers
                    doc: Pick all columns from customers
                      timestamp.
                    sql: SELECT city_connect.*, transactions_connect.* FROM transactions_connect LEFT JOIN city_connect on city_connect.city_id = transactions_connect.shipment.city_id
                    functions:
                      - name: copy
                        fromColumn: order
                        toColumn: order_dup

                  - name: customers_final
                    doc: Pick all columns from customers
                    sql: SELECT * FROM customers limit 1
- You can use the below command to run the
config.yaml.
Example
Note: The above command will automatically download the Flare standalone image; for that, you must have the
dataos:u:toolbox-usertag to have proper permissions. Also, the path could be either an absolute or a relative path.
Anatomy of the command:
| dataos-ctl | develop | start | -s | flare:3.0 | -f | sampledata/flareconfig/config.yaml | -d | sampledata |
|---|---|---|---|---|---|---|---|---|
| Command to operate DataOS CLI (Command Line Interface). CTL stands for control. | Manage DataOS development | Start development container | Stack flag | Stack along with version as argument | File path flag | File path as argument (can be either relative or absolute) | Directory Path flag | Path of the folder where all the datasets are stored. (The content of this directory is mounted on the Docker within /data/examples/) |
On successful execution, the Scala command line shell will open as below:
Flare session is available as flare.
    Welcome to
         ______   _
        |  ____| | |
        | |__    | |   __ _   _ __    ___
        |  __|   | |  / _` | | '__|  / _ \
        | |      | | | (_| | | |    |  __/
        |_|      |_|  \__,_| |_|     \___|  version 1.1.0

    Powered by Apache Spark 3.2.1
Using Scala version 2.12.15 (OpenJDK 64-Bit Server VM, Java 1.8.0_262)
Type in expressions to have them evaluated.
Type :help for more information.

scala>
Error 😩
In case you get the following error:
WARN[0001] 💻 create flare local...error
ERRO[0001] Got permission denied while trying to connect to the Docker daemon socket at unix:///var/run/docker.sock: Post "http://%2Fvar%2Frun%2Fdocker.sock/v1.41/images/create?fromImage=rubiklabs%2Fflare2&tag=5.9.20": dial unix /var/run/docker.sock: connect: please go ahead and execution denied
Please go ahead and execute the following command to resolve the permission error.
Post this run the config.yaml again.
Exploring Spark Commands in Scala Interactive Shell
After successfully setting up the Fare Standalone, you can run various Spark commands in Scala interactive shell.
tablescommand will give you the list of all tables in the current directory. In addition, you should see thecustomer_final**listed, created after the given YAML is successfully run.
scala> tables
+---------+--------------------+-----------+
|namespace|tableName           |isTemporary|
+---------+--------------------+-----------+
|         |city_connect        |true       |
|         |customers           |true       |
|         |customers_final     |true       |
|         |transactions_connect|true       |
+---------+--------------------+-----------+
- You can also run a Spark SQL query to print schema to verify the data, as follows:
scala> spark.sql("SELECT * FROM customers").printSchema
root
 |-- city_id: string (nullable = true)
 |-- zip_code: string (nullable = true)
 |-- city_name: string (nullable = true)
 |-- county_name: string (nullable = true)
 |-- state_code: string (nullable = true)
 |-- state_name: string (nullable = true)
 |-- customer: struct (nullable = true)
 |    |-- customer_index: long (nullable = true)
 |    |-- email: string (nullable = true)
 |    |-- phone: string (nullable = true)
 |    |-- type: string (nullable = true)
 |-- order: struct (nullable = true)
 |    |-- created_on: string (nullable = true)
 |    |-- id: string (nullable = true)
 |    |-- parent_order_id: string (nullable = true)
 |    |-- type: string (nullable = true)
 |-- order_items: array (nullable = true)
 |    |-- element: struct (containsNull = true)
 |    |    |-- id: long (nullable = true)
 |    |    |-- pricing: struct (nullable = true)
 |    |    |    |-- actualprice: long (nullable = true)
 |    |    |    |-- listprice: long (nullable = true)
 |    |    |    |-- saleprice: long (nullable = true)
 |    |    |-- promotion: struct (nullable = true)
 |    |    |    |-- amount: long (nullable = true)
 |    |    |    |-- percent: long (nullable = true)
 |    |    |    |-- type: string (nullable = true)
 |    |    |-- quantity: long (nullable = true)
 |    |    |-- sku_id: string (nullable = true)
 |    |    |-- tax: struct (nullable = true)
 |    |    |    |-- amount: long (nullable = true)
 |    |    |    |-- percent: long (nullable = true)
 |-- payments: struct (nullable = true)
 |    |-- amount: long (nullable = true)
 |    |-- credit_card_number: string (nullable = true)
 |-- shipment: struct (nullable = true)
 |    |-- carrier: string (nullable = true)
 |    |-- charges: long (nullable = true)
 |    |-- city_id: string (nullable = true)
 |    |-- mailing_street: string (nullable = true)
 |-- user_client: struct (nullable = true)
 |    |-- ip_address: string (nullable = true)
 |    |-- mac_address: string (nullable = true)
 |    |-- session_id: string (nullable = true)
 |    |-- type: string (nullable = true)
 |    |-- user_agent: string (nullable = true)
 |-- order_dup: struct (nullable = true)
 |    |-- created_on: string (nullable = true)
 |    |-- id: string (nullable = true)
 |    |-- parent_order_id: string (nullable = true)
 |    |-- type: string (nullable = true)
- You can also run a Spark SQL query to verify the data, as follows:
scala> spark.sql("SELECT * FROM customers_final").show(false)
+-------+--------+---------+--------------+----------+----------+---------------------------------------------------------+--------------------------------------------------------+-----------------------------------------------------------------------------------------------------------------------------+---------------------------+---------------------------------------------+-----------------------------------------------------------------+--------------------------------------------------------+
|city_id|zip_code|city_name|county_name   |state_code|state_name|customer                                                 |order                                                   |order_items                                                                                                                  |payments                   |shipment                                     |user_client                                                      |order_dup                                               |
+-------+--------+---------+--------------+----------+----------+---------------------------------------------------------+--------------------------------------------------------+-----------------------------------------------------------------------------------------------------------------------------+---------------------------+---------------------------------------------+-----------------------------------------------------------------+--------------------------------------------------------+
|CITY1  |36091   |Verbena  |Autauga County|AL        |Alabama   |{null, cherished1888@protonmail.com, 529-950-3707, Guest}|{2019-07-17 04:03:25.429840, 10000000001, null, created}|[{1, {290, 319, 290}, {null, null, null}, 3, SKU1367, {20, 7}}, {2, {267, 345, 314}, {47, 15, 15% OFF}, 1, SKU3099, {19, 7}}]|{1186, 2473 0520 6029 0223}|{DHL eCommerce, 10, CITY1, 847 Monument Mall}|{93.69.144.250, 00:16:3e:38:ae:86, 2R11F11G53X3TE52Q1Y, App, iOS}|{2019-07-17 04:03:25.429840, 10000000001, null, created}|
+-------+--------+---------+--------------+----------+----------+---------------------------------------------------------+--------------------------------------------------------+-----------------------------------------------------------------------------------------------------------------------------+---------------------------+---------------------------------------------+-----------------------------------------------------------------+--------------------------------------------------------+
Once you have successfully tested your Flare jobs, you can run them in production.