Governance of Lens
Data governance of Lens is structured across four layers to protect and control sensitive information:
Data source layer
In the Data Source Layer, security measures are implemented at the database, schema, or table level within data storage platforms such as Snowflake, BigQuery, or AWS Redshift. These measures are typically controlled via management consoles or SQL commands provided by the respective platforms. Key security controls include:
Access control: Role-Based Access Control (RBAC) is managed through the platform's administration console, such as Snowflake's RBAC settings or similar tools in other data warehouses. The administrator assigns roles (e.g., read, write, admin) at different levels of the data storage system (database, schema, table).
Data masking: This can be configured through the data source's console or via SQL functions (e.g., MASKING_POLICY in Snowflake) to mask sensitive information like personally identifiable information (PII) or financial data.
Row-Level Security (RLS): Security at the row level is typically configured through SQL-based policies or via the database platform's UI or console. For example, in Snowflake, administrators can set up RLS using SQL scripts or through Snowflake's user interface.
For example, if a user wants to create a semantic model on certain data in DataOS, they must first ensure that they have access to the data. Additionally, they need to confirm they have the necessary permissions to create, update, and delete the Lens Resource.
Query engine layer
In addition to data source-level security, governance can also be enforced at the federated query engine level. Federated query engines such as Minerva or Themis supports heterogeneous data sources, enabling integration with multiple systems such as Snowflake, PostgreSQL, BigQuery, and Lakehouse. It provides governance at both the metadata and data levels, ensuring secure and consistent access across various sources. It allows to define access control on who can query what catalog, schema or table or interact with specific datasets. However, the access rules only apply when queries are run through the engine. If someone accesses the data with a different engine or source engine, the engine-level permissions don't apply.
Governance at the federated query engine level can be applied in the following ways:
-
Access control: It enables administrators to define role-based access to restrict or grant data access. This ensures that only authorized users can query or modify data according to their assigned roles. In DataOS, access control is managed through Policy Resource and it's interface Bifrost, which provides an intuitive and easy to use GUI to manage access permissions.
-
Data masking: Data Masking in federated query engines is applied through Data policies of Policy Resource to protect sensitive information. Administrators define masking rules to obfuscate sensitive data, like Personally Identifiable Information (PII), ensuring that only authorized users can view the full data.
-
Data filtering: Similarly, row-level filtering based on user roles can be applied through data filter policy in Policy Resource. This feature ensures that users only access the data that they are permitted to see.
This ensures governance is applied throughout downstream layers when the semantic model is created on the Minerva/Themis engine.
Model layer
After the source data is governed and secured, the next layer is the Model Layer, where the Lens (semantic model) is created. In this layer, raw source data is transformed into a model that provides a unified view of the data. Governance at this layer focuses on two key aspects:
- Who can create, update, delete, or read the Lens?
- Who can explore the semantic model after it is created through the Lens?
The governance ensures that only authorized users have access to create, update, or explore the data, providing tight control over who can interact with the semantic model.
The following key governance measures are enforced at the Model Layer:
-
Access to Read, Create, Update or Delete the Lens: The access to read, create, update, delete the Lens is granted based on user roles. For example, a user with Data Analyst role may only have read access to a specific Lens, while users with Data Engineer role may be granted permissions to create, update, or delete it. This can be managed via Bifrost.
-
Access to explore the Lens semantic model and it's elements: Access to explore the semantic model is managed by creating a
user_groups.ymlfile, which is placed alongside the model folder. This file defines which users belong to which groups, their API scopes, and tags. This ensures that users can only access the data and features they are authorized to interact with. Additionally, Data policies are applied based on user groups to control access at a more detailed level. These policies can mask sensitive data or filter rows based on dimensions and segments. For instance, users in one group might see only certain rows or have some data masked, while others have full access to the data. By using user groups and data policies together, you can ensure that only authorized users can access and interact with the data.
The governance defined at the Model layer, will be effective and can be seen in any downstream layers such as the Activation layer.
Activation layer
The Activation Layer is the stage where the governed semantic model (Lens) is consumed by end-users through Business Intelligence (BI) tools like Power BI, Tableau, and Superset. At this point, users access data through visualizations, reports, or dashboards that provide insights and facilitate decision-making. The key focus in the Activation Layer is to maintain the governance policies and security measures established in previous layers (such as Data Source, Query Engine, and Model layers) while ensuring that sensitive information is protected and displayed correctly. Additionally, BI tools like Power BI and Tableau allow administrators to define user roles and permissions at the report/dashboard level, row-level etc. For instance, a user might have permission to view a dashboard but not to interact with or modify underlying data.
- Power BI integrates row-level security through roles and filters that govern what data is visible to specific users.
- Tableau allows row-level security and user-specific filtering via the use of calculated fields and filters that limit the visible data based on the user’s identity or group.
- Superset uses SQL-based filtering and user-specific access controls to ensure that users only see data that complies with governance policies.
How to manage access permissions to create Lens?
Bifrost plays a central role in managing and controlling user access to manage Lens. Administrators use Bifrost to assign permissions for reading, creating, updating, or deleting Lens to users either via granting role or via granting use-case. This may include:
Permissions and accessing its semantic model can be granted either by
Managing Lens access permissions via granting use-cases
Granting permissions via use-cases allows operators to exercise precise control over user access, ensuring that only the necessary permissions are granted. This method is ideal for limiting users' actions to specific tasks, reducing the potential for unintended access to sensitive or unrelated data.
Example use-case
Imagine you are an operator who needs to grant a user permission to read the Lens in all workspaces, while allowing them to create and manage the Lens only in the curriculum workspace. In such cases where you need to provide granular access, granting permissions via use-cases is the ideal solution. By using Bifrost, you can assign the appropriate use-cases to the user, ensuring they have read-only access to the Lens across all workspaces while allowing full management permissions within the curriculum workspace.
The following are the use-cases to manage Lens permissions:
-
Read Lens: Allows users to read or explore the Lens without making any changes. This permission is ideal for users who need to access the data but don’t need to modify or create new models. -
Create, Update, and Delete Lens in a specified workspace within the user layer: Allows users to create, update, and delete the Lens (semantic model) only within a specific workspace such aspublic,sandbox,curriculum. An operator can also use a wildcard (**) to grant access across all workspaces, instead of specifying individual ones. -
Create Update and Delete Lens in user layer workspaces: Grants users the ability to create, update, and delete the Lens across all workspaces. This is broader and suitable for admins managing models across different workspaces such aspublic,sandbox,curriculum.
Follow these steps to assign the permissions effectively:
Navigate to DataOS
Log in to DataOS and open Bifrost. The Bifrost interface will launch.
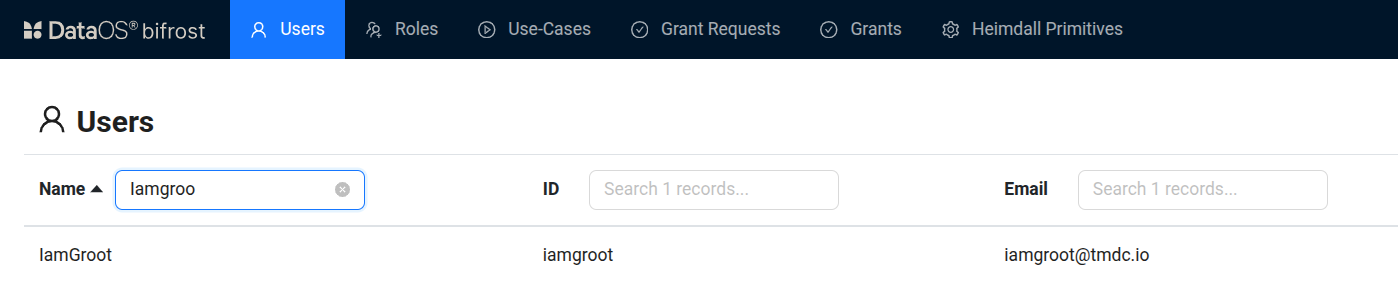
Search for the User
Navigate to the 'Users' tab and use the search box to locate the user.
Select the User
After selecting the user, detailed users information will be displayed. Go to the 'Grants' section to manage assigned permissions and use cases.
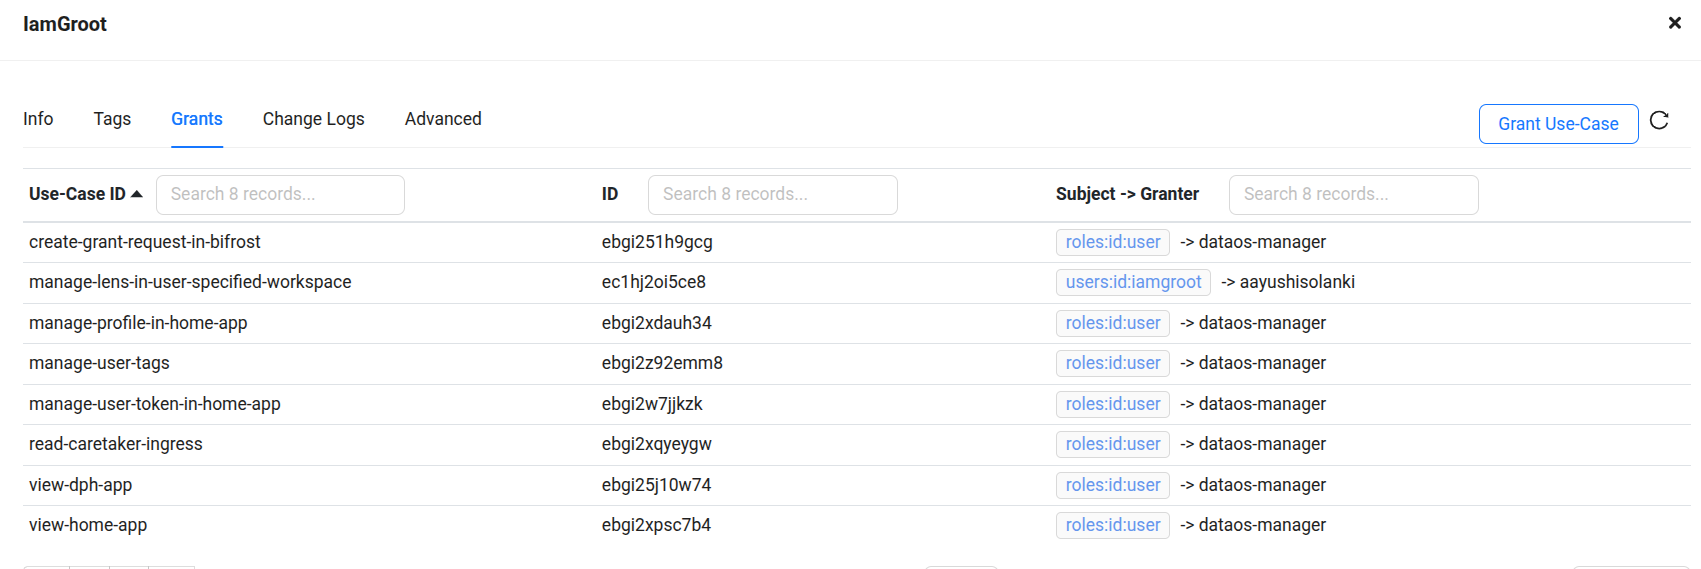
Click on the 'Grant Use-Case' button.
Search for the required use-case
A search dialog box will appear after clicking the 'Grant Use-Case' button. Search for the required use case:
Create, Update, and Delete Lens in user layer specified workspace – Manage Lens in the specified workspace

Specify the Workspace
After selecting the use case, a dialog box will prompt for the workspace name. Enter the workspace name where access should be granted.
In the example below, the user has been granted permission to read Lens in all workspaces but can create, update, and delete Lens only in the curriculum workspace.
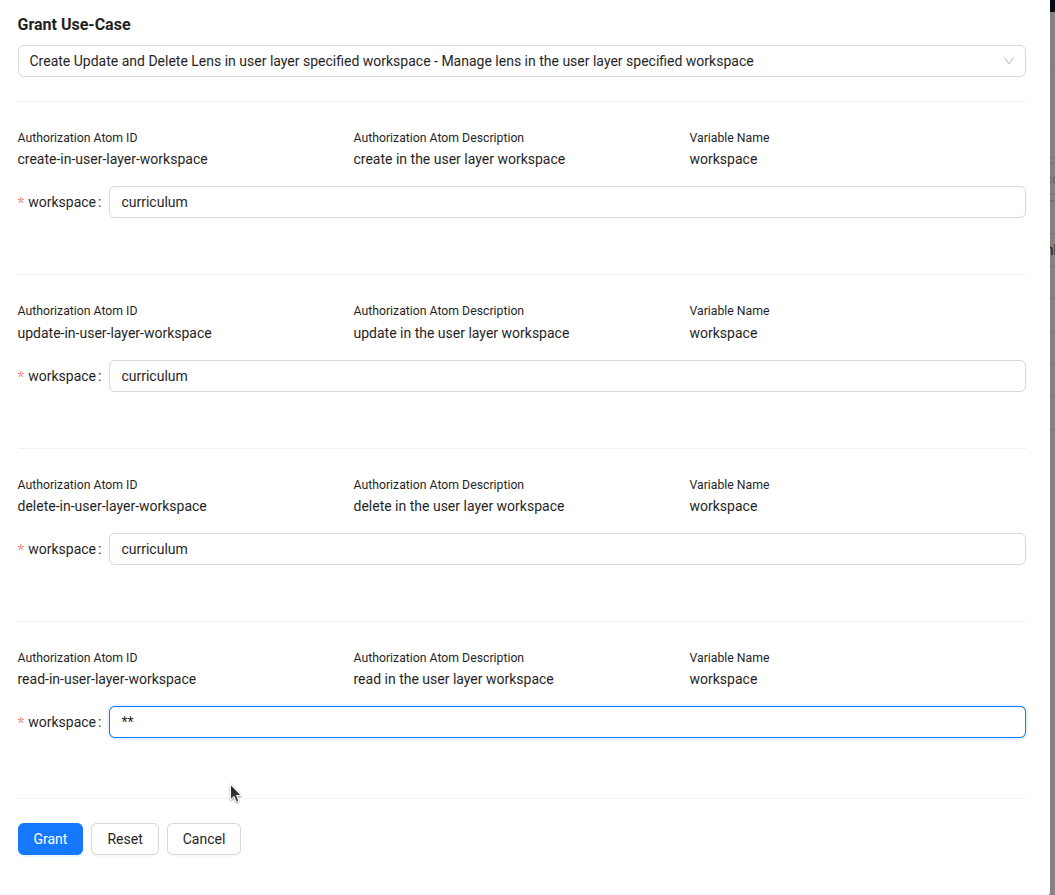
Once the form is completed, click the Grant button to apply the changes. The permissions will be updated, allowing the user to read Lens in all workspaces while managing Lens only in the curriculum workspace.
Managing Lens access permissions via assigning a Role
While use-cases allow precise control, roles encompass a broader scope of permissions. Assigning roles grants users a wider range of capabilities, often beyond just managing the Lens. Roles may include permissions for a variety of tasks across the system, not limited to the creation or management of the Lens itself.
If access is granted through a role, it must include the necessary Lens-related use cases. For example, the Data Dev role contains permissions for creating and managing a Lens.
The Data Dev role is identified by the tag roles:id:data-dev.
Example use-case
Imagine you are an operator and need to assign a user the permissions to manage the Lens (semantic model) across all workspaces, along with other responsibilities like managing ETL pipelines. To achieve this, you can assign the user a role that encompasses all required permissions. For example, assigning the role Data Dev would be ideal, as it provides access to manage the Lens across workspaces, as well as other relevant tasks.
Follow the steps below to assign the Data Dev role:
Log in to DataOS and access Bifrost
Log in to DataOS and navigate to Bifrost. The Bifrost interface will launch, providing the necessary tools to manage user roles and permissions.
Locate the user
Navigate to the 'Users' tab in the Bifrost interface. Utilize the search function to locate and select the specific user you need to assign a role to
Select the user and access the 'Tags' section
After selecting the user, detailed information about the user will appear. Scroll down to the 'Tags' section, which allows you to manage roles and permissions for the selected user.
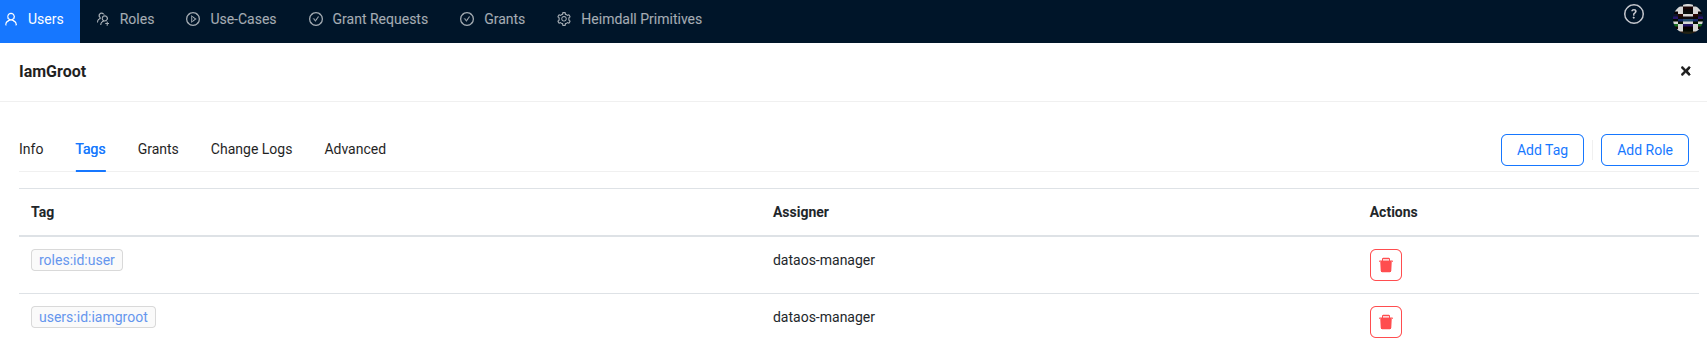
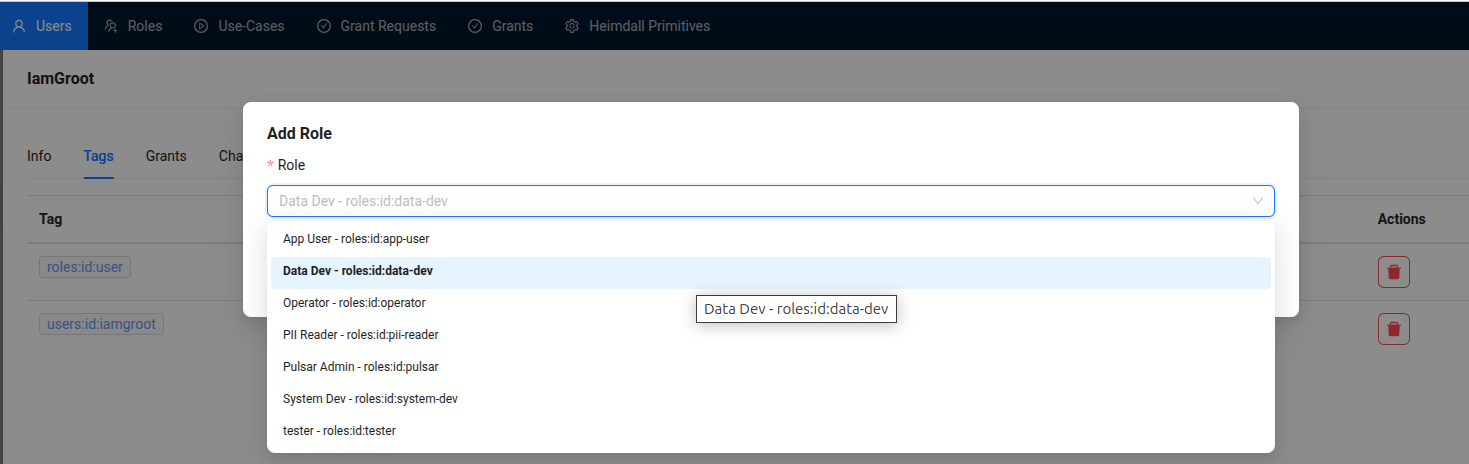
Assign the 'Data Dev' Role
In the 'Tags' section, click the 'Add Role' button to search for the Data Dev role. Once located, click on the role to select it.
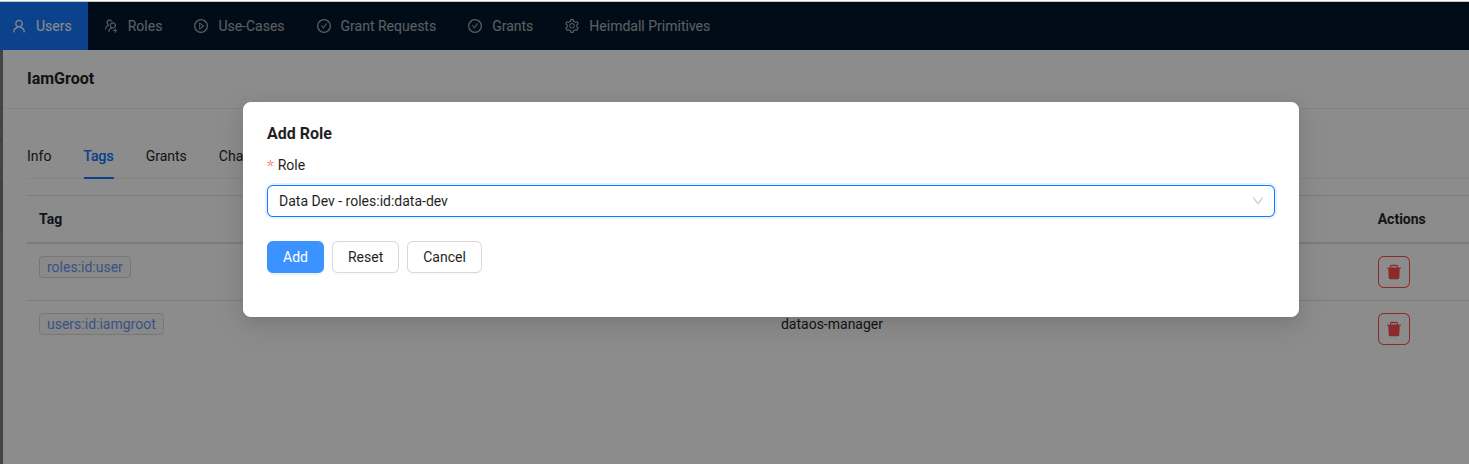
Confirm the Role assignment
Click the 'Add' button to confirm the assignment of the Data Dev role to the user. A success message will be displayed, confirming that the role has been successfully assigned to the user.
Through the Data Dev role a user will be able to read, create, update and delete Lens in all workspace along with other permissions unrelated to managing the Lens.