Configure the Python Service
Prerequisites
Before starting to configure the Python Service using Python Stack, ensure you have met the requirements listed in this section.
Steps
1. Secure repository credentials
If the application code is stored in a private Git repository, authentication credentials must be secured within DataOS. Credentials are stored as secrets and injected automatically during repository synchronization. Follow the links below to secure the repository credentials.
-
GitHub: Python Service requires a Personal Access Token (PAT) to access private GitHub repositories. After creating the PAT, the user must store it in DataOS as a secret so that the Stack can authenticate during repository synchronization. To do so, please refer to the following link.
(Optionally, see GitHub documentation: Create a Personal Access Token)
-
Bitbucket: Python Service requires an App Password (API token) to authenticate with private Bitbucket repositories. The app password is generated from Bitbucket settings, which include the necessary repository permissions. Once created, it must also be stored in DataOS as a secret for use by the Stack. To do so, please refer to the following link.
(Optionally, see Bitbucket documentation: Create an App Password)
2. Create a Python Service manifest file
Create a Python Service manifest file using the template given below.
name: ${{service-name}}
version: v1
type: service
tags:
  - service
  - python-stack
  - dataos:type:resource
  - dataos:resource:service
  - dataos:layer:user
  - dataos:workspace:public
description: ${{service description}}
owner: ${{user-id}}
workspace: ${{workspace-name}}
service:
  servicePort: 8050
  ingress:
    enabled: true
    path: ${{/endpoint}}
    noAuthentication: ${{true/false}}
  replicas: 1
  stack: python3:1.0
  logLevel: INFO
  dataosSecrets:
    - name: ${{instance-secret-identifier}}
      allKeys: true
      consumptionType: envVars
  compute: ${{runnable-default}}
  resources:
    requests:
      cpu: 1000m
      memory: 1536Mi
  stackSpec:
    repo:
      baseDir: ${{path-to-base-directory}}
      syncFlags:
        - '--ref=${{branch}}'
      url: ${{git-repo-url}}
name: python-test
version: v1
type: service
tags:
  - service
  - python-stack
  - dataos:type:resource
  - dataos:resource:service
  - dataos:layer:user
  - dataos:workspace:public
description: Python Service Sample
owner: iamgroot
workspace: public
service:
servicePort: 8050
ingress:
  enabled: true
  path: /myapp
  noAuthentication: true
replicas: 1
stack: python3:1.0
logLevel: INFO
dataosSecrets:
  - name: bitbucket-cred
    allKeys: true
    consumptionType: envVars
compute: runnable-default
resources:
  requests:
    cpu: 1000m
    memory: 1536Mi
stackSpec:
  repo:
    baseDir: python-stack/app/
    syncFlags:
      - '--ref=main'
    url: https://github.com/iamgroot/python-stack/
To get more details on each attribute of the Python Service manifest file, please refer to this link.
3. Apply the manifest file
Apply the Python Service manifest file by executing the command below.
4. Verify the Service
Validate the Service by executing the command below.
Example:
dataos-ctl resource get -t service -w public -n my-python-app-test
# Expected output:
INFO[0000] 🔍 get...
INFO[0001] 🔍 get...complete

         NAME        | VERSION |  TYPE   | WORKSPACE | STATUS |  RUNTIME  |    OWNER
---------------------|---------|---------|-----------|--------|-----------|--------------
  my-python-app-test | v1      | service | public    | active | running:1 | iamgroot
If the Service does not appear in an active or running state, refer to the Troubleshooting Guide for common error scenarios and resolution steps.
5. Validate the code execution
To validate if the Python script executed without any errors, run the following command.
Example:
dataos-ctl resource log -t service -w public -n python-test
INFO[0000] 📃 log(public)...
INFO[0001] 📃 log(public)...complete

              NODE NAME              │    CONTAINER NAME     │ ERROR
─────────────────────────────────────┼───────────────────────┼────────
  python-test-6r2v-d-64bb7bfcd-45hk9 │ python-test-6r2v-main │

-------------------LOGS-------------------
/etc/dataos/work
Downloading urllib3-2.5.0-py3-none-any.whl (129 kB)
Installing collected packages: pytz, watchdog, urllib3, tzdata, typing-extensions, tornado, toml, tenacity, smmap, six, rpds-py, pygments, pyarrow, protobuf, pillow, packaging, numpy, narwhals, mdurl, MarkupSafe, idna, click, charset_normalizer, certifi, cachetools, blinker, attrs, requests, referencing, python-dateutil, markdown-it-py, jinja2, gitdb, rich, pydeck, pandas, jsonschema-specifications, gitpython, jsonschema, altair, streamlit
Successfully installed MarkupSafe-3.0.2 altair-5.5.0 attrs-25.3.0 blinker-1.9.0 cachetools-5.5.2 certifi-2025.8.3 charset_normalizer-3.4.3 click-8.3.0 gitdb-4.0.12 gitpython-3.1.45 idna-3.10 jinja2-3.1.6 jsonschema-4.25.1 jsonschema-specifications-2025.9.1 markdown-it-py-4.0.0 mdurl-0.1.2 narwhals-2.5.0 numpy-2.3.3 packaging-24.2  watchdog-4.0.2
WARNING: Running pip as the 'root' user can result in broken permissions and conflicting behaviour with the system package manager, possibly rendering your system unusable. It is recommended to use a virtual environment instead: https://pip.pypa.io/warnings/venv. Use the --root-user-action option if you know what you are doing and want to suppress this warning.

[notice] A new release of pip is available: 25.0.1 -> 25.2
[notice] To update, run: pip install --upgrade pip

Collecting usage statistics. To deactivate, set browser.gatherUsageStats to false.

  You can now view your Streamlit app in your browser.

  URL: http://0.0.0.0:8050/myapp
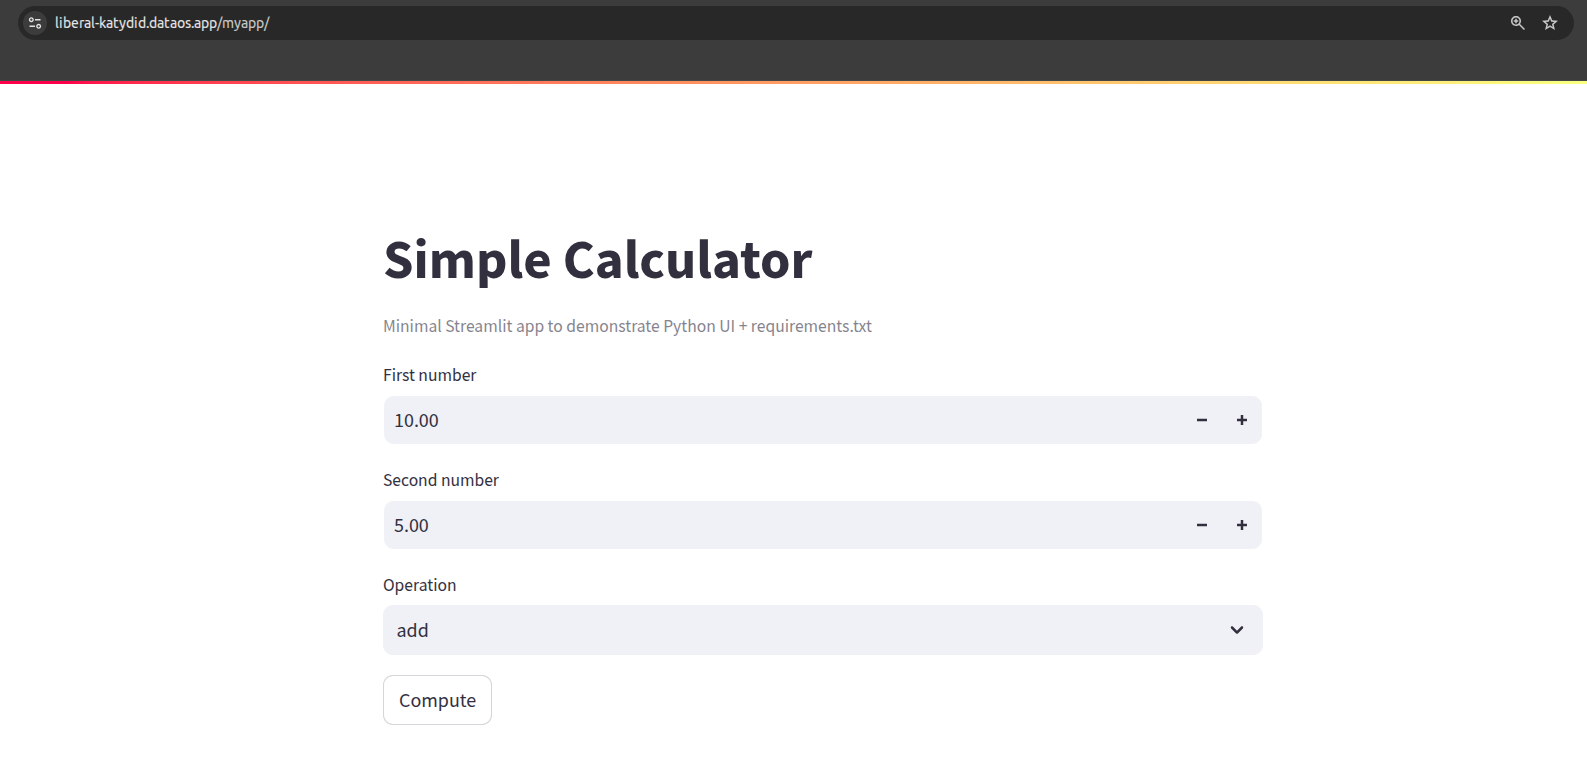
6. Access the Python application
Once your Python service is deployed, you can access it using the endpoint path specified in the Service configuration.
So, with the ingress path /myapp, the full URL would look like:
Example:
If your DataOS FQDN is https://liberal-katydid.dataos.app and the ingress path is /myapp, then the application will be available at: https://liberal-katydid.dataos.app/myapp/.
Open this URL in your browser to use the Simple Calculator UI.